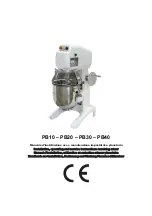
The following electrical safety devices have been applied:
1. start up with start/stop button that must be pressed again to restart the machine after an outage of
power main;
2. microswitch on the bowl lid as preventing machine startup when the lid is open;
3. microswitch as preventing machine from starting without first having lifted the bowl.
INSTALLATION AND FUNCTIONING TESTS
Open the carton and make sure that all components are intact.
Lift the machine (Fig. 2) according to the instructions and place it in its selected setting for installation.
Place the machine on a suitably plane, smooth and dry surface sufficiently strong to support the machine
weight.
Install near an outlet complying to EU and derived from an electrical system made to current regulations.
Before completing the connections, check that the mains correspond to the data shown on the plate.
THREE-PHASE CONNECTION
Start the machine for just a few seconds and check that the planetary turns in the right direction (see arrow
on the machine). In the case where the rotation is not correct, disconnect power and exchange two of the
three phase wires in the plug.
AVAILABLE CONTROLS (Fig. 3) AND MACHINE USE
1. STOP BUTTON: press the button to stop the operation of the machine;
2. START BUTTON: press the button to start the machine; the startup is enabled only when the lid is
closed, bowl top and set timer;
3. TIMER: it allows the working time to be set; timed operation position (0 to 15 minutes): turn the
knob clockwise on the graduated scale; continuous operation position: turn the knob counter-
clockwise to the ”manual” position;
4. TOOL SPEED ADJUSTMENT LEVER: allows to adjust the speed of rotation of the tool as a function
of the processing to be performed (three gear positions);
5. HANDWHEEL/LEVER BOWL LIFT: allows you to raise or lower the bowl.
PLACEMENT BOWL
1. Lower the tank by turning the handwheel / lever side.
2. Insert the pin back and two side brackets of the tank in their seats.
3. Act on the side levers to lock the bowl (excluding model PB10).
4. Raise the bowl by turning in the opposite direction the handwheel / lever side.
PLACEMENT TOOL
1. Lower the bowl completely by rotating the handwheel / lever side.
2. Open the lid and insert the tool on the shaft. Then lock it by rotating it counter-clockwise.
3. Close the lid and lift the bowl by rotating the handwheel / lever side.
MACHINE USE
1. Select a speed with the transmission in function of the type of processing: for hard dough select a
low speed (1), for soft dough select a high speed (2 or 3). Open the lid of the bowl to enter the
ingredients and close the lid.
2. Select a processing time using the timer or select position continues.
3. Start the machine by pressing the START button.
4. At the end of the process to stop the machine by pressing the STOP button; if you have set the timer
function will turn off the machine when the timer back to zero.
5. Turn the handwheel / lever side to lower the tank, turn the side levers to release it to discharge the
product worked.
6. After processing, rinse the tank and the tool with warm water and detergent.
7. Clean the lid with a damp sponge.
CLEANING THE MACHINE
The machine must be carefully cleaned at least once a day or more often as necessary.
To clean the machine use only a cloth soaked in water and non-lathery detergent for dishes with pH at 7-8
and at least at + 30° C. Do not use steel wool or abrasive cleaning products.
6
Summary of Contents for PB10
Page 15: ...FIGURE PICTURE ILLUSTRATION BILDER Fig 1 Abb 1 Fig 2 Abb 2 Fig 3 Abb 3 15...
Page 18: ...ESPLOSI EXPLODED DRAWINGS CLAT E EXPLOSIONZEICHNUNGEN 18...
Page 19: ...19...
Page 20: ......

