◼
⚫
⚫
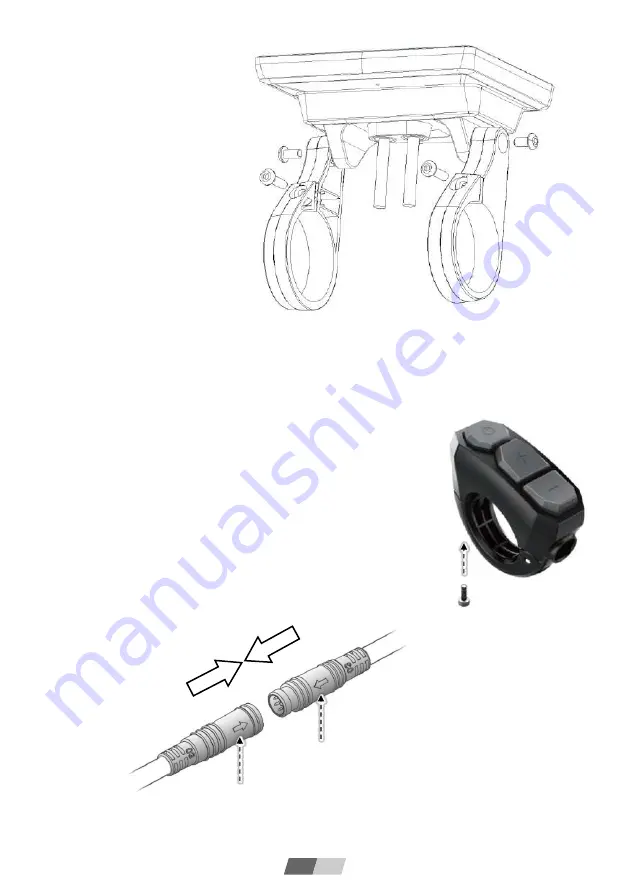
1-1
1-2
2-1
2-2
3
Installation
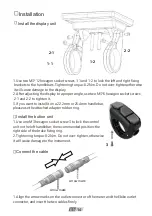
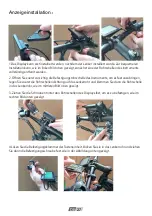
Install the display unit
1. Use two M3*12 hexagon socket screws 1-1 and 1-2 to lock the left and right
brackets to the handlebars. Tightening torque: 0.2N.m. Do not over-tighten,otherwise
it will cause damage to the display.
2. After adjusting the display to a proper angle, use two M3*6 hexagon socket screws
2-1 and 2-2 to tighten it.
3. If you want to install it on a 22.2mm or 25.4mm handlebar,
please use the attached adapter rubber ring.
fixing
Install the button unit
1. Use one M3 hexagon socket screw 3 to lock the control
unit on the left handlebar, the recommended position: the
right side of the brake fixing ring.
2. Tightening torque: 0.2N.m. Do not over-tighten, otherwise
it will cause damage to the instrument.
Arrow mark
Arrow mark
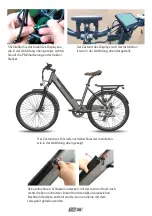
1. Align the arrow marks on the outlet connector of the meter and the Ebike outlet
connector, and insert the two cables firmly
EN
1
4
⚫
Connect the cable
Summary of Contents for F26 PRO
Page 1: ...Smart EV Moped User Manual Model F26 PRO F28 PRO EN DE FR IT ES...
Page 2: ......
Page 4: ......
Page 5: ...Model F26 PRO Model F28 PRO...
Page 6: ...CONTENTS English 1 20 Deutsch 21 40 Fran ais 41 60 Italiano 61 80 Espa ol 81 100...
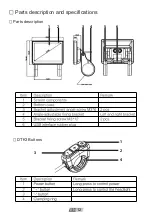
Page 18: ...3 1 2 4 1 3 2 4 5 6 EN 12 Parts description and specifications Parts description DTK3 Buttons...
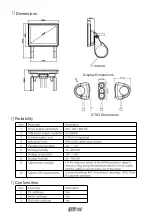
Page 19: ...Dimensions Display Dimensions DTK3 Dimensions Reliability Conformities EN 13...
Page 38: ...3 1 2 4 1 3 2 4 5 6 DE 32 Teilebeschreibung und Spezifikationen Teilebeschreibung DTK3 Tasten...
Page 39: ...Abmessungen Display Abmessungen DTK3 Abmessungen Verl sslichkeit Conformities DE 33...
Page 59: ...Dimensions Dimensions d affichage Dimensions DTK3 Fiabilit Conformities FR 53...
Page 79: ...Dimensioni Dimensioni del display Dimensioni DTK3 Affidabilit Conformities IT 73...
Page 99: ...Dimensions Dimensiones de la pantalla Dimensiones DTK3 Fiabilidad Conformidades ES 93...
Page 107: ......


