


Appendix A
Removing and Replacing FRUs
A - 4
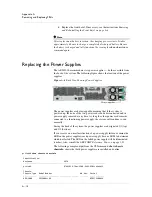
The FRUs that are accessible from the back of the ARX-2000 are the power
supplies, as called out in the following figure.
Figure A.2
Back Panel Showing FRUs
As a general rule, perform all FRU replacements on the backup switch.
WARNING
Static electricity can damage switch components. Be sure to wear antistatic
straps before handling hardware modules and disk drives.
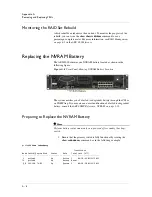
Removing and Re-Installing the Front Bezel
On the ARX-2000, the front bezel must be removed before you can replace
the disk drives or the NVRAM battery. The following figure shows the
appearance of the front bezel when installed.
Figure A.3
ARX-2000 Front Bezel
Remove the bezel, as described in the following steps:
1. If necessary, remove any cables still attached to the system.
2. Insert fingers through the two cutouts on the lower half on either
side of the bezel and pull it gently away from the front of the
system.
When you have completed the FRU replacement, re-install the bezel as
follows:
1. Line up the bezel with the switch.
2. Gently push the bezel onto the front of the switch until it clicks into
place.
3. Connect any Ethernet cables, as desired, to the front of the switch.
Summary of Contents for ARX-2000
Page 1: ...ARX 2000 Hardware Installation Guide 810 0062 00 ...
Page 2: ......
Page 6: ...vi ...
Page 7: ...Table of Contents ...
Page 8: ......
Page 11: ......
Page 12: ...Table of Contents xii ...
Page 14: ......
Page 22: ......
Page 28: ...Chapter 2 Unpacking and Installing the Switch 2 8 ...
Page 30: ......
Page 48: ...Chapter 3 Connecting the Switch to the Network 3 20 ...
Page 49: ...4 Maintenance Powering Down the ARX 2000 LED Indicators POST Diagnostics ...
Page 50: ......
Page 60: ......
Page 72: ...Appendix A Removing and Replacing FRUs A 14 ...
Page 73: ...B Installing the Rail Kit Installing the Rail Kit ...
Page 74: ......
Page 76: ...Appendix B Installing the Rail Kit B 4 ...
Page 77: ...Index ...
Page 78: ......
Page 80: ...Index Index 4 ...


