18
3.3 Cutting blade installation & indexing
EUROBOOR B60(S) comes pre-assembled with 10 cutting blades. Operation of the machine wears the
cutting blades out, and they need to be checked before every use. Work solely with sharp and
undamaged cutting blades, as per EUROBOOR recommendation. There are multiple ways to ensure
maximum performance of the cutting blades:
-
Indexing the cutting blades by rotating the blades 90 degrees in the tool holder, until all
clean and sharp edges have been used and worn. This must be done in the exact same way
for all 10 blades at the same time
-
Swapping the inner and outer blades if only the overlapping corners show signs of wear, as
to make maximum use of the unused edge corners
-
Replacing the cutting blades if they are completely worn out or no longer suitable for the
operating task at hand. All 10 blades need to be replaced at the same time
Following steps cover all above mentioned handlings.
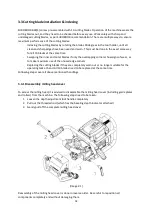
3.3.1 Disassembly milling head cover
To access the milling head, it is advised to disassemble the milling head cover (including guide plates
and rollers) from the machine. The following steps need to be taken:
1.
Loosen the depth adjustment lock handle completely
2.
Pull out the threaded rod (which has the beveling depth indicator attached)
3.
Gently pull off the complete milling head cover
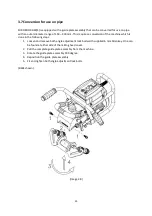
[image 2-1]
Reassembly of the milling head cover is done in reverse order. Be careful to reposition all
components completely and without damaging them.
Summary of Contents for B60
Page 2: ...2 ...
Page 4: ...4 ...
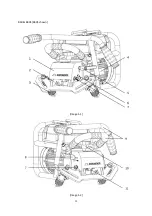
Page 11: ...11 B60 B60S B60S shown image 1 1 image 1 2 ...
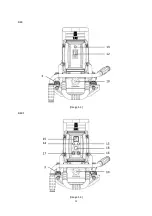
Page 12: ...12 B60 image 1 3 B60S image 1 4 ...
Page 20: ...20 image 2 3 ...
Page 39: ...39 8 Exploded view spare part list 8 1 Exploded views B60 ...
Page 40: ...40 B60 CONTINUED ...
Page 41: ...41 B60S ...
Page 42: ...42 B60S continued ...
Page 45: ...45 8 3 Wiring diagrams B60 ...
Page 46: ...46 B60S ...
Page 48: ...48 ...


