Printing Procedures
A
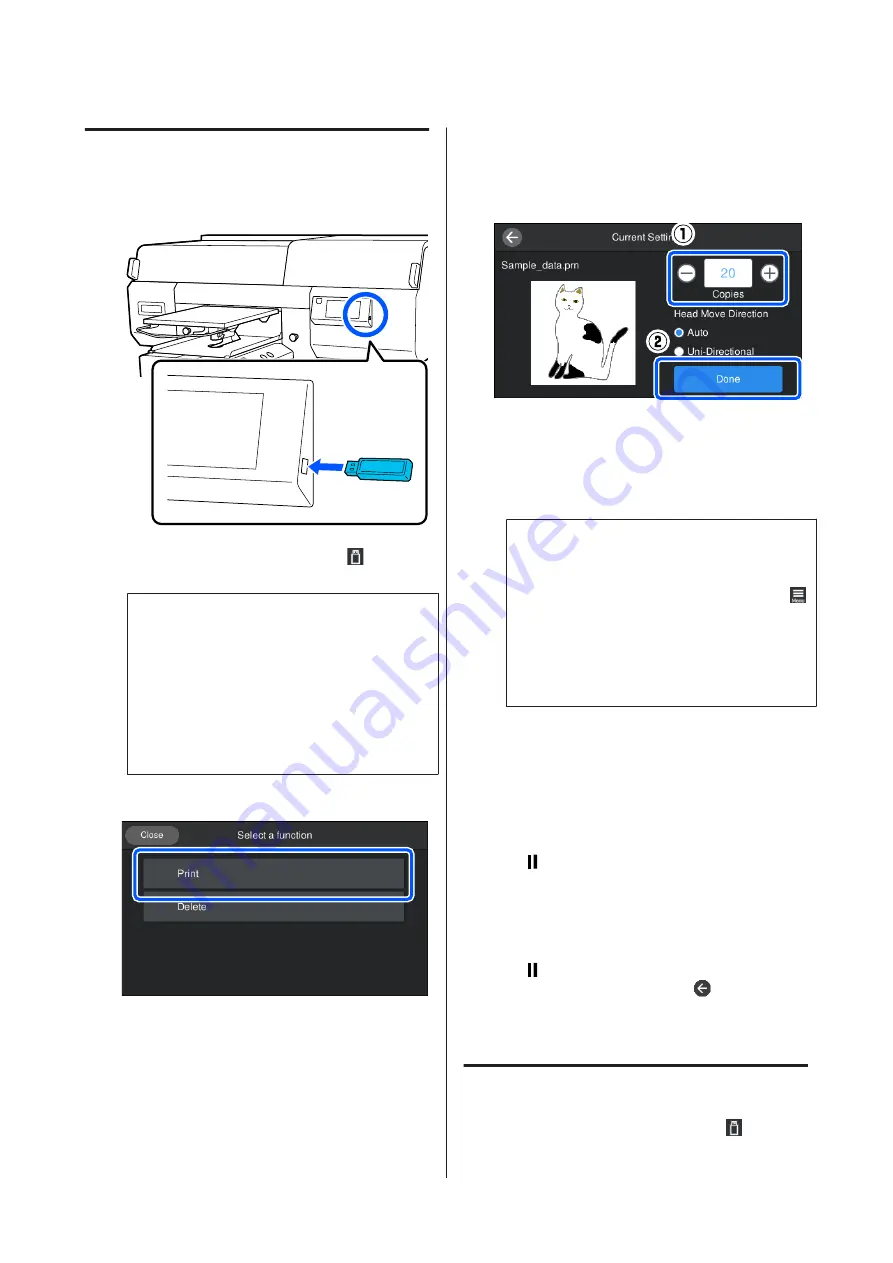
Insert the USB memory containing the saved
jobs to the USB memory port.
B
On the control panel screen, press
(USB
printing).
c
Important:
❏
Do not connect or disconnect the USB
memory when the
P
light is flashing.
❏
Connect the USB memory stick directly to
the printer. We cannot guarantee
connections that use an extension cable, a
USB hub, or a card reader.
C
When the following screen appears, press
.
D
Select the data to print.
A preview of the print data appears.
E
Input the number of prints, and then press
Done
.
You can also change the settings for the
Head
Move Direction
here.
❏
Auto
: Printing is done according to the settings
of the print job.
❏
Uni-Directional
: While moving left and right,
the print head prints only in the first direction.
F
When the preview display opens on the printer’s
screen and the
x
button lights, load a T-shirt on
the platen, and then press the
x
button.
U
“Load the T-shirt (media)” on page 59
Note:
When you execute
Print Head Nozzle Check
or
Head Cleaning
before you start printing or in
between repeated printings, press in the order of
(menu) -
Maintenance
, and then select the menu.
When executing
Print Head Nozzle Check
, be sure
to load the media in the center of the platen.
U
After printing the specified number of garments, a list of
print jobs appears on screen.
To change the specified number of garments while
printing
Press the
button on the printer or the screen to stop
printing, and then redo the settings from step 4.
To print a different job before the specified number
of garments are finished printing
Press the
button on the printer or the screen to stop
printing, in the preview screen, press
to return to the
list of print jobs screen, and then redo the settings from
step 3.
Deleting
A
On the control panel screen, press
(USB
printing).
SC-F3000 Series User's Guide
Basic Printing
74


