


Installing a 3.5-inch Drive
Follow these steps to install a drive in the 3.5-inch drive carrier:
1.
Follow the instructions on page 5-4 to remove the drive
carrier from the computer.
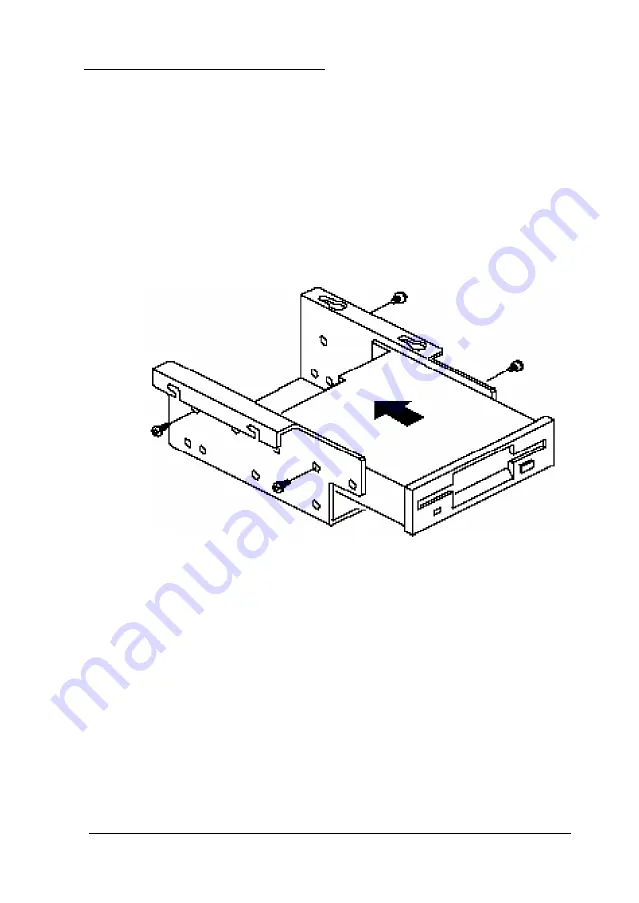
2.
Position the drive so its front panel faces the front of the
drive carrier and the drive’s connectors face the back. Then
slide the drive into the carrier.
3.
Install the four screws that came with the drive to secure it
to the drive carrier. If you are installing a drive in the lower
drive carrier bay, you can install the screws on the bottom
of the carrier or at the sides.
4.
Follow the instructions on page 5-6 to reinstall the drive
carrier in the computer.
Installing and Removing Drives
5-7
Summary of Contents for Endeavor P60
Page 1: ...EPSON User s Guide Printed on 50 recycled paper 10 post consumer content ...
Page 59: ...SIMM configurations continued 4 12 Installing and Removing Options ...
Page 82: ...Using the Video Utilities 6 3 ...
Page 102: ...Error Messages 7 4 Troubleshooting ...
Page 103: ...Troubleshooting 7 5 ...
Page 112: ...7 14 Troubleshooting ...
Page 121: ...System Memory Map Specifications A 9 ...
Page 122: ...System l O Addresses A 10 Specifications ...
Page 123: ...System 170 addresses continued System Board Interrupts Specifications A 11 ...
Page 126: ...Primary power connector J1H1 Diskette drive connector JBJ1 A 14 Specifications ...
Page 127: ...AT IDE hard disk drive connector JBJ2 Speaker connector JlFl Specifications A 15 ...
Page 128: ...Auxiliary 2 V front fan connector J3A1 ISA expansion board connectors A 16 Specifications ...
Page 129: ...ISA expansion board connectors continued Specifications A 17 ...
Page 130: ...PCI expansion board connectors A 18 Specifications ...
Page 132: ...video monitor port connector J13A1 VESA feature connector J10A1 A 20 Specifications ...