


g
Set
Top Edge
,
Bottom Edge
,
Left Edge
, or
Right Edge
according
to the parts of the image that are overlapped.
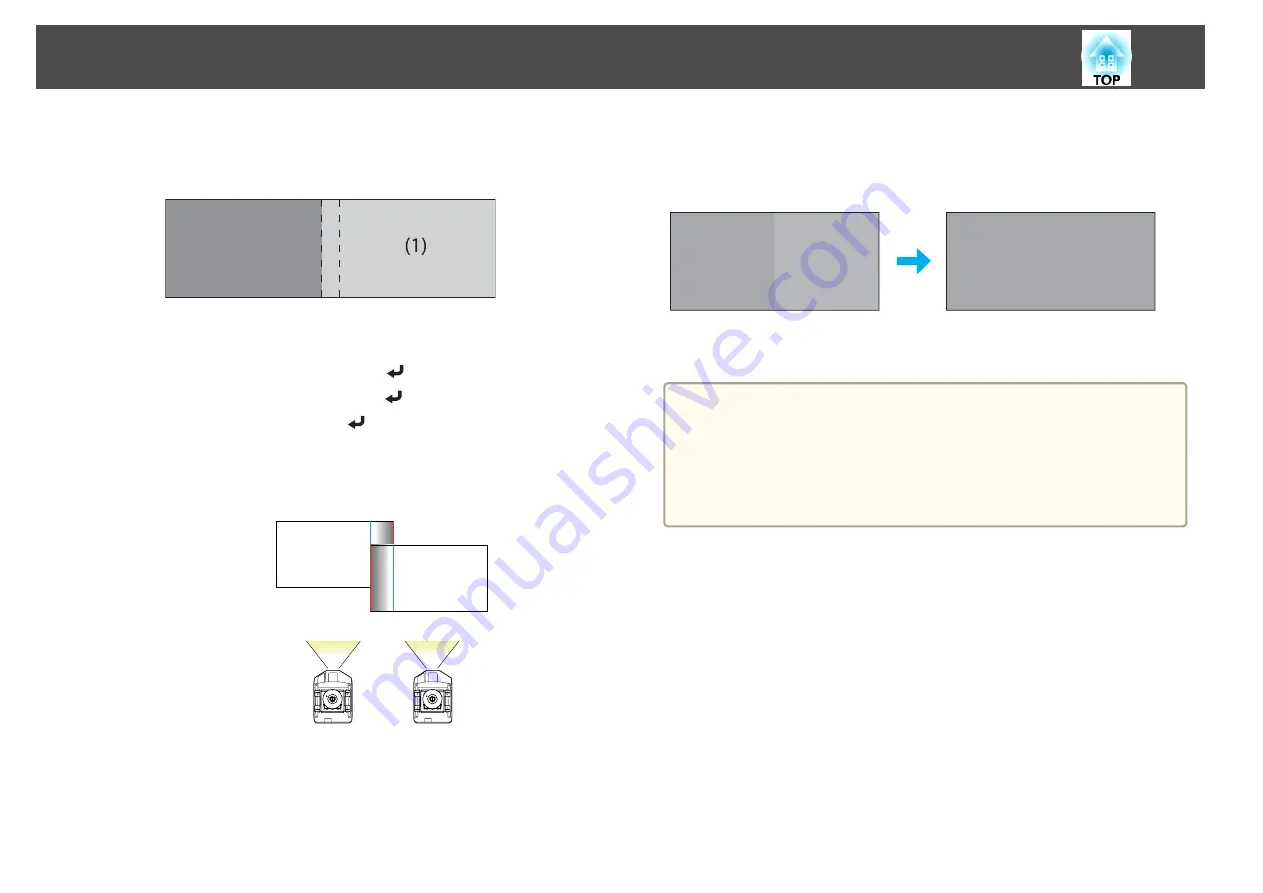
The following shows how to set screen (1) as an example.
In the example above, you need to adjust the
Left Edge
because you
can see the overlapping areas on the left side of the image (1).
(1)
Select
Left Edge
, and then press the [
] button.
(2)
Select
Blending
, and then press the [
] button.
(3)
Select
On
, and then press the [
] button.
(4)
Press the [Esc] button.
(5)
In
Blend Range
, adjust the range to be shaded.
When a guide appears on the same position as the overlapping area, you
can set the blend range with the selected value.
(6)
Press the [Esc] button.
h
After the settings are complete, set
Guide Display
and
Pattern
Guide
to
Off
to finish.
Correcting the brightness
Adjust the
Brightness Level
so that the lamp brightness is the same for
each projector.
Adjust so that all projectors are the same brightness as the darkest lamp.
You can adjust the brightness in five levels.
a
•
Set
Power Consumption
to
Normal
.
s
Settings
-
Power Consumption
•
You cannot adjust the
Brightness Level
during the portrait
projection.
•
Even if you adjust the
Brightness Level
, the brightness of each lamp
may not match exactly.
Multi-Projection Function
83
Summary of Contents for EB-Z10000U
Page 1: ...User s Guide ...
Page 13: ...Introduction This chapter explains the names for each part ...
Page 24: ...Remote control operating range Part Names and Functions 24 ...
Page 57: ...Basic Usage This chapter explains how to project and adjust images ...
Page 113: ...Configuration Menu This chapter explains how to use the Configuration menu and its functions ...
Page 185: ...Appendix ...
Page 233: ...Z Zoom 19 37 Index 233 ...


