


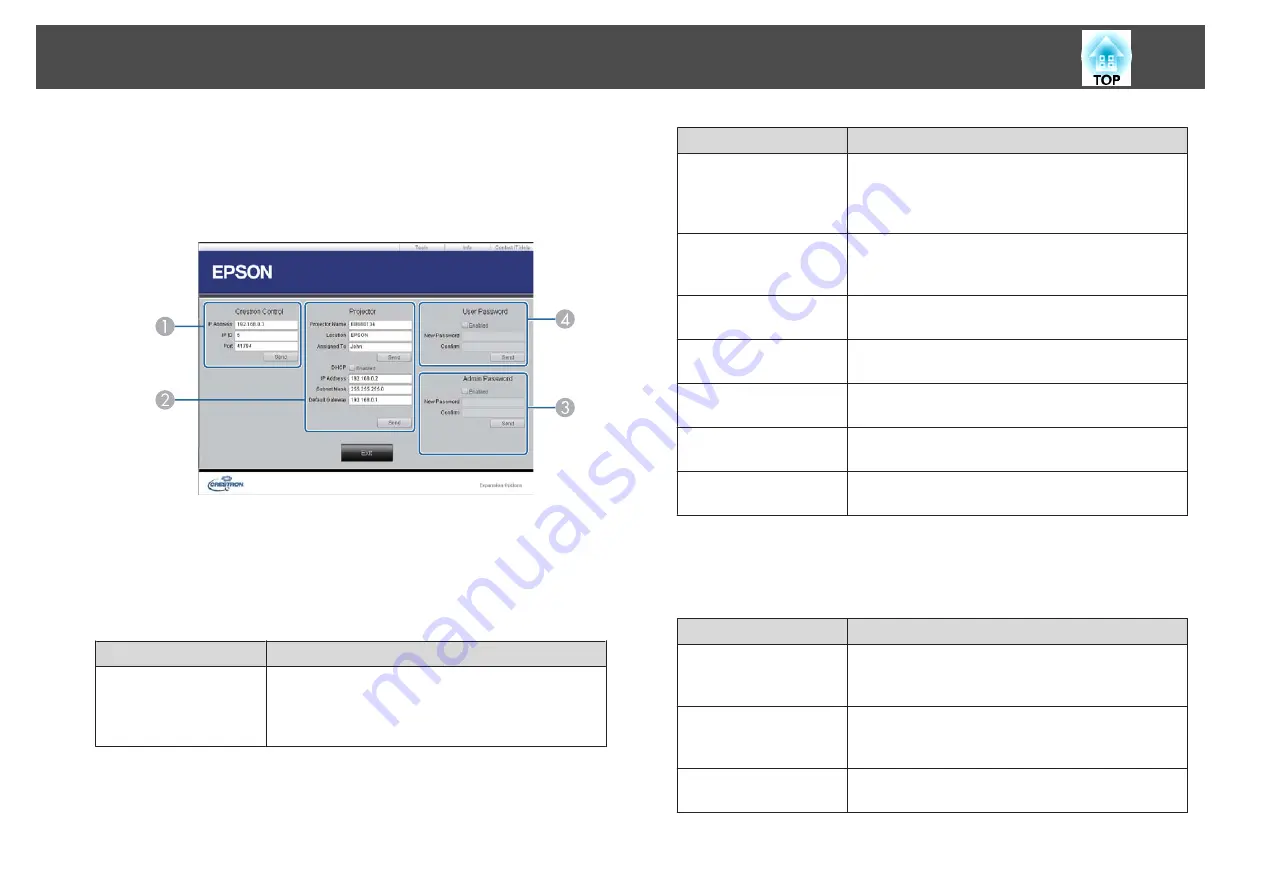
Using the tools window
The following window is displayed when you click the
Tools
tab on the
operation window. You can use this window to change settings in the
projector that is currently connected.
A
Crestron Control
Make settings for Crestron
®
central controllers.
B
Projector
The following items can be set.
Item
Function
Projector Name
Enter a name to differentiate the projector that is
currently connected from other projectors on the
network. (The name can contain up to 15 single-byte
alphanumeric characters.)
Item
Function
Location
Enter an installation location name for the projector
that is currently connected on the network. (The name
can contain up to 32 single-byte alphanumeric
characters and symbols.)
Assigned To
Enter a user name for the projector. (The name can
contain up to 32 single-byte alphanumeric characters
and symbols.)
DHCP
Select
Enabled
to use DHCP. You cannot enter an IP
address if DHCP is enabled.
IP Address
Enter the IP address to assign to the currently connected
projector.
Subnet Mask
Enter a subnet mask for the currently connected
projector.
Default Gateway
Enter the gateway address for the currently connected
projector.
Send
Click this button to confirm the changes made to the
Projector
.
C
Admin Password
Select the Enabled check box to require a password to open the
Tools
window.
The following items can be set.
Item
Function
New Password
Enter the new password when changing the password to
open the Tools window. (The name can contain up to 26
single-byte alphanumeric characters.)
Confirm
Enter the same password as you entered in
New
Password
. If the passwords are not the same, an error is
displayed.
Send
Click this button to confirm the changes made to the
Admin Password
.
Monitoring and Controlling
196
Summary of Contents for EB-Z10000U
Page 1: ...User s Guide ...
Page 13: ...Introduction This chapter explains the names for each part ...
Page 24: ...Remote control operating range Part Names and Functions 24 ...
Page 57: ...Basic Usage This chapter explains how to project and adjust images ...
Page 113: ...Configuration Menu This chapter explains how to use the Configuration menu and its functions ...
Page 185: ...Appendix ...
Page 233: ...Z Zoom 19 37 Index 233 ...


