c
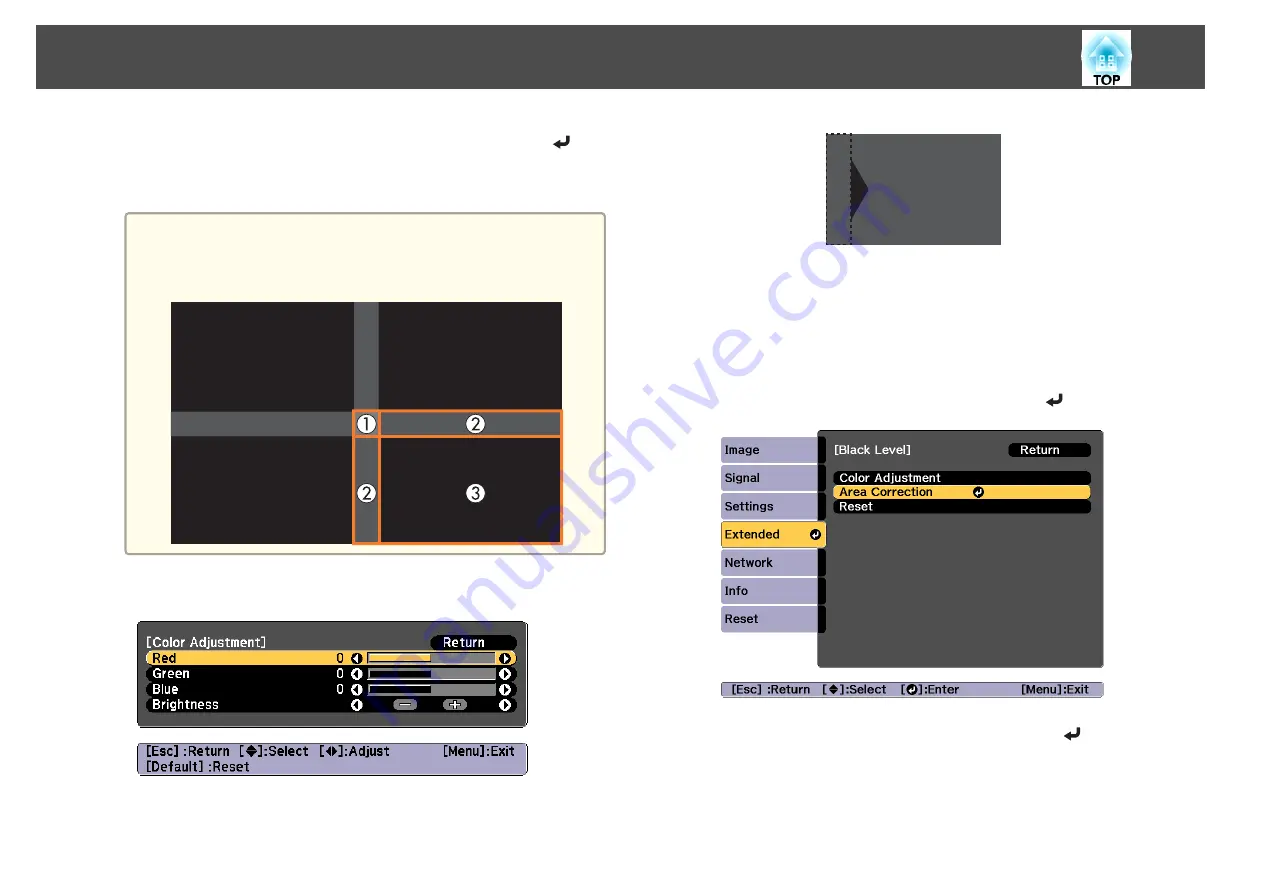
Select the area you want to adjust, and then press the [
]
button.
The selected area is displayed in orange.
a
When multiple screens are overlapping, adjust based on the area
with the most overlap (the brightest area). In the illustration
below, first align (2) with (1), and then adjust so that (3) aligns
with (2).
d
Adjust the black tone and brightness.
e
Repeat steps 3 and 4 as needed to adjust any remaining parts.
After this, if the tone for some areas do not match, adjust them by
Area Correction
.
f
Press the [Esc] button, to return to the screen displayed in step
2.
g
Select
Area Correction
, and then press the [
] button.
h
Select
Start Adjustments
, and then press the [
] button.
Multi-Projection Function
101
Summary of Contents for EB-L1490U
Page 1: ...User s Guide ...
Page 15: ...Introduction This chapter explains the names for each part ...
Page 58: ...Connecting Equipment 58 ...
Page 59: ...Basic Usage This chapter explains how to project and adjust images ...
Page 140: ...Configuration Menu This chapter explains how to use the Configuration menu and its functions ...
Page 219: ...Appendix ...


