


171
5.
Select
Select Destination
to select a destination.
6.
Change any of the displayed settings on the
Scan
tab as necessary.
7.
Select the
Advanced Settings
tab to view and change additional scan settings, if necessary.
8.
On the
Scan
tab, press the
Upload
icon to start scanning.
Your product scans your original and saves the scanned file to the selected destination.
Parent topic:
Starting a Scan Using the Product Control Panel
Scanning to a Memory Device
You can scan an original and save the scanned image to a memory card or external USB device.
1.
Insert a memory card into your product's memory card slot or connect an external USB device to the
port on the front of the product.
2.
Place your original on the product for scanning.
3.
Press the
home icon, if necessary.
4.
Select
Scan
.
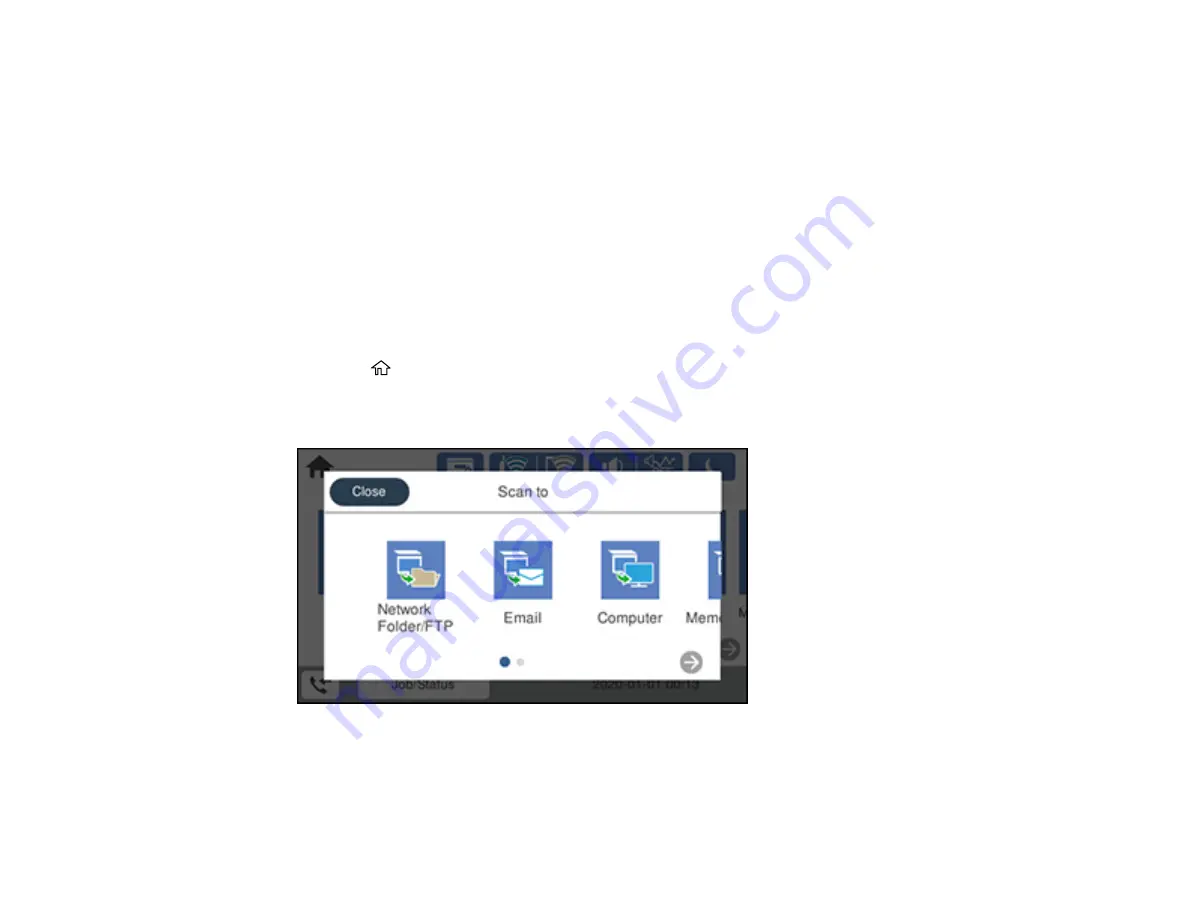
You see a screen like this:
5.
Select
Memory Device
.
Summary of Contents for C11CH67201
Page 1: ...WF 7820 WF 7840 Series User s Guide ...
Page 2: ......
Page 14: ......
Page 37: ...37 Product Parts Inside 1 Document cover 2 Document mat 3 Scanner glass 4 Control panel ...
Page 183: ...183 You see an Epson Scan 2 window like this ...
Page 185: ...185 You see an Epson Scan 2 window like this ...
Page 197: ...197 1 Click the Settings button You see a screen like this 2 Click the File Name Settings tab ...
Page 199: ...199 You see a screen like this 2 Click the Save Settings tab ...
Page 202: ...202 You see a screen like this 2 Click the Customize Actions tab ...
Page 204: ...204 You see this window ...
Page 288: ...288 You see a window like this 5 Click Print ...


