ENSONIQ Avista 7600 User’s Guide
3
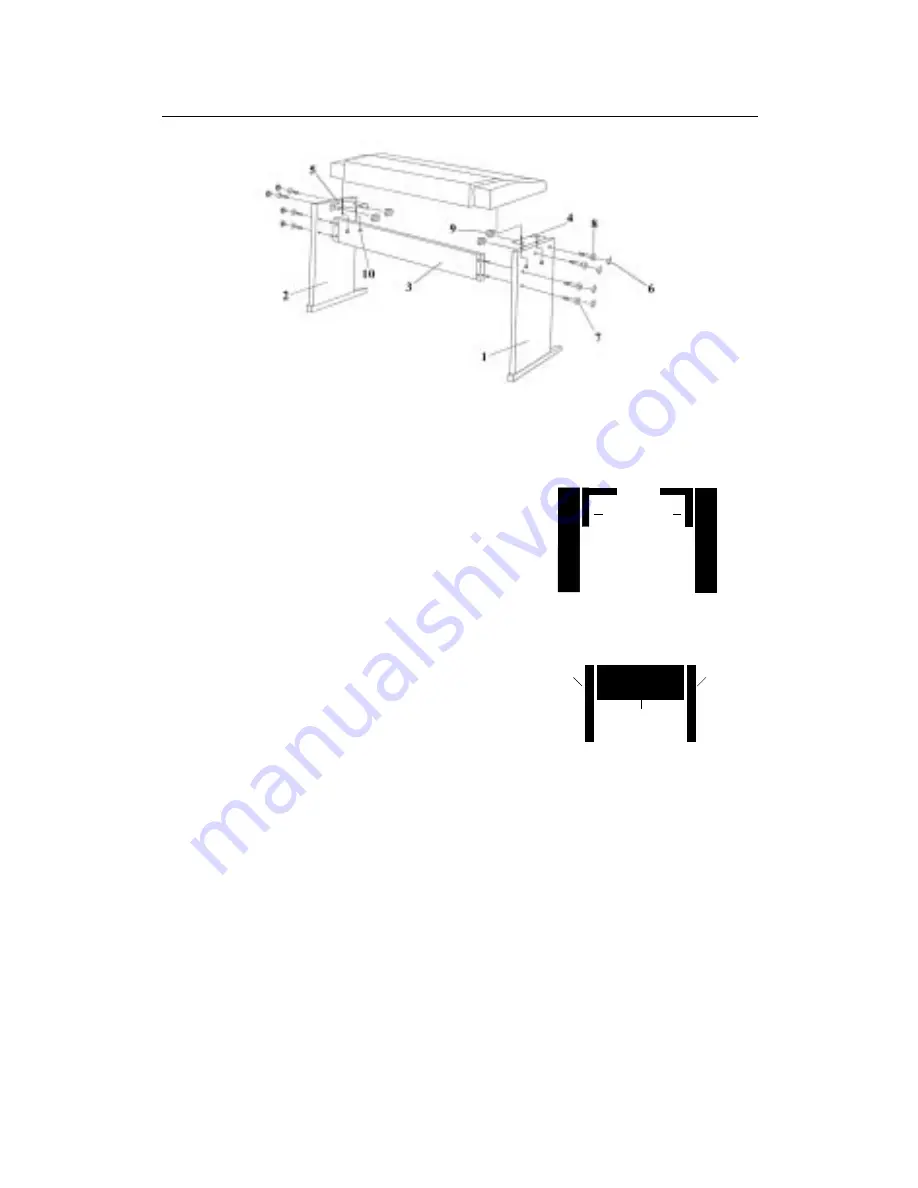
Avista 7600 Stand Assembly Instructions
1.
Using the four larger screws (8), connect a bracket (4 and 5) to the
inside of each leg (1 and 2) so that its lip is facing toward the foot
side of the leg. Each bracket has two
circular holes on one of its sides, and
two oval-shaped holes on its other
side. When attaching a bracket to a
leg, align the two circular holes with
the two bracket holes on the leg.
Insert each screw from the outside of
the leg and fasten it on the inside of
the bracket using a nut (9).
2.
Taking care not to crack the center
support board (3), use the smaller
screws (7) to attach it to the inside of
one of the legs and then the other.
3.
Set the stand upright and place the Avista on top of the stand so
that its keyboard is facing the leg feet.
4.
From underneath, use the plated thumbscrews (10) to attach the
keyboard to the oval-shaped holes in the brackets. You may have to
slightly re-position the keyboard so that its holes line up with the
holes in the brackets.
5.
Snap each of the four screwhole covers (6) into a hole on the
outside of each stand leg to cover the head of the screw mounted in
the hole.
6.
Insert the music stand into the slots in the top of the Avista 7600.
Center support
board
Leg
Leg
When each leg is viewed from
its front edge, the brackets
should look like this
Oval-shaped holes on top
Circular holes


