6. Assembly of Pool Panels with a Deeper Pool
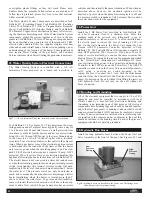
When the deeper pool option has been selected, tension straps
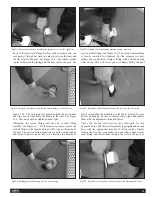
cannot be used. The anchor bolts provided with every kit must
be used for these installations. They secure the panels to the
concrete through the holes in the bottom flanges of the panels.
See Figures 6.1 and 6.2. Ensure that the pool is square before
securing the panels to the concrete. Also be sure that an ade-
quate shelf is present on each side and at the front and back for
the stainless steel benches which will be installed later. If an
Optional Full-Depth Stair has been ordered the shelf the last step
lands on must be at least 60". See further discussion of this in
“Optional Full-Depth Stair,” Section 22 and in Tech Bulletin #10.
The bottom flange of each panel has pre-drilled holes
to accept the 3/8" x 3" anchor bolts provided. See Figures 6.1
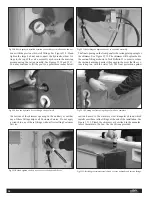
and 6.2. An absolute minimum of 10 anchor bolts are required
as described in the Installation Video. See figure 6.3. When pos-
sible more anchor bolts should be used with an emphasis on the
centers of the panels and the center of the long sides of the pool
enclosure. See Tech Bulletin #2, page 2 for anchoring informa-
tion.With the deeper area pool, it is critical that the panel enclo-
sure be installed correctly so that your custom liner will fit.
Please refer to Tech Bulletin #2 for details of the deeper area.
EPI will make a liner only after receiving a completed copy of
the Liner Order Form which is typically filled out once the pan-
els are installed. This Order Form should be completed in full
and faxed to EPI Customer Service at 610 497 8693. Allow 3
weeks for delivery of the custom liner. While awaiting the cus-
tom liner the installation and finish work may proceed.
7. Installation of Reinforcing Channels
The 2 channels, each 6
5
/
8
" wide, fit over the top flanges of the
two long sides of the pool. The channels bridge the joint
between the panels on the long walls. Check that the enclosure
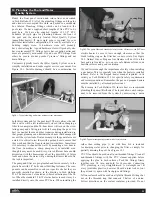
is square. Put the channels on loosely. See Figure 7.1. Check to
see if either channel has a sharp edge or burr and be sure to
locate this on the outside face of the pool or file it down and/or
cover the sharp edge securely with duct tape. The channels will
be secured down later with the self-drilling fasteners provided
in the liner hanger kit. These channels are structural and must be
installed correctly to withstand the hydrostatic load. If you have
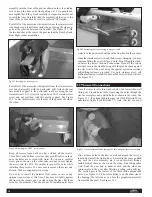
Fig 6.1:
Drilling through foundation to secure anchor bolts.
Fig 7.1: Installing the structural channels.
Fig 6.2: Anchor bolts installed securing pool panel to the foundation.
MINIMUM ANCHORING PLAN
Fig 6.3: Minimum anchor bolt placement.
Fig 5.4:Tightening the tension strap bolts.
8


