28. Optional Deeper Platform
Sometimes customers desire a deeper pool completely above-
ground without excavation. This can be done by constructing a
wooden platform using a drawing supplied by Endless Pools,
Inc. This system is described in Tech Bulletin #14. This solution
only applies to platforms that are 12" or less in height. Any plat-
form of greater height should be designed by a local engineer.
Endless Pools, Inc. can not take responsibility for the structural
integrity of platforms constructed by others. Also note that deep-
er pools hold more water and exert a greater load on the floor
upon which they rest. Endless Pools, either deeper or flat bot-
tomed, should not be built on upper stories without a structural
engineer involved who is willing to stamp the drawings.
29. Optional Stainless Steel Floor Structure
The Endless Pools, Inc. optional stainless steel floor structure
provides a simple cost effective alternative to a poured concrete
floor system. This system is an appropriate alternative if access
to your pool site is a problem for concrete trucks or the distance
is too great to haul concrete. Built to fit your specific pool size,
the stainless steel floor system can be used for flat bottom or
deeper pools. This system has been engineered to withstand the
weight of the pool for pool configurations that are partially in-
ground or fully above ground. The stainless steel has a foam
backing providing added insulation for your pool. Minimal
excavation is needed for above ground or partially in-ground
pools, making this the ideal solution for a speedy installation.
It is delivered with your pool as a kit of parts, which are
assembled on site. Refer to Tech Bulletin #14A for step by step
installation instructions.
30. Felt Underlayment
If it is possible, finish the rest of the pool area, especially the
ceiling over the pool, before proceeding. This will help ensure
that the liner is not damaged, and also keep the pool water, skim-
mer, and filter free of construction debris.
Vacuum the pool floor carefully, and make sure there are no
sharp bumps that might damage the liner. Take special care to
remove any metal chips that may have fallen on the floor. Install
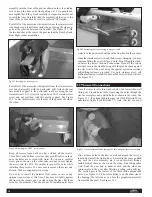
the protective felt underlayment on the floor of the pool. The felt
kit comes in a box with the four foam corners, a can of spray
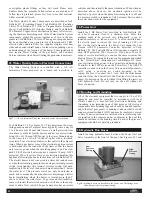
adhesive and Tech Bulletin #15. See Figure 30.1. The felt is 7' x
16'. For wider pools cut pieces as appropriate to cover the floor
of the pool. Place seams near the walls of the pool, so that they
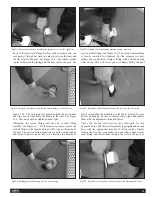
will be covered by the stainless steel benches. Secure the felt to
the floor with the spray adhesive provided. See Figure 30.2.
With deeper pool installations and larger pools, a second and
sometimes even a third box of felt has been provided. Secure the
felt to the bottom and walls of the deeper area as well as to the
floor of the pool. Do not attach felt to the steel walls of the pool.
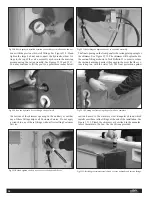
Secure the foam inserts in the 4 corners at the bottom. See
Figure 30.3. Foam corners are not installed in the 4 corners of
the deeper section of a deeper pool.
31. Liner
Standard flat bottom pool liners are usually packaged in a
cardboard box in the pool crate. Liners for deeper pools and cus-
tom-sized pools are sent separately by UPS Ground. Check to
see if your liner was backordered at the time of shipment. If you
have any questions call Customer Service about the status of
your liner.
All work around your pool should be completed before you
install your liner. Take a moment to be sure you have all neces-
sary work completed. Prepare for the liner installation. Be sure
that the liner hanger, corners, panel joints and panel to base
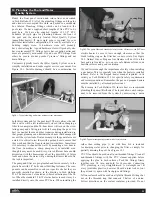
material are sealed with silicone. Tape off all holes in the pool
wall (lights, jets and front panel holes) from the outside. Place a
vacuum hose through the skimmer hole and tape off the skim-
mer hole. Figures 31.1 and 31.2. The hose should be 3" – 4" off
of the bottom of the pool floor felt. Install the liner by starting at
the center of the front panel.
Fig 30.1: Felt kit with foam corners.
Fig 30.2: Installing felt with spray adhesive.
Fig 30.3: Secure the foam corner inserts with spray adhesive.
16


