


10
Installation and start-up
Sensor Vari KNX 3L-TH-D
• Version: 08.12.2016 • Technical changes and errors excepted.
2.4.1. Preparation for installation
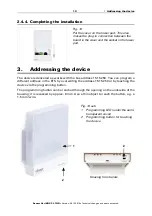
2.4.2. Fitting the lower part of the housing with mounting
Now, first of all, assemble the lower part of the housing with the integrated mounting
for wall or pole installation.
Wall installation
Use fixing materials (dowels, screws) that are suitable for the base.
Fig. 5
The cover and lower part of the housing are
connected together. Pull both parts apart in a
straight line.
Fig. 6
The device is installed with two screws. Break
off the two longitudinal holes in the housing.
Longitudinal holes
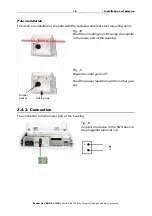
Fig. 7 a+b
a) If the power lead is to be hidden when in-
stalled, it must emerge from the wall in
the vicinity of the rear of the housing
(marked area).
Summary of Contents for Vari KNX 3L-TH-D
Page 5: ...4 Clarification of signs ...


