20
➋-3
SHOOTING IMAGES
◆
CONNECTING TO A PROJECTOR OR MONITOR
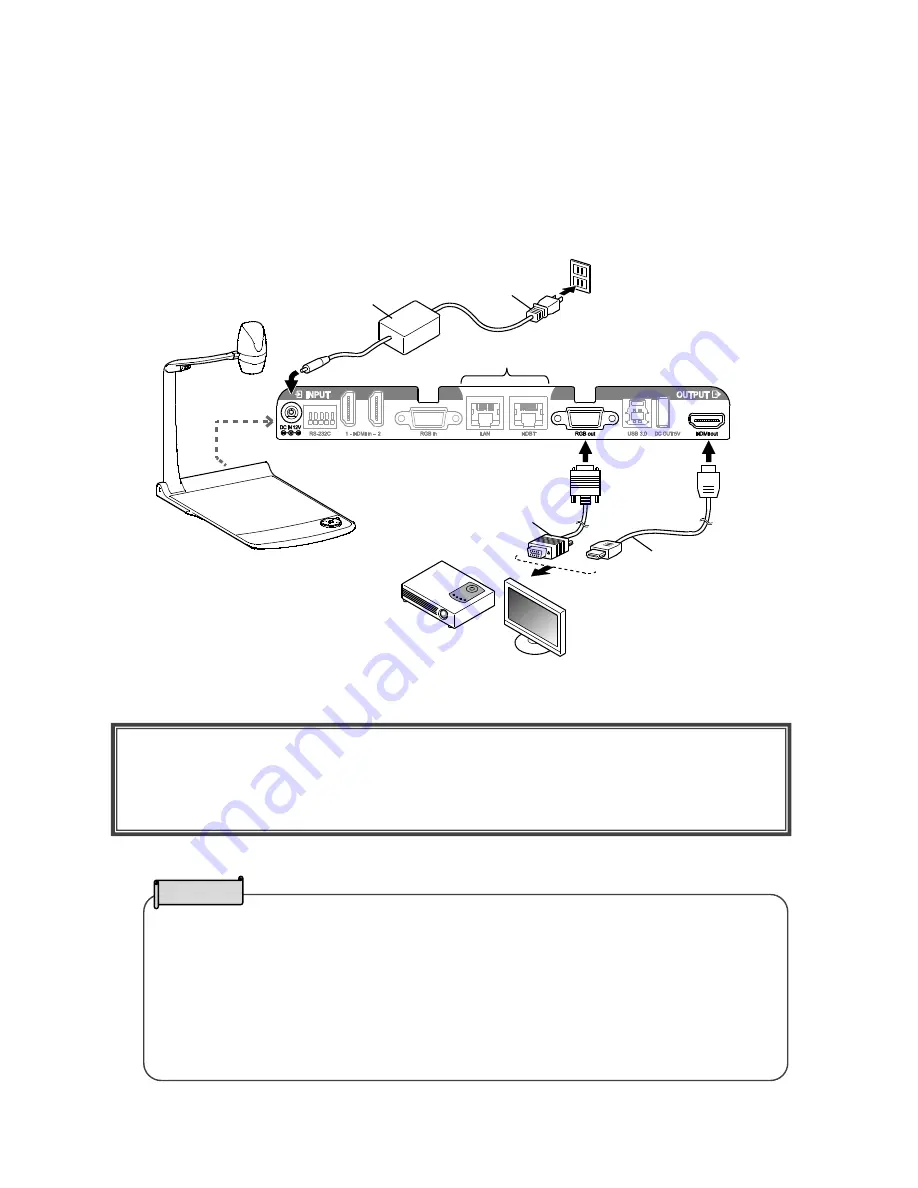
Connect the PX-10/30 to a projector or monitor with the HDMI cable (commercially available) or
the RGB cable (commercially available). Then connect the supplied AC power cord to the AC
adapter.
Connect the AC adapter to the unit and connect the AC power cord to the wall outlet.
The LED of the Power button lights up red.
・
Zoom ratio: Optical zoom 12x + Sensor zoom 2x, Digital zoom 12x (Total 288x
zooming)
※
Sensor zoom 2X can be set only when FHD output is used.
・
When the optical zoom reaches 12x, it automatically shifts to the sensor zoom. When
the sensor zoom reaches 2x, it automatically shifts to the digital zoom.
・
Within the digital zoom range, the image quality is degraded.
・
ON/OFF of the digital zoom can be set in the System Setting menu.
(
⇒
P.30
)
・
When the digital zoom is set to OFF, only the optical zoom is available. (The sensor
zoom is not available.)
NOTE
CAUTION
Before connecting the unit to other devices, be sure to turn off the power of all the devices.
If the image is not displayed correctly after the resolution setting is set to Auto, change the
resolution setting according to the connected device.
(
⇒
P.27
)
Rear panel
AC adapter
AC power cord
To wall outlet
RGB cable
HDMI cable
To a projector or TV monitor
[DC IN 12V]
[HDMI out]
※PX-30 only
[RGB out]


