5-11
C
Co
om
mp
po
on
ne
en
ntt T
Te
ea
arrd
do
ow
wn
n
C
Co
om
mp
prre
es
ss
so
orr A
Arre
ea
a C
Co
om
mp
po
on
ne
en
ntts
s
P
Po
ow
we
err C
Co
orrd
d
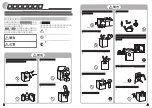
The power cord enters the compressor area on the
lower left side and is secured to the compressor
mounting plate with a P-clamp and screw.
To remove the power cord:
1.
Pull unit from its installation position to access
the rear compressor area.
2.
Using a phillips head screwdriver, extract the
four screws securing the compressor area
shield to the rear of the unit. Remove shield.
3.
Using a 1/4” socket or wrench, extract the
screw securing the P-clamp to the compressor
mounting plate. (See Figure 5-24)
4.
Using a 1/4” socket or wrench, extract the
screw securing the ground wires to the
compressor mounting plate.
5.
Disconnect the power cord from the wire
harness at the quick disconnect.
Remove power cord from unit.
W
Wa
atte
err V
Va
allv
ve
e
The water valve is secured with two screws to the
right hand side of the unit behind the compressor
area shield.
To remove the water valve:
1.
Pull unit from its installation position to access
the rear compressor area.
2.
Using a phillips head screwdriver, extract the
four screws securing the compressor area
shield to the rear of the unit. Remove shield.
3.
Disconnect water valve from household water
supply. (See Figure 5-25)
4.
Using fingers, disconnect the icemaker
water line from water valve.
5.
Using a 1/4” socket or wrench, extract screws
securing water valve to unit frame.
6.
Disconnect electrical connections from
terminals of water valve.
Figure 5-25. Water Valve Removal
Figure 5-24. Power Cord Removal
Household Inlet
Electrical
Terminals
To Icemaker
Screws
Electrical
Connection
Ground
Screw
P-Clamp
and Screw
Summary of Contents for EILFU17GS
Page 2: ......
Page 56: ...5 16 C Co om mp po on ne en nt t T Te ea ar rd do ow wn n Notes ...
Page 57: ...6 1 I Ic ce e M Ma ak ke er r S Se ec ct ti io on n 6 6 I Ic ce e M Ma ak ke er r ...
Page 70: ...6 14 I Ic ce e M Ma ak ke er r Step 3 Step 4 Step 5 Step 6 ...
Page 71: ...6 15 I Ic ce e M Ma ak ke er r Step 7 Step 8 Step 9 Step 10 ...


