18
UNPACKING
The EcoWater Systems HydroLink
®
remote is shipped
from the factory in one carton. Thoroughly check for
possible shipping damage and parts loss. Also note
any damage to the shipping carton. Notify the trans-
portation company if damage is present. EcoWater
Systems is not responsible for in-transit damages.
Remove and discard (RECYCLE) all packing materials.
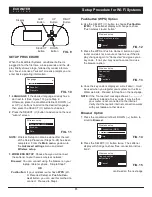
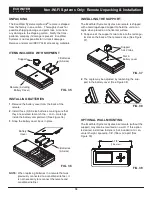
ITEMS INCLUDED WITH SHIPMENT
FIG. 35
Remote (including
Battery Cover)
Support
3 Batteries
(AA size)
INSTALLING BATTERIES
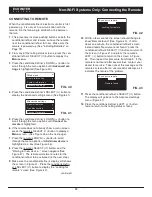
1
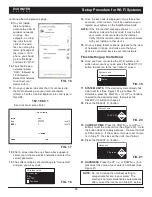
. Remove the battery cover from the back of the
remote.
2
. Install three (3) AA size batteries, making sure that
they are oriented to match the
Æ
and
–
markings
inside the battery compartment (See Figure 36).
3
. Snap the battery cover back in place.
FIG. 36
FIG. 38
INSTALLING THE SUPPORT
The EcoWater Systems HydroLink
®
remote is shipped
with a teardrop-shaped support to hold the unit at an
angle when placed on a horizontal surface.
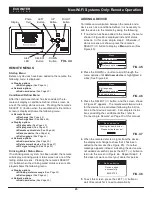
1
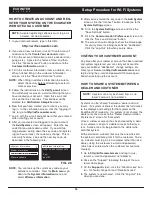
. Snap one of the support’s two tabs into the rectangu-
lar slot on the back of the remote’s case (See Figure
37).
OPTIONAL WALL MOUNTING
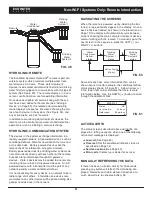
The EcoWater Systems HydroLink
®
remote (without the
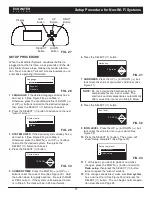
support) may also be mounted on a wall. If this option
is desired, install two fasteners (not included) at a con-
venient height, spaced 6-1/8” (156 mm) apart (See
Figure 39).
FIG. 39
FIG. 37
Support
has 2 tabs
Slot in
battery cover
Battery
Cover
3 Batteries
(AA size)
6-1/8”
(156 mm)
2
. The angle may be adjusted by reorienting the sup-
port in the battery cover (See Figure 38).
ECOWATER
S Y S T E M S
Non-Wi-Fi Systems Only: Remote Unpacking & Installation
NOTE:
When replacing batteries in a remote that was
previously connected to a conditioner/refiner, it
is not necessary to reconnect the remote and
conditioner/refiner.

