24 Operation
4. Turn the Heater Bank toggle switch at the right of the shrink tunnel Power switch
to the On position to turn on the heater bank.
5. Look at the control dials to verify speeds and temperatures are set within typical
levels as applicable for the type and thickness of the film you will be using.
Set the conveyor speed controls on the L-sealer and shrink tunnel panels at
about midrange for initial operation. This can be fine-tuned later. (Exact
desired conveyor speed can be determined later, based on package size and
sealer speed.)
Set temperature controllers for Front Temp Control, Side Temp Control and
shrink tunnel Temperature Controller to temperatures recommended for your
shrink-wrap material. Temperature settings may need to be adjusted higher or
lower until you have achieved satisfactory sealing and shrinking. Once the
correct temperature settings for a product has been determined, you should
not need to adjust any temperature setting again as long as you are running
the same product.
Adjust the blower speed control of the shrink tunnel for proper air flow speed
in the shrink tunnel chamber.
6. Place the product on the product tray.
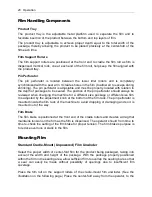
The product tray separates the film, allowing you to place the product
between the upper and lower layers of film.
7. Move the product into the seal head area, pushing it to the left.
8. Move hands out of the seal head area and pull the seal head down. Let go of the
handle as soon as the magnets activate.
The magnets hold the seal head down for the amount of time required to
make the seal. The amount of time is adjustable by turning the Dwell timer
knob, which is located to the left of Power switch under the product tray, to
increase or decrease the amount of time.
While the magnets are holding the seal head down, it is not necessary to wait.
Prepare the next item to be sealed, placing it on the product tray between
upper and lower layers of film.
9. Once the seal is formed completely, the seal head automatically releases. The
sealed product is removed by the takeaway conveyor and fed onto the shrink
tunnel intake conveyor. The next Item can be moved into position for sealing, as
the item just sealed moves into and then is heated in the shrink tunnel.
The takeaway conveyor runs for the specified amount of time required to
move the sealed product onward out of the sealing area to be picked up by
the shrink tunnel intake conveyor. The amount of time the conveyor runs is
Summary of Contents for Combination EC Series
Page 2: ......
Page 4: ......
Page 73: ...Appendix A Electrical Schematic 73 Electrical Schematic L Sealer ...
Page 81: ......


