37
WAYPOINT ICONS
When you save a waypoint, the AccuMap Spor t automatically assigns an
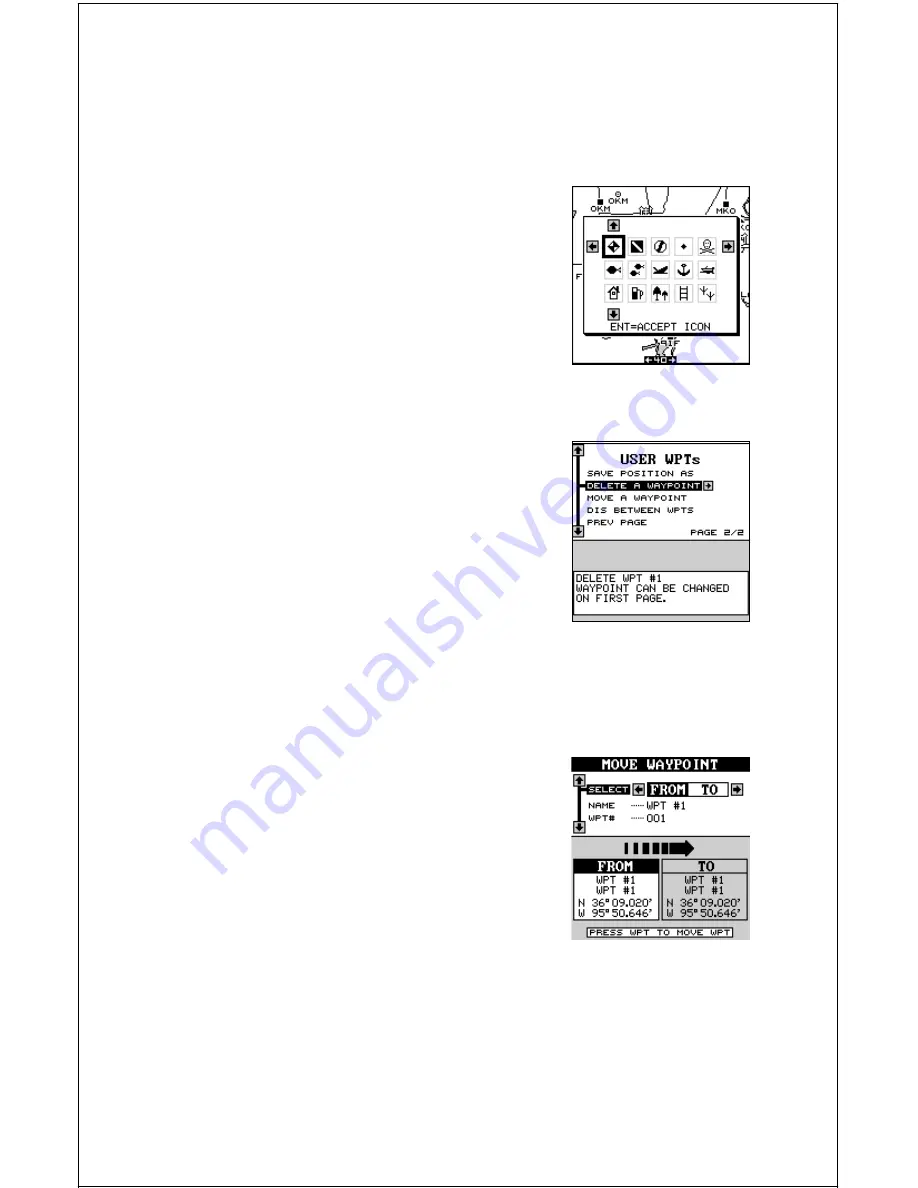
icon to it. If you wish to change it to a different icon, first go to the user
waypoint menu, select the waypoint you want to change, then press the
down arrow key until the black box is on the “EDIT
ICON” label. Now press the right arrow key. The
screen shown at right appears.
Press the arrow keys to move the black box to the
desired icon, then press the ENT key to assign it
to your waypoint. The unit returns to the waypoint
screen with the icon you selected assigned to the
waypoint.
Delete a Waypoint
To remove all information from a waypoint, first
select the waypoint number on the waypoint menu’s
first page that you wish to delete. Next, press the
down arrow key until the black box is on the “Next
Page” label. Press the right arrow key. Now press
the down arrow key until the black box is on the
“Delete A Waypoint” label. Press the right arrow
key. A message appears, asking you if you really
want to delete the selected waypoint. If you choose
yes, all information in the selected waypoint will be deleted. The unit re-
turns to the second waypoint menu page. You can make other waypoint
selections or press the EXIT to erase this menu.
Move a Waypoint
You can move all information from one waypoint
number to another. In this example, we’ll move all
of the information in waypoint number one to way-
point number 10. To do this, go to the second user
waypoint menu page. Now press the down arrow
key until the black box surrounds the “Move A
Waypoint” label. Press the right arrow key. The
screen shown at right appears. The black box is
resting on the “Select From” label. Now press the
down arrow key to move the black box to either the name or waypoint
number labels. You can select a waypoint to be moved by name or num-
ber. In this example, it’s already on waypoint number one.
Once you have the desired waypoint showing on the screen that you’re
going to be moving the information FROM, then you need to choose the
Summary of Contents for AccuMap Sport
Page 1: ...1 INSTALLATION AND OPERATION INSTRUCTIONS AccuMap Sport TM TM ...
Page 62: ...62 ...
Page 63: ...63 WINDOW BOXES These windows are used on Map 4 and Nav 1 only 1 2 3 4 5 6 7 8 9 10 11 12 ...
Page 64: ...64 13 14 15 16 ...
Page 65: ...65 WINDOW GROUPS This is a listing of window groups A through T A B C D E F G H I J K L ...
Page 66: ...66 M N O P Q R S T ...
Page 70: ...70 ...


