


RS4203 Manual
Chapter 14 – Maintenance Guide
Rev 32, 01/11/13
Copyright © 2013, Tipper Tie, Inc., All rights reserved
97
___ Check voider eccentric and crank assemblies for excessive wear. Replace if necessary.
___ Ensure mounting bolts for voider pivot blocks are tight. Apply Loctite and retighten as required.
___ Check for any loose components on the coarse and fine adjustments of the slack-fill adjustment
blocks. The blocks are used for the voider retract and extend cylinders.
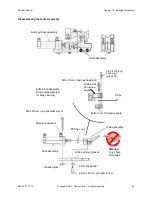
___ Check to make certain the skin brake, and voider have the correct dimensional relationship.
* The horn should be approximately .25 inch (6,35 mm) from the face of the stationary voider.
* The horn should protrude through the skin brake approximately .125 inch (3.17 mm).
___ Inspect voider plates for burrs or galling between each plate.
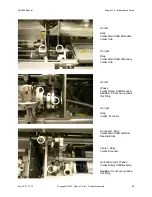
14.9.4 Inspect clipper
___ Perform a clip resistance test. Place a clip in both die supports and manually run clip down each
channel. The clips should not free-fall and should encounter the same surface resistance while
moving past the gate and into the clipper’s die.
___ Inspect the clipper drive yoke and crank assembly for loose parts. Check yoke for excessive play
due to worn bushing, yoke, or key. Tighten the set screw holding the yoke’s retaining key. Replace
if necessary.
___ Check and clean dies, punches and clip channel rails of wax and aluminum buildup.
___ Check that crimp stop knob is in place.
___ Check that adjustment screw for adjustable die is tight.
14.9.5 Inspect conveyor
___ Inspect all conveyor bearings for severe drag or bind and replace if necessary.
___ Inspect drive chain and lubricate and adjust if necessary.
14.9.6 Inspect control box
___ Open the control box and inspect for condensation, water leaks and oil accumulation.
___ Clean and dry out the control box if necessary.
___ After completing the inspection, completely close and fasten down the control box doors to prevent
water and other contaminants from entering the box.
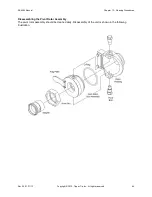
14.9.7 Inspect product horn and rotor
___ Inspect product horn lip and mounting flange for burrs and remove as needed.
___ Inspect horn rotor and housing for burrs or galling. Remove burrs and clean as needed.
___ Check the o-rings for wear or damage.


