


RS4203 Manual
Chapter 10 - Clipper and Looper Operation and Adjustments
Rev 32, 01/11/13
Copyright © 2013, Tipper Tie, Inc., All rights reserved
64
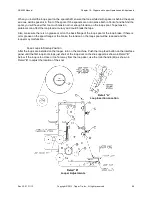
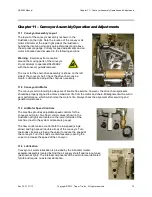
10.5 Punch Pressure Regulator
The machine is designed to operate with the air pressure from the main regulator set at 90 PSI (6,2 bar).
To ensure the maximum life expectancy of the clipper, do not exceed the recommended air pressure.
In addition to the crimp control in the previous section, clip tightness is also related to the air pressure on
the punch cylinder. This clipper is equipped with a pressure regulator that controls the air pressure to the
punch cylinder. Changing the air pressure varies the punch force, which closes the clip. This feature
provides consistent clip tightness for a variety of casing sizes and types. Turn the T-handle to adjust the
pressure.
If the clip does not close properly after you have adjusted the crimp control ring and the punch pressure
regulator, check the incoming air supply pressure. Also, examine the punch and die for damage or
accumulated dirt and debris that may be jammed into the die pockets.
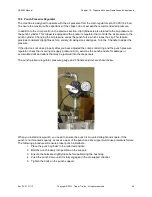
The punch pressure regulator, pressure gauge and T-handle adjuster are shown below.
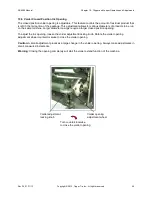
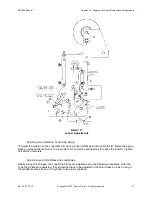
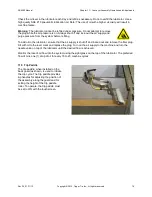
When you install a new punch, you need to ensure the punch is mounted straight and square. If the
punch is not mounted squarely, excessive wear of the punch and die support will cause premature failure.
The following procedure will ensure proper punch installation:
1. Place the punch cylinder in the retracted position.
2. Bolt the punch loosely into position on the support.
3. Ensure the bolts are slightly loose before performing the next step.
4. Push the punch down until it is fully engaged in the die support channel.
5. Tighten the bolts on the punch support.


