44
11.
TROUBLESHOOTING GUIDE Square Deal “B”
No. Category
Issue
Corrective Action
1
Cleanliness
The reloading process is inherently
"dirty" because of residue from
used primers, leftover corn cobb
from tumbling and spilled powder.
The general reloading process of
sizing and seating bullets and
primers can also generate metal
particles. Live primer residue
along with leftover Case Lube are
other contaminants that need to
be cleaned up.
1.
Compressed air or a “can of air" and a 1” paintbrush are the reloader's “best
friends.” At the end of a reloading session, blow out the Primer Slide and
Shellplate areas. A small paintbrush can be used for cleaning spilled powder.
2.
Periodically clean out the Size, Seat and Crimp Die with alcohol and swabs. They
will get dirty over time.
Brass residue can also build up on
the end of Pistol Powder Funnels in
the flaring process.
1.
Polishing the end of the Powder Funnel may also be necessary if the Funnel
starts sticking inside pistol cases.
2
Indexing
Difficult Indexing
1.
Make sure the Shellplate Bolt is tight.
2.
Wrong size Locator Buttons.
3.
Sticky gunk or debris under the Shellplate. --Remove the Shellplate, clean with
alcohol.
4.
Make sure the Ejector wire is not dragging on the Shellplate. --Adjust Ejector
Wire height to clear Shellplate.
Shellplate over-traveling or
“jumping backward” after indexing
1.
Index Ball and Spring stuck down with gunk or debris. --Remove Shellplate and
clean bottom of Shellplate, Index Ball, Spring and Spring/Ball Pocket.
Handle movement difficult
1.
Powder or other debris causing a jamming of moving parts.
2.
Link Arm and/or Pins are worn or galled. —Clean and Relube.
3.
Main Shaft or Wave Bearings are worn, sticky or dirty. --Clean and lubricate with
30 wt. oil. Do not use spray lubes like WD-40.
4.
Priming System is not aligned with Platform/Shellplate. —Realign.
3
Depriming
Bending or breaking Depriming
Pins
1.
Berdan case.
2.
Smaller case inside the larger case.
3.
Debris in cases.
4
Sizing
Scratched Cases
1.
Brass residue will build up in the Size Die (even carbide) over extended periods
especially if the brass cases are not cleaned well. This very hard brass residue
will leave vertical scratches on the case. Remove any hardened brass buildup in
the size die with Red 3M Scotch Brite wrapped around a wood mandrel. Chuck
the mandrel in a drill motor and run it gently back and forth inside the size die to
remove hardened brass buildup. You can also use Sweets 7.62 Solvent. Remove
all Sweets residue afterward.
2.
Dirty Brass.
3.
New Brass has burrs.
Case stuck or sticking in Size Die
1.
Insufficient Lube on the case.
2.
Overpressure or” blown-out” case—Case is out of spec/oversize.
3.
Alcohol from Dillon Case Lube is not given time to evaporate.
5
Priming
Primers not feeding properly.
1.
Stuck Primer in the tube. Discard Tube.
2.
Damaged Magazine Tip or Tube. Replace Tip or discard the Tube.
3.
Debris preventing Primer Slide from traveling far enough into the Primer Feed
body. --Remove and clean Slide and Feed body, or clear with compressed air.
Primer Cup on Primer Slide not aligned properly with Magazine Tip.
Primers may stick on the end of the
Depriming Pin and be “pulled back
up” into the primer pocket
1.
Polish the end tip of the Depriming Pin, so the taper is gone. This gives a wider
tip, and the primer is less likely to get jammed onto it. Also, you can polish the
end of the tip of the pin so it is less likely to get stuck in the primer anvil.
2.
Make sure there are no “burrs” on the end of the Depriming Pin. Polish if
necessary and make sure that the Spring-Loaded Depriming Assembly is intact
especially the “E” clip on top of the Depriming Bolt Assembly.
The Priming Cup is not picking up
primers reliably under the Primer
Magazine. Primers are being
caught in Dispensing Tip
1.
Remove the Primer Magazine from the Magazine Shield. Caution! Any primers
left in the Primer Magazine will fall out. Push a small cloth patch, 3/8" x 3/8",
wet with alcohol, through the Magazine Tube several times to clean the interior.
Verify the Dispensing Tip (Red or Blue) is not damaged--Replace if visibly
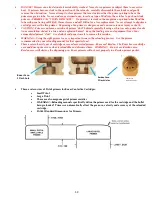
damaged—see below. Verity that the Primer Slides is assembled properly and
to the proper height as shown below:
Summary of Contents for Square Deal B
Page 50: ...50 13 DILLON PRECISION Square Deal B EXPLODED VIEWS AND PARTS IDENTIFIER 13 1 Main Assembly ...
Page 51: ...51 13 2 Frame and Lower Assembly Index Assembly Index Assembly installed in Frame Index Pawl ...
Page 52: ...52 13 3 Typical Toolhead Assembly 45ACP Shown ...
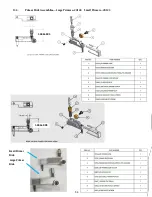
Page 53: ...53 13 4 Automatic Primer Assembly ...
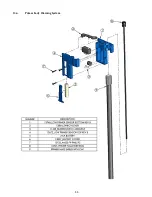
Page 55: ...55 13 6 Primer Early Warning System ...


