24
Upgrading a Model 30 (No Diskette)
NOTE
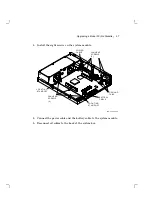
Before disconnecting the power cable in the next step, be sure
to release the connector latch on the back side of the power
connector.
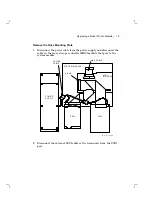
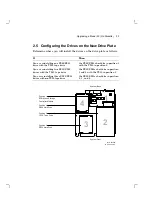
3. Disconnect the power cable and the battery cable from the system
module.
M A - X 0 8 0 5 - 8 8
P O W E R
C A B L E
B A T T E R Y
C A B L E
P A N H E A D
S C R E W S
G R O U N D
T A B S
P A N H E A D
S C R E W S
L O C A T I N G
S T A N D O F F
L O C A T I N G
S T A N D O F F
( 3 )
( 5 )
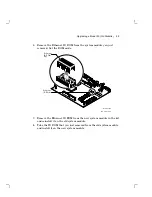
4. Remove the eight screws from the system module.
5. Remove the system module by carefully popping off the two front
corners of the two locating standoffs.
CAUTION
In the next step, you will swap the Ethernet ID ROMs on both
the new system module and the old system module that you
just removed. Be careful not to bend the pins on the ROM or
not to mix up the ROM that goes on each system module.
Summary of Contents for VAXstation 3100
Page 5: ...Contents v Tables 1 Related Documents viii 3 1 RX23 SCSI ID Switch Settings 66 ...
Page 105: ...Upgrade and Return Forms 97 ...
Page 107: ...Upgrade and Return Forms 99 ...
Page 109: ...Upgrade and Return Forms 101 ...
Page 111: ...Upgrade and Return Forms 103 ...
Page 113: ...Upgrade and Return Forms 105 ...

