


103
When you have drawn the last point (must be at or beyond
the right edge of the filter display area), the mouse cursor
will change to an "hourglass" shape for a few seconds while
the filter is being calculated. When the calculations are
complete, the mouse cursor and the buttons in the Hi-Res
Graphic control window will return to normal appearance.
6.
Suppose you decide that you would like to remove the "dip"
which occurs in the filter curve at approximately 3000 Hz in
Figure 4-46, above. Click on
Edit
to bring up the following
display (Figure 4.45):
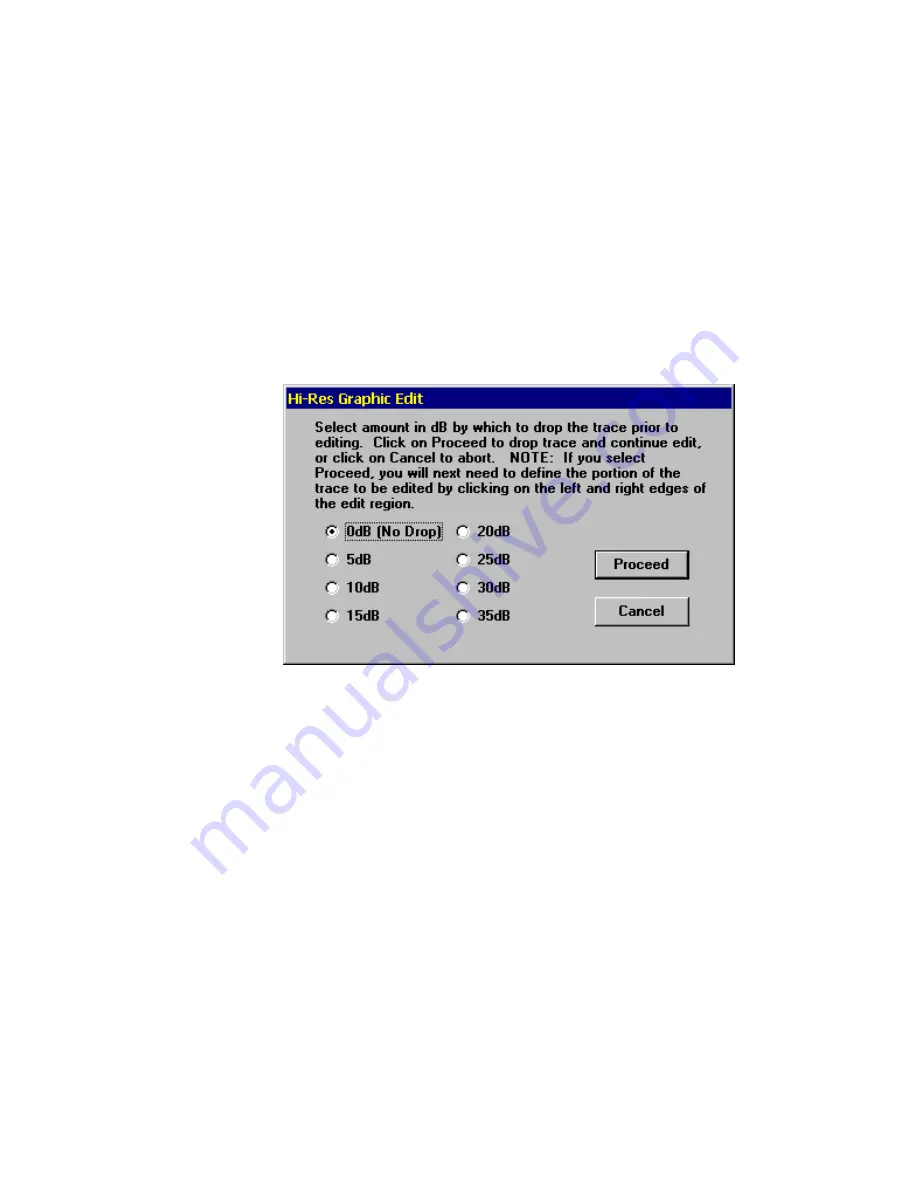
In this window, you can make the entire filter curve drop by a
specified amount prior to editing the curve. This can be used
to create headroom which can be used to increase the gain
(decrease the attenuation) in one portion of the curve relative
to the rest of the curve. For now, select a drop of
0dB (No
Drop)
and click on
Proceed
.
7.
You should now notice that all the buttons on the control
window have been replaced with a single
Abort
button, which
permits returning to the pre-Edit filter.
To edit out the dip, you will first need to define the edit region
by carefully specifying the left and right edges of the portion
of the filter curve that you wish to modify. Click your mouse
to the left and to the right of the dip to produce the following
display (Figure 4-48):
Figure 4-47 Hi-Res Graphic Edit Window
Summary of Contents for PCAP II
Page 2: ......
Page 4: ......
Page 14: ...2 ...
Page 68: ...56 Figure 4 14 Lowpass Filter Graphical Description ...
Page 71: ...59 Figure 4 16 Highpass Filter Graphical Description ...
Page 75: ...63 Figure 4 18 Bandpass Filter Graphical Description ...
Page 90: ...78 Figure 4 28 Slot Filter Graphical Description ...
Page 104: ...92 ...
Page 110: ...98 ...
Page 128: ...116 ...
Page 154: ...142 ...


