


www.digimerge.com
VCE400 Series QSG_EN_R1 Page 3
Information in this document is subject to change without notice. As our products are subject to continuous improvement, Digimerge Technologies Inc. reserves the right to modify product design, specifications and prices, without notice and without incurring any obligation. E&OE © 2007 Digimerge. All rights reserved.
STEP 2
SETTING UP YOUR DIGTIAL VIDEO RECORDER (DVR)
- BASIC - NETWORK SETUP
2
3
1
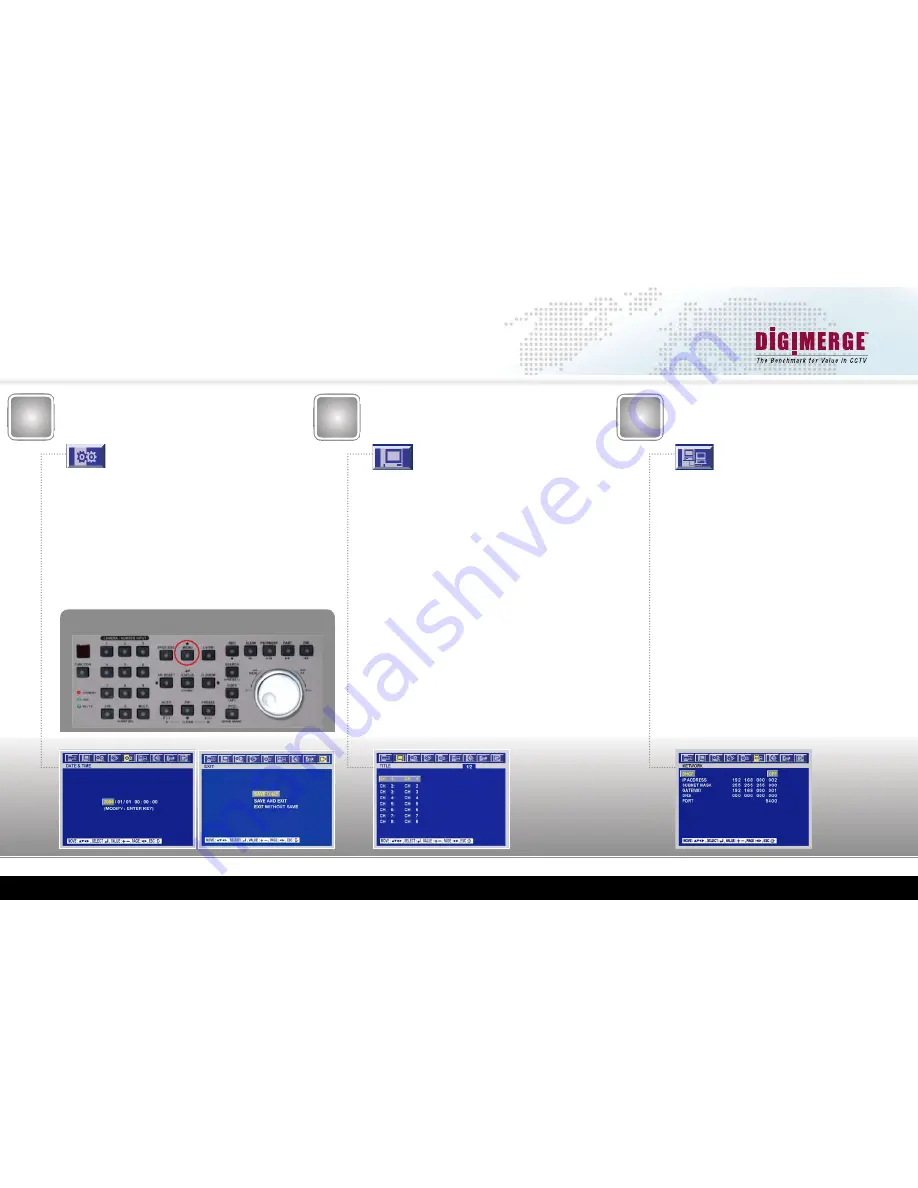
Setting Date & Time
Press the
“Menu”
Button
Use the Left or Right Arrows to Navigate to the
“System”
Menu
Move down to
“Clock”
and press
“status/home/enter”
Select
“Date&Time”
and press
“status/home/enter”
Use the arrow keys to highlight which entry to modify
(year/month/day hour:minute:second)
Use the
“F-” (auto) or “F+” (freeze)
keys to decrement
or increment the highlighted values
Press
“status/home/enter”
to set the time
Press the
“Spot/ESC”
button 3 times
Move to
“Save and Exit”
and press
“status/home/enter”
Setting Camera Names
Press the
“Menu”
Button
Use the Left or Right Arrows to Navigate to the
“Screen”
Menu
Move down to
“Title”
and press
“status/home/enter”
Select desired channel number (i.e. CH 1:) and press
“status/home/enter
Use the directional arrows to Highlight the desired
letters or numbers, Press the
“status/home/enter”
to
select the letter
Repeat this process until the camera name is displayed
in the
“CH x: ”
section
To make corrections to the data entered, you can
use the “F-” (auto) or “F+” (freeze) keys to highlight
the letter in the “CH x:” section you want to change/
modify, then use the directional arrows to highlight the
letter you want to change it to, press the “status/home/
enter” to change the selected character
Press
“Spot/ESC”
to set the Camera Name
Repeat this process for each Channel
Press the
“Spot/ESC”
button 2 times
Move to
“Save and Exit”
and press
“status/home/enter”
Network Setup
Press the
“Menu”
Button
Use the Left or Right Arrows to Navigate to the
“Link”
Menu
Select
“Network”
and press
“status/home/enter”
For more information on these features, refer to the
VCE400 Series Manual, under the “6.6.1 Network”
section
Press the
“Spot/ESC”
button 2 times
Move to
“Save and Exit”
and press
“status/home/enter”
MENU


