background image

www.digimerge.com

VCE400 Series QSG_EN_R1 Page 11

Information in this document is subject to change without notice. As our products are subject to continuous improvement, Digimerge Technologies Inc. reserves the right to modify product design, specifications and prices, without notice and without incurring any obligation. E&OE © 2007 Digimerge. All rights reserved.

8

5

6

4

STEP 4

DYNAMIC DNS SETUP FOR REMOTE SECURITY MONITORING 

(continued)

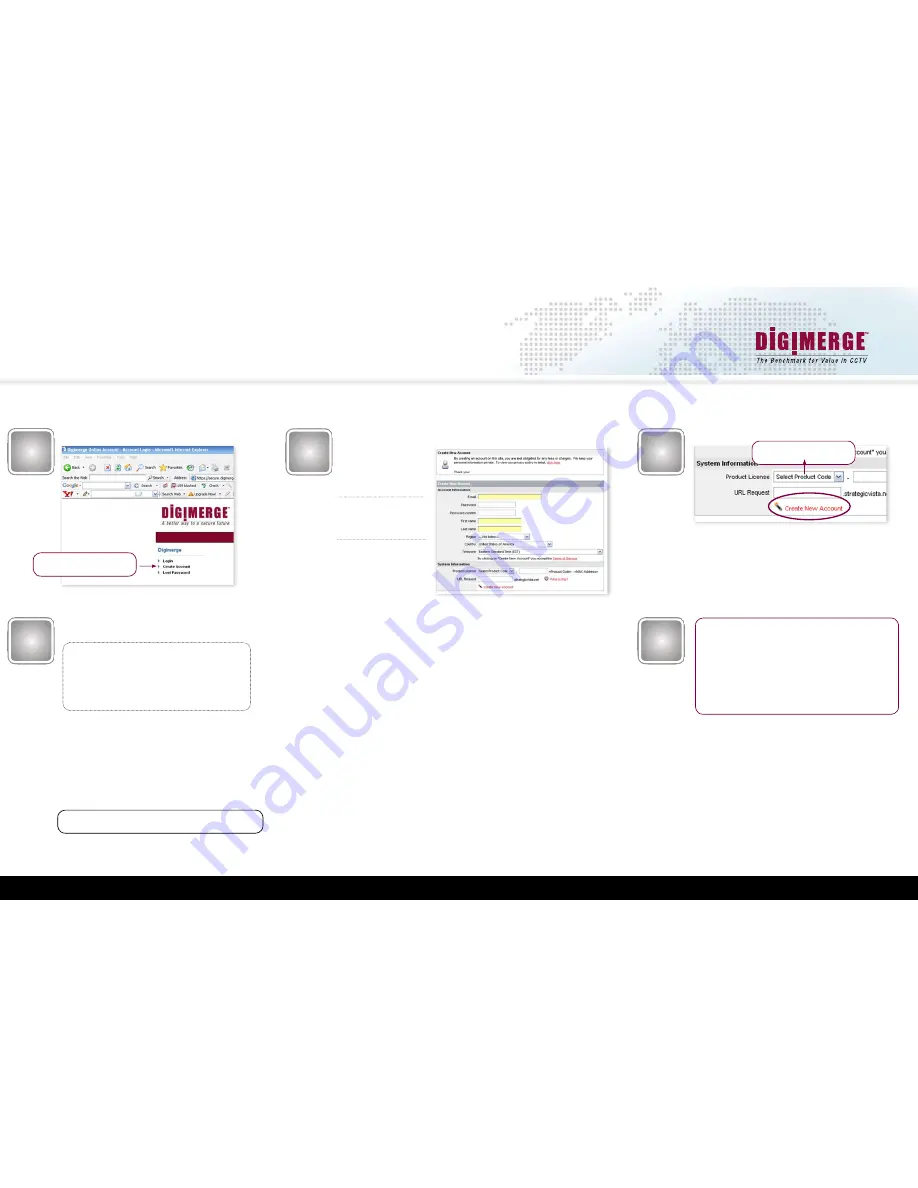
Port forwarding Your Router and the Creation of a DDNS Account with Digimerge is required in order for you to have Remote Internet Access.

Select the Create New Account Link

Complete Account Information

1. For Product License: Select 
your Product Model Number 
from the drop down menu 
(VCE400 Series)

2. For Product Code enter the 
MAC address (without any 
space) recorded earlier

3. For URL Request choose a 
URL Name (not to exceed 15 
characters) (e.g. your name, 
your company etc.)

1

2

3

Select the Create Account Option

Create Account

An Automated Confirmation email will be sent 

to you. Record the information below

Port Forward your Router. You will need to   

Forward port 5400 (default).
All routers are different. To Port Forward your 

Router:

Refer to your Router’s manual for specific in-

structions on port forwarding

DDNS:   


ON

Domain name:   


johndenver

User name: 


johndenver1

Password: 


<enter the password>

DDNS Status:   


GOOD

The DDNS Status will show GOOD if your configuration is OK.

Once the DDNS Account has been configured (and the account 
details are received in Email), then these settings can be added to the 
DVR unit. See the DDNS Set menu options on your owner’s manual 
for further details.

Once you finish entering the information press ESC twice and use 
the option SAVE ONLY.Go back to the menu LINK /DYNAMIC DNS 
and check the DDNS status.

VCE400 Series

Note : If your status is FAILED, check your settings or your internet    

connection and try again.

Summary of Contents for VCE404

Page 1: ...QUICK REFERENCE GUIDE ENGLISH VERSION 1 02 The Benchmark for Value in CCTV VCE400 SERIES Pentaplex Network DVR Copyright 2007 Digimerge Technologies Inc...

Page 2: ...ed to the CH1 CH2 CH3 CH4 Video Inputs BNC Inputs 2 Insert the power cord to the DVR Your system is now ready to use Refer to your DVR s owner s manual to learn how to record playback use the search f...

Page 3: ...ton Use the Left or Right Arrows to Navigate to the Screen Menu Move down to Title and press status home enter Select desired channel number i e CH 1 and press status home enter Use the directional ar...

Page 4: ...e desired letters or numbers Press the status home enter to select the letter Repeat this process until the full domain name is displayed in the Do main Name section To make corrections to the data en...

Page 5: ...s to decrement or in crement the Resolution value the options are 320x240 720x240 720x480 Setting Normal continuous Record IPS The Normal IPS Settings are only used when the Record button is pressed P...

Page 6: ...ngs dictate what type of events will trigger the VCE400 to record by default these are all enabled O indicates the option is enabled indicates the option is disabled A indicates an externally triggere...

Page 7: ...atures refer to the VCE400 Series Manual under the 6 3 1 Record Setup section Press Spot ESC 2 times Move down to Save and Exit and press status home enter In this menu you can configure a weekly reco...

Page 8: ...New Password and the Re type fields are the same Press Spot ESC 2 times Move down to Save and Exit and press status home enter Setting Resetting VCE400 Admin Password This option will return the unit...

Page 9: ...ange Direction This will play the recorded video until the selected event stopped recording the VCE400 will return Completed at the end of the recording To return to the live view of the VCE400 press...

Page 10: ...f ethernet cable not sup plied to the DVR the other end to the broad band router not included Power router and DVR ON if not already ON Port forwarding Your Router and the Creation of a DDNS Account w...

Page 11: ...se a URL Name not to exceed 15 characters e g your name your company etc 1 2 3 Select the Create Account Option Create Account An Automated Confirmation email will be sent to you Record the informatio...

Page 12: ...ould be populated in the above list Select the DVR by clicking on it and then click on the Connect Button A login window should appear Enter in the DVR s 8 digit password and press Ok Logging Into Liv...

Reviews: