12
PowerConnect B-DCX4S Backbone Hardware Reference Manual
53-1001808-01
Preparing for PowerConnect B-DCX-4S installation
2
Preparing for PowerConnect B-DCX-4S installation
NOTE
Read the safety notices before installation (
“Safety notices”
).
The following steps are required to ensure correct installation and operation.
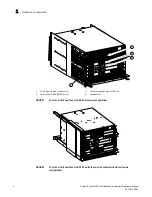
1. Provide a space that is 9 rack units (9U) high, 61.19 cm (24.09 in.) deep, and 43.74 cm (17.22
in.) wide. 1U is equal to 4.45 cm (1.75 in.). If you do not use the provided port side exhaust kit,
the space needs to be only 8 rack units (8U) high.
The PowerConnect B-DCX-4S can be installed facing either direction in a cabinet, if
serviceability and cooling requirements are met.
2. Ensure that dedicated electrical branch circuits with the following characteristics are available:
•
200 – 240 VAC, 50–60 Hz (two branch circuits)
•
Two cables for the 200 - 240 VAC service
•
Power supply standards (
“Power specifications”)
are met
•
Protected by a circuit breaker in accordance with local electrical codes
•
Supply circuit, line fusing, and wire size adequate to the electrical rating on the chassis
nameplate
•
Location close to the chassis and easily accessible
Installing the rack mount kit or
port side exhaust kit.
30 minutes
Refer to the one of the following if you are
mounting the PowerConnect B-DCX-4S in a
rack:
PowerConnect B-Port Side Exhaust Kit
Installation Procedure
PowerConnect B-DCX-4S Mid-Mount Rack Kit
Installation Procedure
or
PowerConnect B-DCX-4S Rack Kit Installation
Procedure
.
Mounting and securing PowerConnect
B-DCX-4S in rack.
15 minutes
Installing power cables and powering on
the PowerConnect B-DCX-4S.
10 minutes
Power cables.
Establishing serial connection, logging on
to PowerConnect B-DCX-4S, and
configuring IP addresses.
20 minutes
Serial cable (provided in the accessory kit).
Workstation computer with a serial port or
terminal server port and a terminal emulator
application (such as HyperTerminal).
Ethernet IP addresses for the switch.
Installing an Ethernet cable, opening a
Telnet session, and configuring the
PowerConnect B-DCX-4S domain ID, date
and time, and additional system
parameters. Verify and back up
configuration.
20 minutes
Ethernet cable for Telnet access.
Refer to the
Fabric OS Administrator’s Guide
.
Installing SFPs. Attaching and managing
fiber optic cables.
15 minutes
SFP optical transceivers. Fiber optic cables
and cable ties.
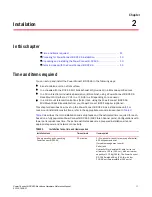
TABLE 3
Installation tasks, time, and items required (Continued)
Installation task
Time estimate
Items required

