


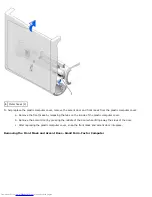


b. Using an 8-inch #2 Phillips screwdriver, remove the screw holding the control panel to the computer, and pull
the panel up and away from the computer.
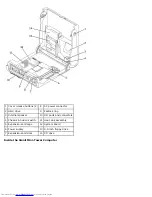
Small Mini-Tower Computer
1. To remove the badge, open the front USB door.
a. From inside the door, push in the two tabs on either side of the badge to release the badge.
b. Press on the badge until it is freed.
2. To remove the control panel, perform the following steps:
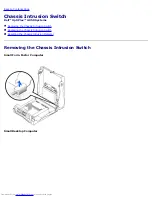
a. Lay the computer on its right side and open the cover.
b. Remove the top and bottom panels of the computer by releasing the eight tabs on each panel.
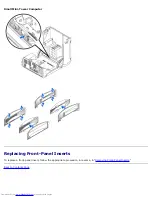
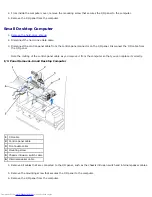
c. Remove the front bezel by releasing the three tabs located on the front bezel: one tab is located by the CD drive,
and two tabs are located by the I/O panel.
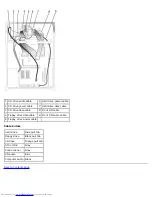
NOTE:
This view of the small mini-tower chassis shows the CD drive data cable removed.
Front Bezel Tabs—Small Mini-Tower Computer
Summary of Contents for OptiPlex GX50
Page 17: ...Small Desktop Computer ...
Page 26: ......
Page 30: ...To replace the I O panel follow the removal procedures in reverse Back to Contents Page ...
Page 45: ...1 Power cable 2 Audio cable 3 CD drive cable 4 CD drive connector Small Mini Tower Computer ...
Page 65: ...Back to Contents Page ...