2. Install the
.
after working inside your computer
.
3.5 in. hard-drive assembly
Removing the 3.5-inch hard drive assembly
Prerequisites
before working inside your computer
.
2. Remove the
.
3. Remove the
.
About this task
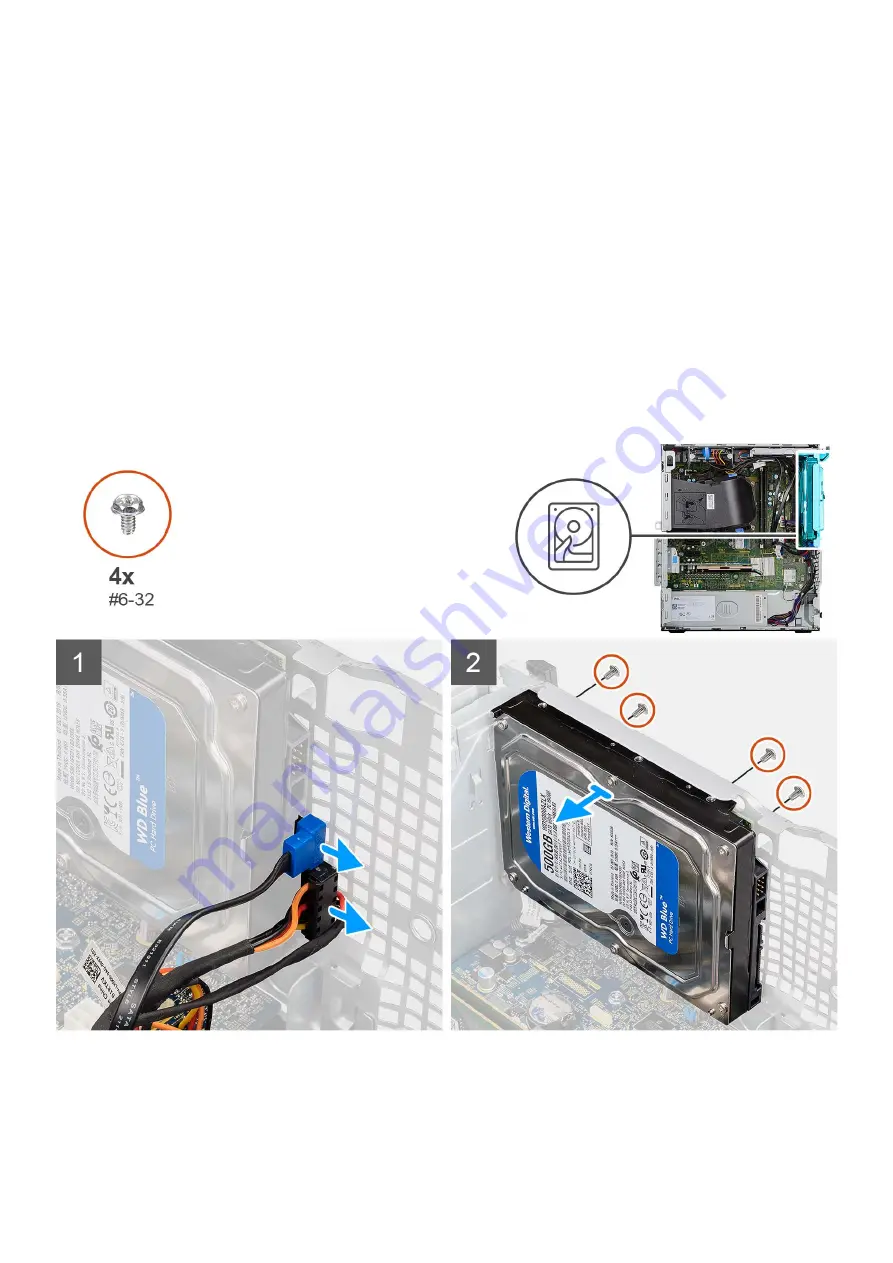
The following images indicate the location of the 3.5-inch hard drive assembly and provide a visual representation of the removal
procedure.
Steps
1. Disconnect the data and power cables from the 3.5-inch hard drive module.
2. Remove the fours (#6-32) screws that secure the hard drive to the chassis.
3. Remove hard drive away from the chassis.
28
Removing and installing components
Summary of Contents for D32M
Page 14: ...14 Removing and installing components ...
Page 16: ...16 Removing and installing components ...
Page 83: ...Removing and installing components 83 ...
Page 84: ...84 Removing and installing components ...
Page 87: ...Removing and installing components 87 ...
Page 88: ...88 Removing and installing components ...


