


36
Changing the Multi-Image Preview
The appearance and some of labels on HS-600 Multi-Image Preview can be changed by the user.
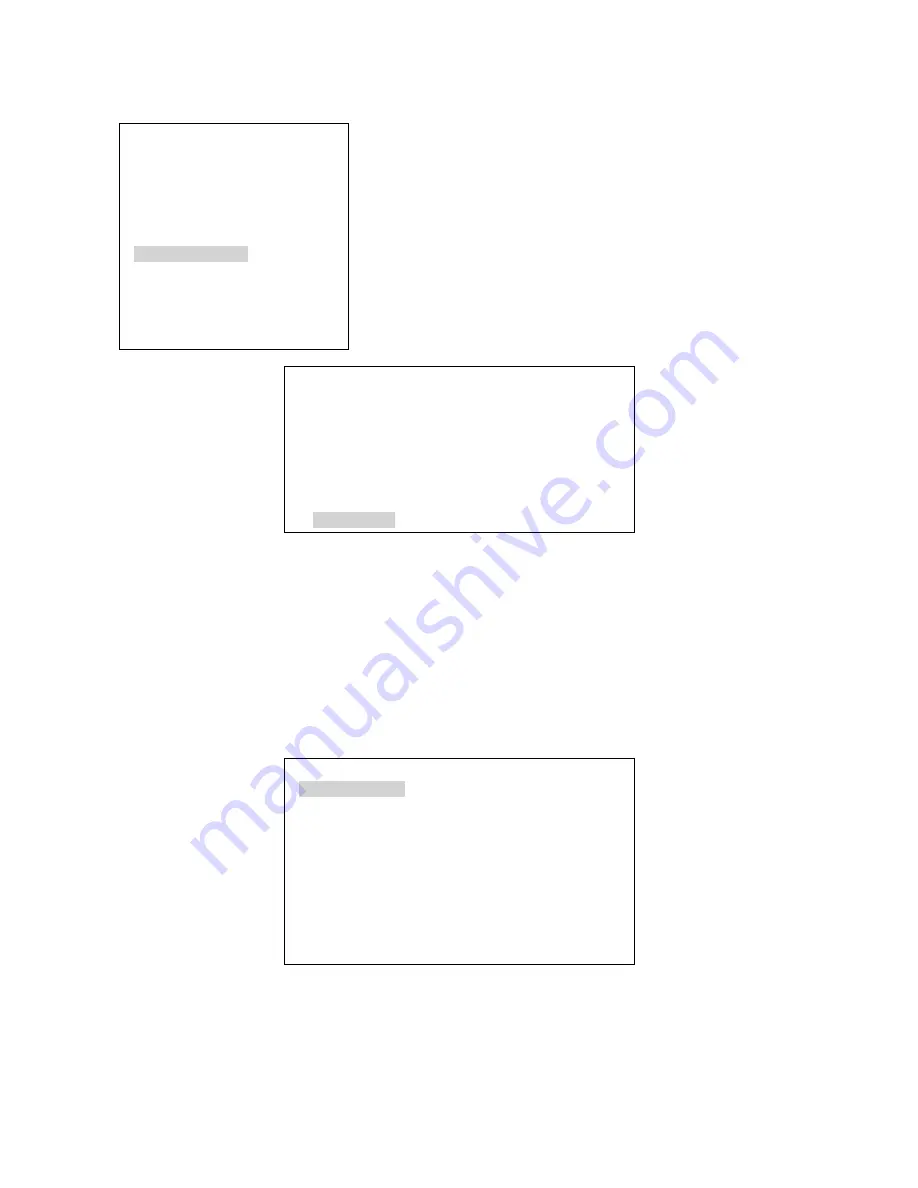
1: COUNT_DOWN_TIME
2: PIP
3: CG (LUMA KEY)
4: LOGO
5: VIDEO IN & OUT
6: AUDIO MIXER
7: MULTI. IMAGE
8: SYSTEM
9: STORE RECALL & UPDATE
10: RESET DVI_IN
ESCAPE
When the
SETTING
button
is pressed in the
EFFECTS
area of the
HS-600 keyboard the Main Menu list, shown left, is displayed between
the PST and PGM images on the Multi-Image Preview output.
Option 7: MULTI. IMAGE allows the user to change settings which
effect the labelling and appearance of this DVI based preview output.
Use the arrow buttons to highlight the
MULTI. IMAGE
item then press
the
ENTER
button to confirm the selection.
The settings for the Multi-Image Preview are covered across two menu
pages. The first page of options is shown below.
[MULTI. IMAGE SETTING-1 ]
1: OUTPUT TYPE = 16 : 9
2: BORDER BRIGHT = 001
3: DVI_TX_EMPHASIS = ON (LONG CABLE)
4: DVI_TX_PRE_DRIVE = ON (LONG CABLE)
5: DVI1_DE_SKEWING = +0
6: DVI2_DE_SKEWING = +0
NEXT PAGE
1: OUTPUT TYPE
– This option allows the user to modify the aspect ratio of all image windows in the Multi-Image
preview. The user can choose between 4:3 and 16:9.
2: BORDER BRIGHT
– This option allows the user to adjust the brightness of the border of all image windows in
the Multi-Image preview. The user can choose a greyscale value between 000 (Black) and 100 (White).
Options 3, 4, 5 and 6
– These options are used to adjust the DVI signalling when using long cables between the
mixer and the monitor being used to display the Multi-Image Preview.
Labels
To display the second page of options use the arrow keys to highlight
NEXT PAGE
then press
ENTER
.
[MULTI. IMAGE SETTING-2 ]
1: CAM1_NAME
=[CAM1 ]
2: CAM2_NAME =[CAM2 ]
3: CAM3_NAME =[CAM3 ]
4: CAM4_NAME =[CAM4 ]
5: CAM5_NAME =[CAM5 ]
6: CAM6_NAME =[CAM6 ]
7: CAM7_NAME =[CAM7 ]
8: CAM8_NAME =[CAM8 ]
ESCAPE
The second page of options allows the user to change each of the labels for each of the input preview windows.
The labels for the AUX, PST and PGM images cannot be changed by the user. To change a label use the arrow
keys to highlight the first character of the selected input. Then use the up or down arrows to change the selected
character. Use the left and right arrows to move to the next character in the label. Once the label is complete press
the ENTER key. Each label has a maximum length of six characters.


