


25
How to set up a Window Matte for Luma Keying
Press the LUMA KEY SETTING Key in the EFFECTS area of the HS-600 keyboard. This is a short cut key that
allows you to get to the Luma Key menu settings quickly. When this key is pressed you will see a LUMA KEY
SETTING Menu appear in the Multi-Image Preview in-between the PST_SUB and PGM_MAIN images.
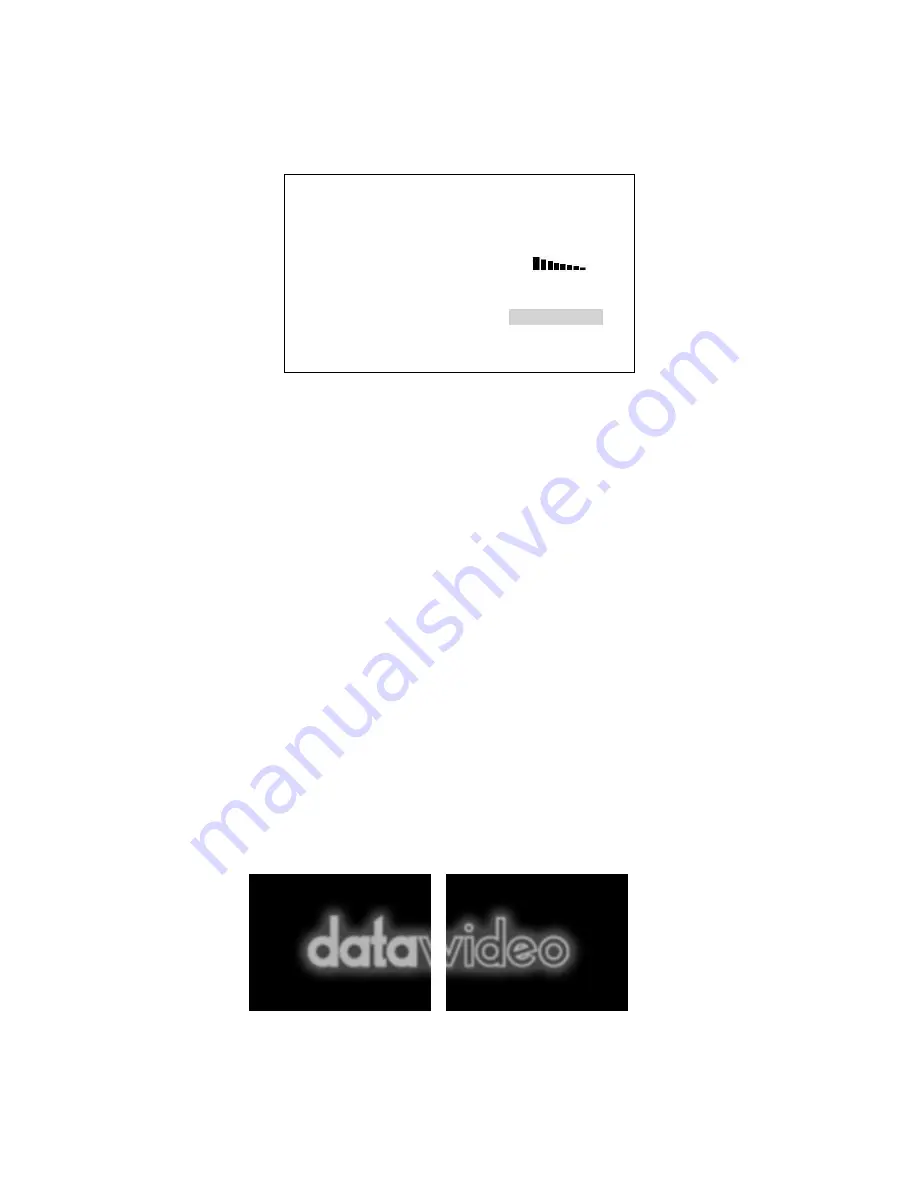
The LUMA KEY options provided here are:
[LUMA KEY SETTING]
1: SOURCE = CH_8
2: KEY LEVEL MAX. = 240 (OFF WHITE )
3: KEY LEVEL MIN. = 20 (OFF BLACK )
4: TRANSPARENT PT. = 20 W
[ ] B
5: TRANSPARENCY = 0
6: WINDOW LEFT_TOP = X=000 , Y=000
7: WINDOW RIGHT_BOTTOM = X=720 , Y=576
ESCAPE
It is possible to define a Window Matte area using X and Y screen co-ordinates. The X and Y values (options 6 and
7 above) define a box area by setting a top left corner position and a bottom right corner position. The part of the
key source image outside this defined matte box area is then keyed out to show the selected video MAIN source
behind it.
LOGO function
Overview
The HS-600 can display one or two logos in any location on the screen. If you want a larger logo it is possible to
create two halves and combine them on the screen. The logos when activated will only show in the PGM_MAIN
window or on Program outputs so you need to plan, prepare and set up the logos well in advance of the start of the
production.
The Logo function can also be used as a second Luma Key overlay, from any one of the eight input channels. For
example you could take an output from a PC or Laptop via DVI, and key out the background to create a text or
graphic overlay as described in the Luma Key section.
The Logos are transferred to the HS-600 on an SD Card, which is inserted into the SD card slot on the left hand
edge of the HS-600 keyboard. See page 9, Keyboard Overview, Item 8.
The logos need to be .bmp format and no larger or smaller than
128 x 96 pixels, RGB, 888
For the HS-600 to recognise the logos they
must
be
called
logo1.bmp
and
logo2.bmp
The logos are positioned on the screen using X axis and Y axis settings. Y axis is the position top to bottom and X
axis left to right.
The two sample logos are:
LOGO 1
LOGO2


