


DSV2+
Turbo
User Manual, Version 1.09
20
Copyright
©
2006 by Datastrip, Inc. All rights reserved.
Reproduction in whole or in part is prohibited.
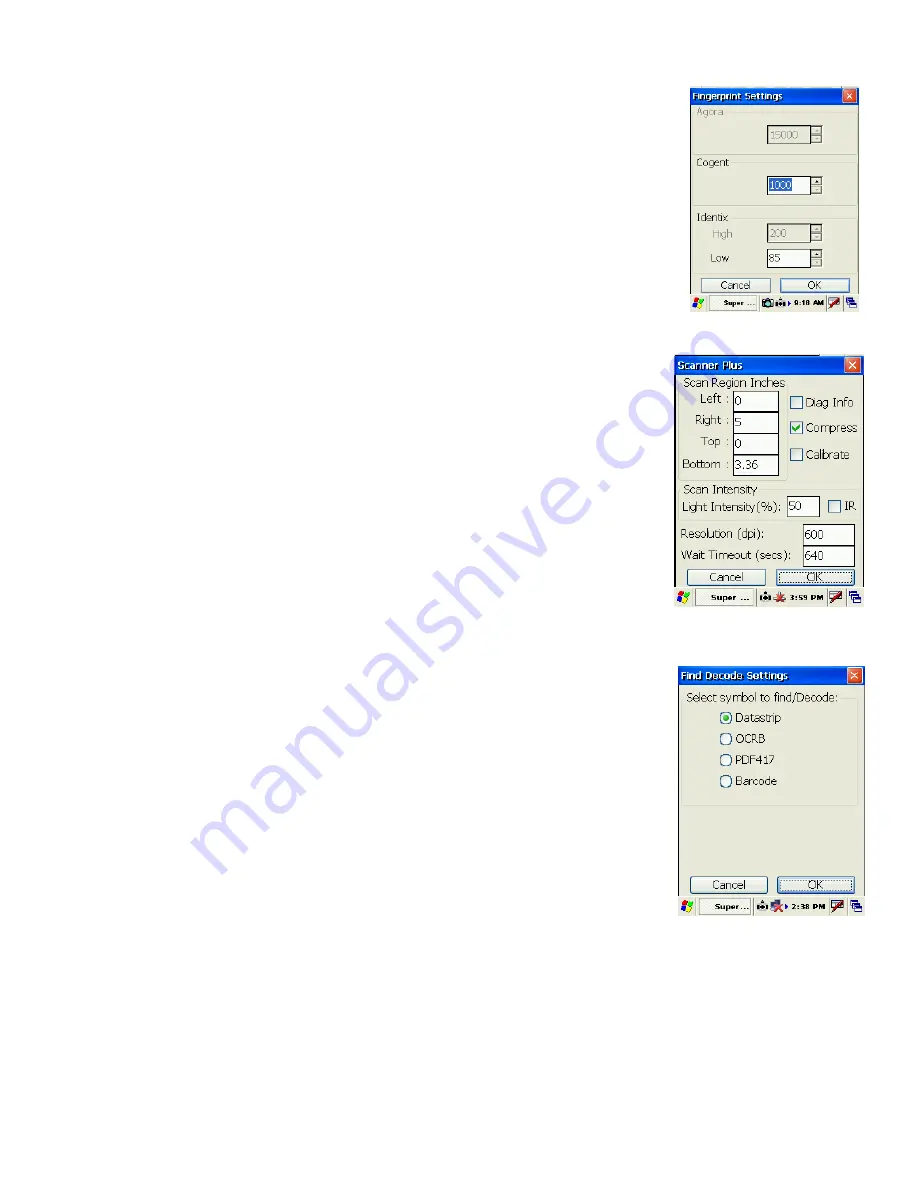
Fingerprint Settings Screen
On the
Fingerprint Settings
screen, a user can configure the thresholds used by
the fingerprint matching algorithms. A higher number tells the system to
require a better match of the fingerprints. Agora, Cogent, and Identix are
different fingerprint algorithms that can be licensed for use on the DSV2+.
•
Clicking on the ‘OK’ will save the settings and return the application
to the Configuration Screen.
•
Clicking on the ‘Cancel’ or the ‘X’ will abort any changes to the
settings and return the application to the Configuration Screen.
Scanner Settings Screen
On the
Scanner Settings
screen, a user can configure the Scan Region
(Window size, Scan Intensity for both IR and RGB, resolution and timeout.
The example shown to the right shows the default settings for a DSV2+-PA.
•
The scanner parameters can be changed from this screen. For details
on the scanner settings please refer to Appendix B – Section 17.1
Scanner Settings.
•
Clicking on the ‘OK’ will save the settings and return the application
to the Configuration Screen.
•
Clicking on the ‘Cancel’ or the ‘X’ will abort any changes to the
settings and return the application to the Configuration Screen.
Find Decode Settings Screen
On the
Find Decode Settings
screen, a user configures the type of optical
symbology the system will look for to decode. Only one symbology at a
time can be selected.
•
Select the type of ‘symbol’ that the DSV2+ will Find and Decode
from this screen. The choices are Datastrip, OCRB, PDF417 or
Barcode.
Datastrip
: Datastrip2D and 2DSuperscript two-dimensional
barcodes
OCRB
: OCRB text
PDF417
: PDF417 two-dimensional barcode
Barcode
: a variety of linear (1 dimensional) barcodes
•
Clicking on ‘OK’ will save the settings and return the application to
the Configuration Screen.
•
Clicking on the ‘Cancel’ or the ‘X’ will abort any changes to the settings and return the
application to the Configuration Screen.


