


V180817w
iBoot-G2+ / iBoot-G2S
Page 28
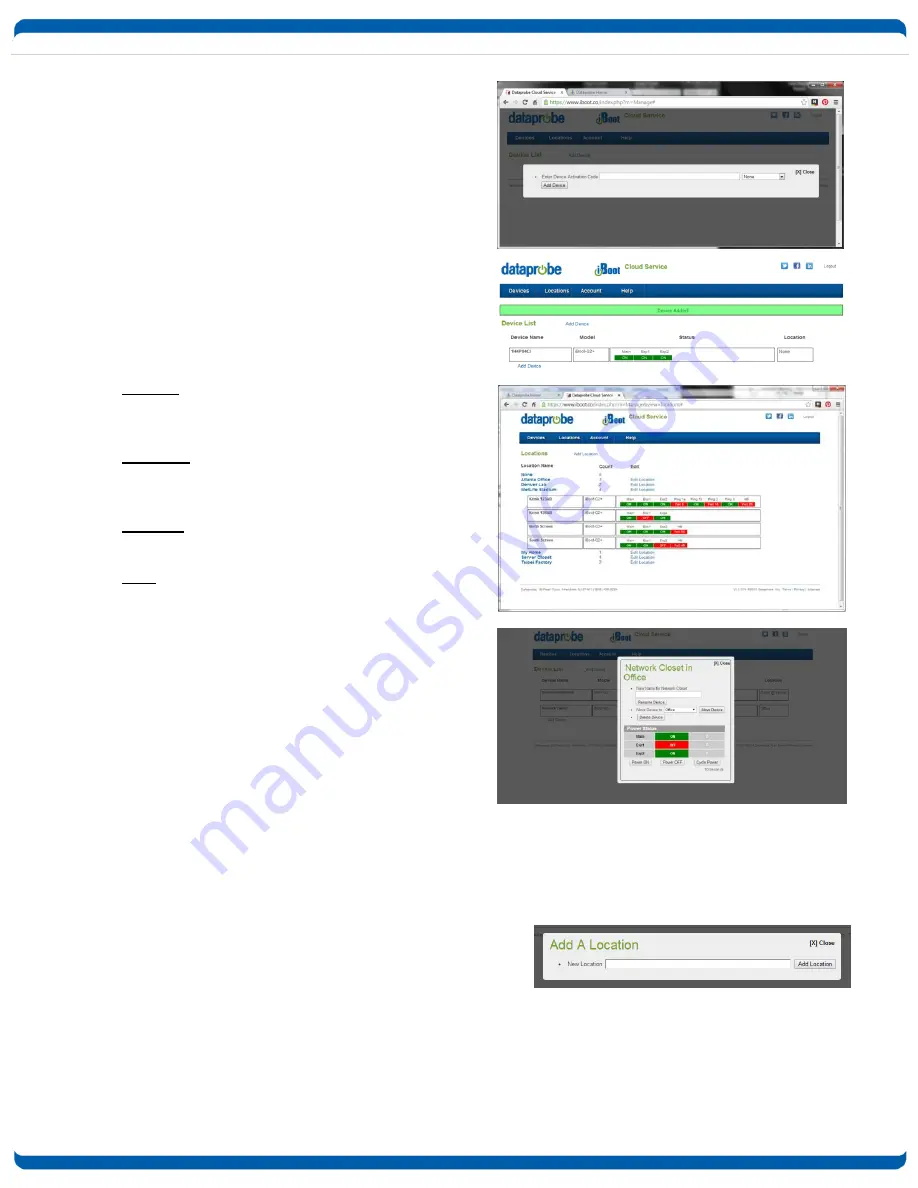
c. Register iBoot with Cloud Account
Click on the Activation code to register the iBoot with
the Service.
You will be re-directed to the Service. Log-in with
your account and the iBoot will be automatically
registered with your account.
Alternatively, you can log in to the Service and click
on Add Device and enter the activation code in the
field provided.
d. iBCS Main Page
The iBCS main web page provides a menu bar with
the following options:
Devices: List all registered iBoot units, ordered by
their Name. Click on any iBoot line to manage that
unit.
Locations: Group all iBoots by location. Click on any
location to display or hide all the iBoots at that
location.
Account: Display and edit account information and
obtain account access history.
Help: Links to the iBoot Cloud Forum and Dataprobe
support pages.
e. Control Power from the Cloud
The status screen will detail all the iBoots registered
with the cloud. You can add locations and group
iBoots by location.
Each iBoot displays the power status and AutoPing if
configured.
Click on the box that holds the Activation Code for
the device you just entered. A modal box will
appear with options to rename the device, move the device to a defined location or delete the device.
Give the device a name, and Click Rename Device.
The remainder of the modal is very similar to the iBoot web page.
Select Power ON, Power OFF or Cycle Power.
f. Assign Names and Locations
You can establish multiple locations and assign each iBoot to a location. You can also rename each iBoot
independently from the default name (local location name) that is transmitted to the cloud when registering. as
displayed on the iBoot-G2+ web page. To add locations, click on the Locations button on the menu bar, and
then click Add Location. Name the location and click the Add Location button.


