10
W-Class
3.0.1 Communications
Using a data detection process, the interface selection occurs automatically in the
printer. At power-up, the printer begins monitoring the interface ports for
activity. When the host transmits data, the printer port detecting this data is set
‘active’ and remains active as long as data flow continues. Once the incoming
(received) data flow stops and the Host Timeout Value (see Section 4.1.6) is
exceeded, the detection process will be repeated. In addition, should the data
flow stop before a complete label format is received, the format will be ignored
and must be sent to the printer again.
ã
Note: To change an active port immediately, cycle the printer power ‘Off’
and ‘On’.
Parallel Port:
The parallel interface has two menu-selectable modes of operation: uni-
directional or bi-directional. Uni-directional mode is forward channel
communication and requires a Centronics
cable with a 36 pin male connector.
Bi-directional mode is IEEE 1284 Compliant, using forward and reverse channel
communications. In this mode, data can be sent to the host provided it is also
IEEE 1284 Compliant and has supporting software. This mode requires an IEEE
1284 cable with a Centronics
36 pin male connector.
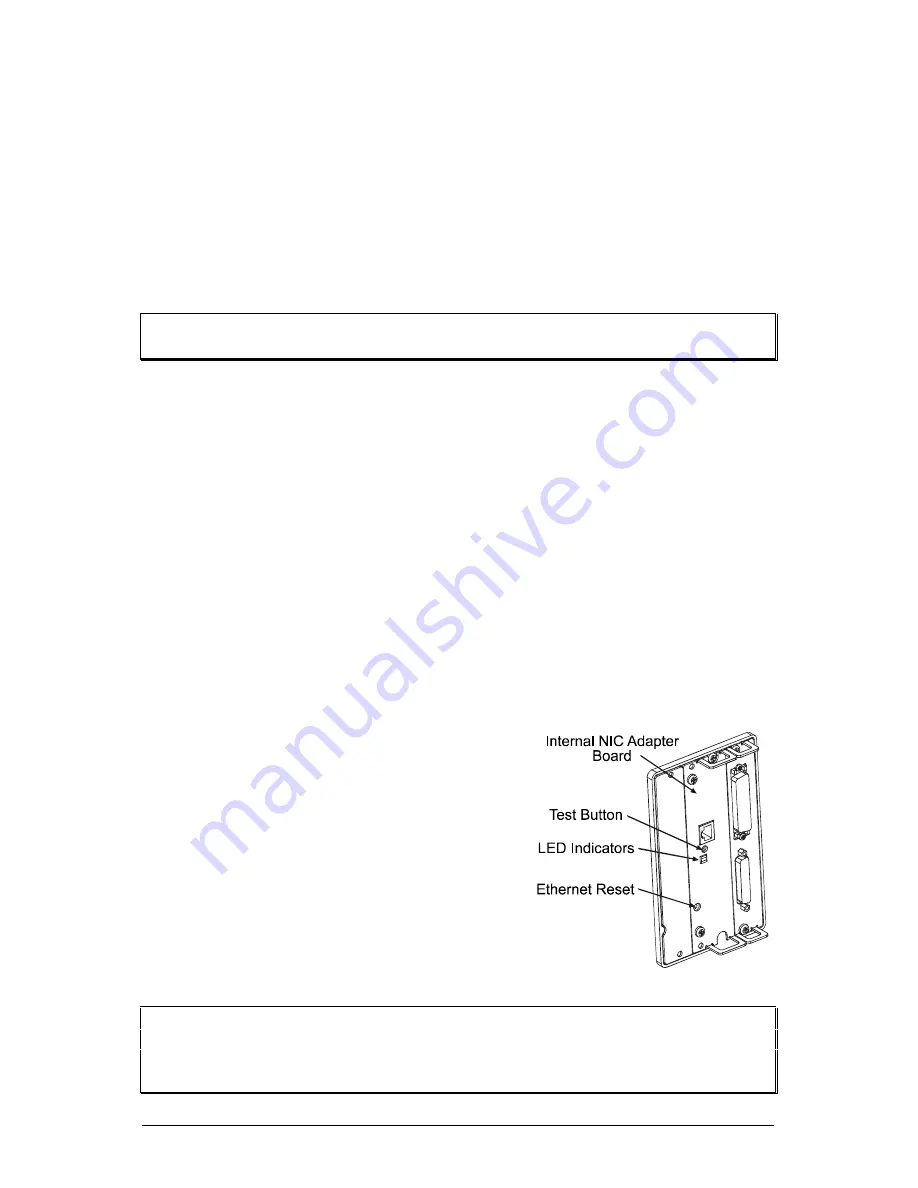
NIC Adapter (optional):
The NIC Adapter has several menu-selectable modes; see Section 4.1.6 for
details. Refer to the information provided with the option for connection
requirements. The following items are accessible from the back of the printer:
•
The LED Indicators provide operational
information: A green LINK LED indicates
a good network connection. A green 100
LED indicates a 100BASE-T network
connection. The ACT LED (activity)
flashes green or red when the server is
ready for use.
•
The Test Button will cause a NIC
Configuration label to print.
•
The Ethernet Reset button will reset the
NIC Adapter.
ã
Note: Following initialization, the printer will indicate ‘Ready’; however, the
NIC Adapter will not be ready to receive data until its ‘boot-up’ process
is completed. Depending upon the NIC Adapter configuration, this
process may take up to two minutes to complete.
Summary of Contents for W-6208
Page 2: ......
Page 4: ......
Page 10: ...iv Warranty Information 113 Glossary 117 Index 121 ...
Page 32: ...22 W Class ...
Page 96: ...86 W Class ...
Page 120: ...110 W Class ...
Page 126: ...116 W Class ...


