background image

________________________________________________________
__
Page - 54

Using the Printer

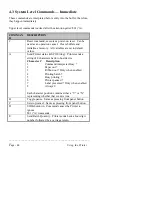
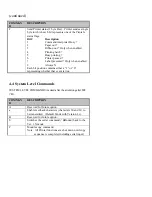
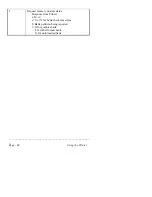
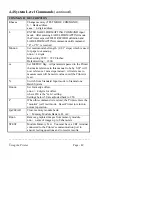
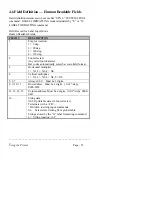
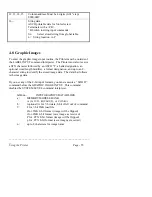
4.7  Field Definition — Bar Code Fields

Field definition statements to be sent after “STX L” SYSTEM LEVEL
command.  LABEL FORMATTING mode terminated by “E” or “X”
LABEL FORMATTING command.

Field Record for Label Input Mode
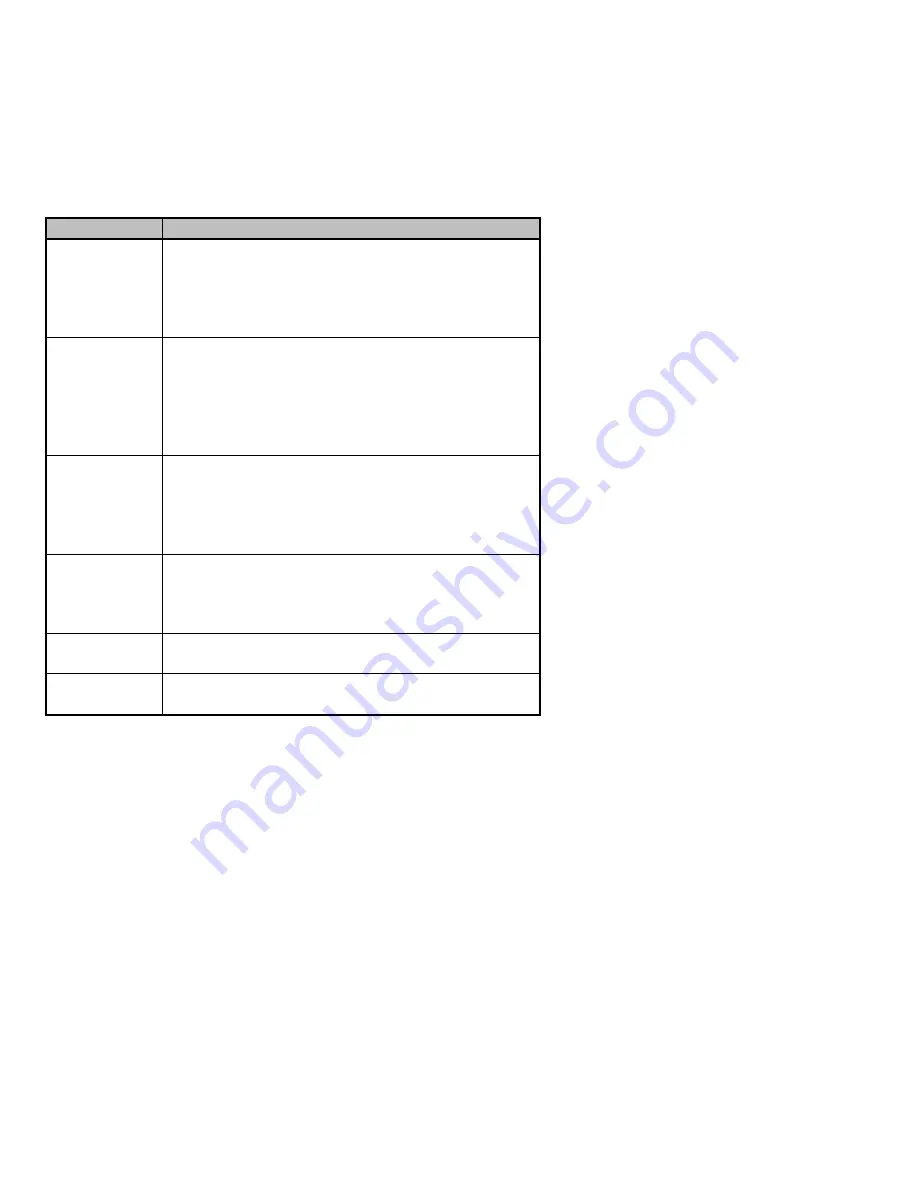
Bar Code Fields:

CHAR #

DESCRIPTION

1

Flag for rotation.
1 = 0 deg.
2 = 90 deg.
3 = 180 deg.
4 = 270 deg.

2

Font selected.
Any valid font character.
Bar codes automatically select bar code field format.
Fonts designated by uppercase ALPHA letters print
with human readable interpretations.  Lowercase
ALPHA bar code fonts print as bars only.

3

Bar code wide bar width.
.005 increments.  Accepts 1-9 and A-K.
For UPC and 128 fonts, only 1,2,3,4,6, & 8 are valid
when interpretation is printed.

4

Bar code narrow bar width.
.005 increments.
Accepts 1-9 and A-K.  For UPC and 128 fonts,
narrow bar should be set equal to wide bar setting.

5, 6, 7

Bar code height.  Must be 3 digits. (0.01" step)
001-999

8, 9, 10, 11

Row address. Must be 4 digits. (0.01" step)
0000-9999

Summary of Contents for Prodigy

Page 1: ...Prodigy Operator s Manual ...

Page 2: ...oduced or transmitted in any form or by any means for any purpose other than the purchaser s personal use without express written permission of DATAMAX Bar Code Products Corporation All rights reserved Printed in the U S A Copyright 1990 1995 by DATAMAX Bar Code Products Corporation 7500 Flying Cloud Drive Suite 655 Eden Prairie MN 55344 612 946 0026 Documentation P N 510366 Revision B1 ...

Page 3: ......

Page 4: ......

Page 5: ...21 3 1 Checking Voltage Selection 21 3 2 Installing Print Media 22 3 3 Power Up Self Test 27 3 4 Explanation of the Self Test Label 28 3 5 Print Test Label 30 3 6 Monitoring Input After Self Test 32 3 7 Printhead Pressure and Support Adjustment 33 3 8 Modes of Operation 35 3 9 Selecting the Mode 36 3 10 Using Standard Input Mode 36 3 11 Setting the Baud Rate and Word Length 37 3 12 Using the Prese...

Page 6: ...ter Loading 62 4 12 Label Formatting Commands 64 4 13 System and Formatting Commands 69 4 14 Controlling Print Quality 72 5 Using the Printer s Internal Labeling Software 75 5 1 Preparing the Printer for Use With a LINK CRT 75 5 1 1 Connect Cables 76 5 1 2 LINK CRT Settings 76 5 1 3 Select Stand Alone Labeling Software Mode 77 5 1 4 Verify Setup Power Up and Load Media 78 5 1 5 Install and Configu...

Page 7: ...rinter 3 PC DB9P to Printer 4 Appendix D Available Fonts and Bar Codes 1 I Standard Human Readable Fonts 1 II BAR CODES With Interpretation Line 2 III Standard Fonts Human Readable Examples 4 IV Bar Code Examples 11 Appendix E Transmitted Error Codes 1 Warranty Information Printer 1 Thermal Printhead 1 Warranty Service Procedures 2 General Warranty Provisions 2 Limitation of Liability 3 ...

Page 8: ......

Page 9: ...popular bar codes are resident in the Printer s memory and can be printed with or without human readable interpretations Nine different character fonts can be printed in any one of four directions Each character font is unique and can be multiplied into 14 different magnifications each with its own set of dot tables This feature allows the Printer to print characters from 035 inch 9 mm to 7 68 inc...

Page 10: ...eters Labels generated in the 5 mil pixel mode can maintain 2 50 8 mm per second For labels in the 10 mil and 15 mil pixel modes print rates of 3 and 4 per second 76 2 mm and 101 6 mm are easily attained The optional 152 dpi printhead places less demand on the CPU allowing longer labels to be printed at faster speeds Software selectable printhead temperature print speed slew rates and form dimensi...

Page 11: ... control labeling Retail merchandise labeling Pharmaceutical labels Deli labeling Retail garment VICS standard labels Price marking HIBC Health Industry Military LOGMARS UPC shipping container labels Work in process Bakery Document tracking Asset management Serial numbering ID plates TALC tickets Time attendance Product labeling Shelf labeling Property identification Cataloging Baggage boarding ta...

Page 12: ...of 4 4 W x 99 99 L 112 mm x 2539 mm optional 152 print area 4 15 W x 99 99 L 105mm x 2539mm User selectable bar code ratios and heights Printing on label ticket and tag stock both die cut and continuous form Self peeling demand mode internal rewind mechanism for rewinding label backing Easy to load label stock and transfer ribbon mechanism Dot addressable graphics function IBM PC compatible driven...

Page 13: ... radio communications Operation of this equipment in a residential area is likely to cause harmful interference in which case the user will be required to correct the interference at his or her own expense UL The Prodigy is listed under UL 1950 INFORMATION TECHNOLOGY EQUIPMENT file number E156091 CSA DATAMAX Corporation has been authorized by Canadian Standards Association to represent the Prodigy...

Page 14: ...6 mm per second Maximum Fields Per Label 100 Minimum Dot Size 0 005 0 127 mm square Optional Dot Sizes 0 010 0 254 mm 0 015 0 381 mm vertical 0 010 0 254 mm horizontal Font Styles Prodigy Nine alphanumeric fonts from 0 035 H 0 9 mm to 7 68 H 195 1 mm including OCR A and OCR B Prodigy 152 has nine alphanumeric fonts from 047 H 1 mm to 10 24 H 260 mm Character Density Prodigy 33 83 cpi FONT 0 at 1X ...

Page 15: ... narrow bar 3 1 ratio 6 34 cpi Code 3 of 9 0 010 narrow bar 3 1 ratio Prodigy 152 9 6 cpi Code 39 0 0066 narrow bar 3 1 ratio 4 81 cpi Code 39 0 013 narrow bar 3 1 ratio Media Width 0 75 19 mm to 4 65 118 mm Length 0 50 13 mm to 99 99 2539 mm Thickness 0 0023 0 06 mm to 010 0 254 mm Type Roll fed die cut labels tags tickets and continuous forms Supply Roll Capacity 8 203 mm maximum outside diamete...

Page 16: ...cators and Switches Indicator Lights POWER RIBBON PAPER OUT PAUSE Switches POWER STOP CANCEL PAUSE FEED TRANSFER ON Rear configuration DIP switch SW1 and Darkness potentiometer Communications Interfacing Communications IEEE RS 232C and RS 422 at 150 300 600 1200 2400 4800 or 9600 baud Character Set ANSI ASCII character set Word Length Selectable 7 or 8 bit data format Handshaking XON XOFF and CTS ...

Page 17: ...receptacle Environmental Temperature 40 F to 100 F 4 C to 38 C Humidity 10 to 95 noncondensing Ventilation Free air movement Dust Nonconducting noncorrosive Electromagnetic Radiation Moderate RF fields can be tolerated Mechanical Size 10 H x 10 W x 18 D 25 4 cm H x 25 4 cm W x 45 72 cm D Weight 35 lb 15 87 kg Options 32K SRAM Memory Module Centronics Parallel Interface Adapter Present Sensor IBM P...

Page 18: ...label creation and label printing can be directly controlled by the Printer Label formats are stored on optional 32K SRAM memory modules Memory Modules Optional 32K SRAM memory modules can be purchased to extend the capabilities of the Printer in its CRT based batch labeling system mode s These memory modules can also be used to store bit mapped graphic images that are created by a host computing ...

Page 19: ... many printing parameters such as the head temperature print speed and slew rates This enables the Printer to be compatible with many direct thermal or thermal transfer media Media sizes can range from 0 75 19 mm wide by 0 50 13 mm long to 4 65 118 mm wide by 99 99 2539 mm long Label edge sensing is carried out by an optical photo sensor located 1 4 from the left edge of the media as it is fed out...

Page 20: ... is burned 3 The amount of heat required to image the paper If the coating layer is too abrasive the printhead will be sanded off at a faster rate than would normally occur If the layer cannot contain the reaction the printhead will become pitted and the dots across the web of the printhead will fail The reaction temperature or the temperature at which the chemical process causes an image to print...

Page 21: ...scratch and smudge resistant 1182 feet long 360 meters 4 6 microns thick 1 inch core no notch required Ink side in 1 foot opaque leader for opaque ribbons clear leader for transparent ribbons 1 foot clear trailer for opaque ribbons opaque trailer for transparent ribbons Backcoating required One ribbon has the capacity to image two full 8 diameter rolls wound on 3 ID cores A wide variety of ribbon ...

Page 22: ...9 0 100 D Label length 99 99 0 500 E Backing thickness 0 010 0 0023 F Label thickness 0 010 0 0023 G Width of sensor opening 0 500 0 200 H Distance from edge of media to edge of sensor opening 2 250 0 200 Lists of Approved Media For a current list of approved standard media for use in this Printer please contact your Value Added Reseller or call the manufacture at the telephone or fax number indic...

Page 23: ... to reduce the chance of moisture damage during shipping After removing the Printer from this plastic bag remove any additional packing material from the Printer mechanism This material is placed in the Printer mechanism to prevent vibration during shipping The front door panel of the Printer is shipped in a separate bag and needs to be installed on the front of the Printer To install the front pa...

Page 24: ...following standard items Printer s Operators Manual Front door panel packaged separately 20 fan folded labels Thermal transfer ribbon rewind clamp Back rewind label rewind clamp Power cord Additionally items purchased separately may be included These items might include Additional labels Additional ribbons Interface cables CRT terminal Memory module cartridges PC Batch software ...

Page 25: ...3 function buttons 3 indicator lights 3 switches including a 8 position DIP switch on the back of the Printer and a Darkness potentiometer for print quality control These buttons switches and indicators are shown in figures 2 1 and 2 2 with descriptions for each in the section that follows Figure 2 1 Front Panel Front Cover Open ...

Page 26: ...when pressed causes the Printer to temporarily stop the printing of labels after the current label is printed All data is still held in memory The Printer can resume printing by pressing the PAUSE Button a second time FEED Button The FEED Button when pressed automatically advances the media to the first print position on the next label ...

Page 27: ...on or both or if the Printer fails to sense T O F Top of Form POWER Indicator The POWER indicator should be ON whenever the Printer s power switch on the rear of the unit is turned ON DARKNESS Control A Darkness adjustment potentiometer is located Potentiometer on the front panel Turning the potentiometer clockwise increases the burn time of the printhead thus producing a darker image on the label...

Page 28: ...inting the individual dot Switch elements of the printhead apply heat to a ribbon The ink on the ribbon is a specially formulated material that is literally melted into the print media bonding with the media to produce an image The Transfer On Switch Figure 2 1 must be set to ON to the right to use this printing method ...

Page 29: ...lew rate In the SETUP AND SELF TEST procedure the Printer will be loaded and tested with both types of media and ran in both print modes Direct Thermal Transfer 3 1 Checking Voltage Selection The standard Printer is shipped in a configuration that allows it to be connected to a properly grounded 115 VAC single phase 50 60 Hz outlet The maximum current draw will not exceed 2 amps The line voltage s...

Page 30: ...t Media The Printer is designed for easy label stock and ribbon installation A diagram located under the cover of the Printer shows the feed path for print media s Simply lift the cover of the printer from the right hand side and open the front cover for installation instructions Media Loading Instructions 1 Slide the Media Retainer to the outer end of the Supply Hanger and fold the Media Retainer...

Page 31: ...4 Loosen the Label Adjust Guide and slide it outward 5 Insert the label media as shown Figure 3 2 Media Routing 6 Slide the Label Adjust Guide inward until it just touches the media tighten the guide in place 7 Engage the printhead by rotating the Head Lift Lever counterclockwise to the DOWN position 8 Press the FEED button a few times to insure proper alignment of the media ...

Page 32: ...e OFF position if a thermal transfer ribbon is not installed If this is not done the Printer will only feed about 25 of media each time the FEED button is pushed Media Rewind Instructions 1 Remove the front door Window Cover 2 Fasten the Rewind Adapter to the front of the Printer as shown Figure 3 3 Attaching the Rewind Adapter ...

Page 33: ...____ __ Setup and Self Test Page 25 3 Route the media so that it passes over the Rewind Adapter as shown in Figure 3 4 4 Route the end of the media around the Media Rewinder and replace the Clasp to hold it in place Figure 3 4 Routing Media for Rewinding ...

Page 34: ...ift Lever clockwise to the UP position 2 Slide the ribbon spool onto the Ribbon Supply Hub 3 Route the ribbon and replace the clasp over the ribbon as shown in Figure 3 5 4 Engage the printhead by rotating the Head Lift Lever counterclockwise to the DOWN position Figure 3 5 Ribbon Loading 5 Press the FEED button a few times to insure proper alignment of the ribbon ...

Page 35: ...Printer When the ribbon has been consumed the ribbon can easily be removed from the spindle 3 3 Power Up Self Test Once labels are installed in the Printer a self test should be performed The Printer will power up in the SELF TEST mode when the FEED button is depressed as the Printer is being turned on The Printer should be loaded with 4 5 wide stock whenever this test is conducted The self test p...

Page 36: ... SYSTEM ROM CHECKSUM 9D IS GOOD FONT ROM CHECKSUM A8 IS GOOD TOTAL ROM SUM 45 IS GOOD SYSTEM RAM U15 CHECKS GOOD SYSTEM RAM U16 CHECKS GOOD SYSTEM RAM U17 CHECKS GOOD SERIAL PORT BAUD RATE IS 9600 TRANSFER SWITCH IS ON SETUP SWITCH 1 2 3 4 5 6 7 8 OFF OFF OFF OFF OFF OFF OFF OFF ANALOG INPUT VALUES PAPER 236 EDGE 184 TEMP 064 VOLT 228 Figure 3 6 Configuration Label The following is an explanation ...

Page 37: ...s and values of all RAM and ROM Checksums SERIAL PORT BAUD RATE IS 9600 SERIAL PORT BAUD RATE IS 9600 This line contains the Printer s Serial Port baud rate setting TRANSFER SWITCH IS ON TRANSFER SWITCH IS ON This line states whether the Transfer Switch on the front of the Printer is ON or OFF SETUP SWITCH 1 2 3 4 5 6 7 8 SETUP SWITCH 1 2 3 4 5 6 7 8 OFF OFF OFF OFF OFF OFF OFF OFF OFF OFF OFF OFF...

Page 38: ..._____ __ Page 30 Setup and Self Test 3 5 Print Test Label The Print Test Label consists of a test pattern of printed bars this label can be used to isolate problems in print quality and to determine bad printheads or rollers Figure 3 7 Print Test Label ...

Page 39: ...plug as illustrated below in Figure 3 8 Connect the plug to the RS 232 connector on the back of the Printer and run the self test again Figure 3 8 Test Plugs If the Printer passes the loop back checks the following two line will print on the Self Test label SERIAL LOOP BACK CHECK IS GOOD SERIAL LOOP BACK CHECK IS GOOD CTS DTR LOOP BACK CHECK IS GOOD CTS DTR LOOP BACK CHECK IS GOOD ...

Page 40: ...eived or after a pause of 1 4 of a second in received data is registered The complete set of ASCII characters can be printed by the Printer including the characters that have values ranging from 0 to 31 These characters will be represented by their control codes An ASCII NUL DEC 00 HEX 00 character has a value of 0 and is represented by a control or The ASCII SOH character DEC 01 HEX 01 has a valu...

Page 41: ...used Without this support the printhead would bear down on the drive roller causing diminished print quality and premature wear The head support plate needs to be engaged only when the media width is less than 4 inches To make the adjustment loosen the two mount screws that fasten the head support plate leaving the screw on the left snug see Figure 3 9 Using the media to be printed on cut a strip ...

Page 42: ... For narrow stock the head support plate should be adjusted so that the print image on the outside edge of the label begins to lighten Then gradually lower the head support plate until the print quality becomes acceptable This should keep the printhead off of the roller It would be advisable for the print quality on the outer edge to be lighter if possible This will ensure that the printhead does ...

Page 43: ...the most widely used mode Any Printer that is controlled by an intelligent host device performing the label formatting will use this mode of the printer For example PC Batch software compatible with IBM PCs uses this operating mode Stand Alone Batch Labeling System In this mode a CRT terminal is connected to the Printer s serial data input output port Software that resides in the Printer is select...

Page 44: ...able This cable connects the DB 25 connector labeled J2 on the back of the Printer to the serial data connector on the host device Several cables for typical interfaces are listed in Appendix C The pin configuration of the Printer for most descriptions of the RS 232 interface on a DB 25 connector is DTE Data Terminal Equipment that is pin 2 is transmit 3 is receive and 7 is ground The Printer supp...

Page 45: ...S1 1 S1 2 S1 3 9600 OFF OFF OFF 4800 OFF OFF ON 2400 OFF ON OFF 1200 OFF ON ON 600 ON OFF OFF 300 ON OFF ON 19200 ON ON OFF TEST 9600 ON ON ON The Printer can accept 7 or 8 bit data while ignoring parity It also requires at least 1 stop bit This configuration assures the greatest compatibility with most serial devices even if the data format arrangement of the host cannot be modified Switch S1 4 l...

Page 46: ...mode With the sensor installed and enabled the Printer will not print the next label in its internal buffer s until the last label printed has been removed from the Printer Quantities of labels printed one at a time can still be requested by remote computing devices S1 6 on the back of the Printer enables the sensor The Printer must be reset in order to read in the switch setting S1 6 ENABLE SENSO...

Page 47: ... interest include 3 13 1 Printhead WARNING Turn OFF the Printer and unplug the unit from the outlet before cleaning the printhead The Printhead can become dirty from operation Regular cleaning approx every 2000 inches dependent on media material of the printhead should be done to insure print quality This printhead is easily cleaned by using a cotton swab and Isopropyl Alcohol see Figure 3 10 Figu...

Page 48: ...part on the Printer A periodical cleaning should be done on all rollers guides and assemblies Isopropyl Alcohol can be used to clean these areas This will insure all items are free from residue and will not contribute to any Printer malfunctions The outside of the Printer can be kept clean by using a soft damp not wet cloth A mild detergent may be used to remove heavier stains Do not use abrasive ...

Page 49: ...ttle if any formatting of data to trigger printing Nearly any string of characters sent to a line printer terminated with an ASCII CR DEC 13 HEX 0D will work Many line printers include special features to increase or decrease the standard width of print line spacing page length and so on The ability to print graphics lines pie charts large characters and possibly bar codes is generated by a host c...

Page 50: ...data received on the next line or to a line further down in a document the Printer allows the host device to select where and how data is to appear on a label The rotation of the data the selection and magnification of the font style and the data for each field can be controlled by the host through simple graphic request statements The Printer has a 3000 character area that is able to store data t...

Page 51: ... The tables on the following pages list the SYSTEM and LABEL FORMATTING commands that the Printer recognizes All commands at the SYSTEM level that are proceeded by an ASCII SOH DEC 01 HEX 01 character are executed immediately as they are received All commands at the SYSTEM level proceeded by the ASCII STX DEC 02 HEX 02 character are placed in the input buffer and are executed in the order received...

Page 52: ...lt values A Send Printer status ASCII String Printer sends a string of 8 characters back to host device Character Description 1 Command interpreter Busy 2 Paper out 3 Ribbon out Only when enabled 4 Printing batch 5 Busy printing 6 Printer paused 7 Label presented Only when enabled 8 Always 0 Each character position contains either a Y or N representing whether that event is true B Toggle pause Sam...

Page 53: ...d 7 Label presented Only when enabled 8 Always N Each bit position contains either a 1 or 0 representing whether that event is true 4 4 System Level Commands SYSTEM LEVEL COMMANDS invoked after the attention getter 02 B COMMAN D DESCRIPTION A Reserved for future option a Enable feedback characters characters 30 and 31 to be transmitted Default Mode with Version 1 x B Reserved for future option b S...

Page 54: ...________________________________________________________ __ Page 46 Using the Printer ...

Page 55: ...tity of labels F Form feed G Prints previously stored or printed label commands May also be used to restart a canceled batch if it was the last processed label Hnnnn Sets the delay after the 5 msec cut signal pulse nnnn of 24 usec delays System default 3125 75 msec Iabfnnn INPUT GRAPHICS DATA BLOCK a MEMORY MODULE BANK A 1st 1 2 B 2nd 1 2 or C 16K b optional A for 7 bit data 8 bit if left out of c...

Page 56: ...________________ __ Page 48 Using the Printer J Request memory module status Response from Printer x bt cr x Y or N for bank checksum status b Bank partition being reported t G for graphics bank L for label format bank X for unformatted bank ...

Page 57: ...d to the Printer that make reference in this manual to be by 0 01 will now reference 1 mm steps instead All reference to measurement will be metric values until the Printer is reset N Switch from Standard Input mode to Stand alone Batch System Onnnn Set form edge offset nnnn 4 digits for offset where 250 is the zero setting Settings below 50 are adjusted back to 250 P When this command is received...

Page 58: ...cs images L for directory of label format files Xatnnn FORMAT memory module partition a Memory module bank A B or C t Type G for Graphics L for label format nnn Up to 8 character name of module bank Y Display analog inputs TEST MODE FUNCTION Z Print human readable test data 4 5 Label Formatting Commands COMMANDS TO BE SENT AFTER STX L SYSTEM LEVEL COMMANDS AND BEFORE FIELD DESCRIPTIONS COMMAND DES...

Page 59: ...me function as Bm system level command The Printer must be reset in order to return to standard measure Pa Enter maximum speed for print cycle 1 digit a Speed A 1 per second B 1 5 per second C 2 per second D 2 5 per second E 3 per second Default F 3 5 per second G 4 per second Qnnnn Quantity of labels to print nnnn 4 digits of quantity Rnnnn Set row offset amount 0 01 steps nnnn 4 digits of row of...

Page 60: ... This command is used when the BE BG and BU commands will be used to modify a fixed format pii Make last entered field incrementing p Zero fill character ii Data added to field pii Make last entered field decrementing p Zero fill character ii Data subtracted from field pii Make last entered field incrementing 0 Z p Zero fill character ii Data added to field pii Make last entered field decrementing...

Page 61: ...eg 3 180 deg 4 270 deg 2 Font selected Any valid font character Bar codes automatically select bar code field format 3 Horizontal multiplier 1 X1 2 X2 4 X4 4 Vertical multiplier 1 X1 2 X2 4 X4 8 X8 5 6 7 Always 0 0 0 Must be 3 digits 8 9 10 11 Row address Must be 4 digits 0 01 step 0000 9999 12 13 14 15 Column address Must be 4 digits 0 01 step 0000 0447 16 String data ASCII printable data for fon...

Page 62: ...ny valid font character Bar codes automatically select bar code field format Fonts designated by uppercase ALPHA letters print with human readable interpretations Lowercase ALPHA bar code fonts print as bars only 3 Bar code wide bar width 005 increments Accepts 1 9 and A K For UPC and 128 fonts only 1 2 3 4 6 8 are valid when interpretation is printed 4 Bar code narrow bar width 005 increments Acc...

Page 63: ...k designation an optional word length modifier a format designation and up to an 8 character string to identify the stored image data The data that follows is the image data If you use any of the 8 bit input formats you must execute a SOH D command before the GRAPHIC IMAGE INPUT This command disables the SYSTEM LEVEL command interpreter Iabfnnn INPUT GRAPHICS DATA BLOCK a MEMORY MODULE BANK A 1st ...

Page 64: ...o generate FFFF FFFF Terminate input of graphics To print an image specify font Y The horizontal and vertical magnifications will work as if it were a human readable font The data sent into the field is used as the name of the defined graphics image Once images are in memory they can be removed with the R SYSTEM COMMAND The image is named after the STX and the R command will be cleared Images are ...

Page 65: ...0007C000007E0003F0000000001FFF80000007FFFFFF0000 CR 8030FFFE0000FFE0001F0001FFC001FFE0000FFF8001FFC001FC0007C000003E0003F8000FFE001FFFC0000007FFFFFF0000 CR 8030FFFE0000FFE0000F8001FFC001FFF0000FFF8000FFC001FC0007C000003E0003F8000FFE001FFFE000000FFFFFFF0000 CR 8030FFFF0000FFE0000F8000FFC001FFF0000FFF8000FFC001FC0007C000003E0003F8000FFE001FFFE000000FFFFFFF0000 CR 8030FFFF0000FFE0000F8000FFC001FFF000...

Page 66: ... box vvv vertical height of box bbb thickness of bottom and top box edges sss thickness of sides of box 4 10 Defining and Printing a Label The following is the procedure for formatting labels 1 The ASCII STX DEC 02 HEX 02 followed by an ASCII L DEC 76 HEX 4C must be sent to the Printer This sets the Printer up to accept LABEL FORMATTING COMMANDS At the entrance into the LABEL FORMATTING mode the P...

Page 67: ... received control the rotation font magnification bar height and print location of the data to be printed The remaining characters in the string are the actual data 3 The first character of a field that is received is shown in the table to be an ASCII character that selects the rotation The possible choices for rotation are 1 2 3 and 4 If the Printer receives any other character as the first chara...

Page 68: ...a bar code font Uppercase bar code fonts will print with human readable interpretation lowercase bar code fonts do not include the interpretation The selection of the font is made from the samples available in APPENDIX D 5 The following digit character number 3 is the horizontal multiplier for human readable fonts The magnification factor represents the number of times the dot tables for the font ...

Page 69: ...on are 1 2 4 and 8 times the normal dot pattern If the font selected is a bar code this character specifies the narrow bar width The range of allowable values for bar code fonts is 1 to 9 and A through L This range will give a narrow bar width of 0 005 to 0 300 when added to the Printer s ability to vary the dot size For UPC and 128 fonts this number should be the same as the horizontal multiplier...

Page 70: ... the CR or LF is the data to be printed This data can be from 1 to 255 characters Characters that are placed in this field may or may not actually be able to print on the label The Printer will print all of the characters that fall within the possible range of the printhead For example you direct the Printer to print HELLO WORLD in rotation 1 font 6 and to magnify 2X in the horizontal and the vert...

Page 71: ... the field registers created and return to the SYSTEM command processor The following is an example of the process explained in Section 4 10 Power up the Printer press FORM FEED and then the host device sends out the following ASCII characters STX L CR 1 3 2 1 000 0100 0050 TEST123 CR 1 a 3 1 090 0000 0110 123456 CR E Spaces in example are shown only for clarity A label will print that looks like ...

Page 72: ...row bar ratio of 3 1 The bar code is positioned to print on the label 0 from the bottom and over from the edge 1 10 The data in the bar code was 123456 The last character sent is the ASCII E character It requests the Printer to begin plotting the characters and bar codes as specified in the memory stored registers 4 11 Register Loading The Printer prints labels in one of two modes The standard mod...

Page 73: ...tring into an existing field STX U 02 112233 CR The Printer recognizes STX U as the FILL REGISTER COMMAND The 02 instructs the Printer to fill register 02 with the following data 112233 The CR terminates the fill register command Then the host can send a STX G command The Printer begins printing a label from this stored data in the registers of graphics memory This process can be repeated as many ...

Page 74: ...need to print a single format on several different types of preprinted labels If the preprinted data does not appear in the same place every time the data you image onto the label may overlap the preprinted data The R command instructs the Printer to print the following label formats further up on the label than the format actually specifies The numbers in the command are digits 0 to 9 which can s...

Page 75: ...ost device may send a command before or after the format to correct for the media 3 C COMMAND SETTING THE COLUMN OFFSET VALUE The Printer has a FORMATTING command function that is used to adjust the printing of data on a label horizontally This feature is useful when you need to print a single format on several different types of labels that have preprinted information If the preprinted data does ...

Page 76: ... per second 5 Sa COMMAND SETTING THE SLEW RATE The slew rate which is the rate at which the label is advanced when no printing is taking place can be set by the Sa command where the a is replaced by an alpha character A through G to get slew rates of A 1 0 per second B 1 5 per second C 2 0 per second D 2 5 per second E 3 0 per second F 3 5 per second G 4 0 per second 6 W COMMAND SETTING THE FORMAT...

Page 77: ... each time a label is printed The character may be replaced by a character to make the field increment alphanumerically instead of just numerically To generate a single field label format that prints the first label with a value of 10000 and increments by 1 for three labels refer to the commands below STX L CR 1 3 2 2 000 0000 0000 10000 CR 01CR Q0003 CR E CR 8 pii_ COMMAND THE DECREMENT FUNCTION ...

Page 78: ...CREMENT ON COUNT An application that requires incrementing or decrementing fields will occasionally require that a duplicate label be printed with the same values before the update of field data occurs The Printer handles this feature with the command The after the is a two digit value It specifies how many labels are to be generated before the modification of the incrementing or decrementing fiel...

Page 79: ...er fields Simply send STX S where is the register A to P in the command string as data The Printer will place the data from the global register into the field A set of commands to use this feature would be STX L CR 1 2 1 1 000 0000 0000 PRINTER CR G CR 1 A 6 2 100 0100 0000 STX SA CR E CR The G CR command after the first field will place the string PRINTER into the next available global register w...

Page 80: ...tring will be of the following format 1 Command interpreter busy 2 Paper out 3 Ribbon out only when enabled 4 Printing batch 5 Busy printing 6 Printer paused 7 Label presented only when enabled 8 Always N 2 SOH COMMAND SERIAL PRINTER RESET The host device may cause the Printer to reset itself In effect the Printer powers down and back up again This command is the SOH command When the Printer recei...

Page 81: ...XIMUM LABEL SIZE The Printer was designed to accept labels with a maximum length of 99 99 The maximum label size can be reduced by sending the Printer a M command where the numbers 0 to 9 represent the maximum length of the label is expressed to the nearest 1 100th of an inch decimal place removed This command is a nice feature while designing labels It prevents the Printer from feeding out tremen...

Page 82: ...ng a direct thermal and thermal transfer print capability To provide this diverse printing option the Printer has a flexible set of printing controls The amount of heat applied per dot row and the rate at which the paper moves under the head have the most effect on the images that are printed The Printer allows you to control these factors but also limits them so you cannot ask the Printer to prin...

Page 83: ...setting the image will fade and at the next higher heat setting the image can bleed This is because the reaction temperature of the media is so high that at higher rates of speed it cannot react quick enough To print fine images at higher speed media with lower reaction or release temperatures are required On the slower end of the print rate settings crisper images are possible because the media i...

Page 84: ...________________________________________________________ __ Page 76 Using the Printer ...

Page 85: ...ng test labels copying and formatting memory modules and several other functions 32K RAM memory modules store up to 50 label formats each Modules can be divided in a 16K 16K split between label formats and graphic images pictures As many memory modules as are necessary can be purchased which effectively allows unlimited memory capacity 5 1 P reparing the Printer for Use With a LINK CRT Several ste...

Page 86: ...K CRT terminal NOTE The Printer does not connect to the Link Parallel Port 5 1 2 LINK CRT Settings The LINK CRT is shipped ready for use with the Printer NOTE The settings should be changed only when necessary If the terminal s settings have been changed since shipment from the factory follow the terminal s set up procedure to re establish all default values For reference the following values are ...

Page 87: ...ware Mode The Printer is typically shipped in the RS 232 mode for use with PCs To use the CRT instead a DIP switch setting needs to be changed Before changing any switch settings turn the Printer s main power switch to the OFF position DIP switch changes are read only upon power up To enable the internal stand alone labeling software set DIP switch SW1 5 located on the back panel of the Printer to...

Page 88: ...nstall and Configure a Memory Module Memory modules are used to store label formats graphics or a combination of both At least one memory module is required to operate the internal labeling software program Properly configured up to 50 typical label formats can be stored in each module To install a module and configure it for use follow these steps 1 Use a small screwdriver or a similar tool to tu...

Page 89: ...d press the S key at the same time This screen will appear SYSTEM MAINTENANCE 1 FORMAT MODULE 2 COPY MODULE 3 METRIC NO 4 PRINT TEST LABEL 5 SYSTEM TEST LABEL 6 TEST MODULE 7 RESET PRINTER 8 EXIT TO RS232 SYSTEM ENTER NUMBER 5 Press the 1 key to select FORMAT MODULE This screen will appear FORMAT MODULE USAGE TYPE G L DIRECTORY A B C MODULE NAME ...

Page 90: ...ormatted for bank C graphics with the internal batch program In this example we will format the module for storing label formats Enter L for label formats at the USAGE TYPE prompt and press the RETURN key The cursor moves to the DIRECTORY position Enter A to select bank A to be formatted as type L label formats The cursor moves to the MODULE NAME position Enter up to a 16 character name for this m...

Page 91: ...label name then press the F3 key The message COPY FROM will appear Enter the name of an existing label already in memory then press the ENTER key A new label is then created with the same data as the source label which allows immediate editing of the new label format The F3 COPY feature will also copy the current field to the next field when the cursor is at the farthest left position of the CREAT...

Page 92: ...position of the PRINT LABEL screen press ALT P to bring up the PRINT PARAMETERS window It looks like this PRINTER ADJUSTMENTS HEAT FACTOR 10 PRINT SPEED E SLEW SPEED G DOT PATTERN 5 mil 2x2 FORMAT W Z Z ROW OFFSET 00 00 COLUMN OFFSET 00 00 COUNT BY 01 MAX LABEL WIDTH 04 47 MAX LABEL LENGTH 12 00 CONTINUOUS FORMS NO Print parameters include row and column offsets label edge offset pixel dot size pr...

Page 93: ...2 or 3 high Default is 2 10 mil dot FORMAT W Z W WAIT format first in bit map memory Z ZIP format while printing FORM EDGE OFFSET 0 00 to 9 99 Default is 2 50 ROW OFFSET 0 00 to 99 99 Default is 0 00 Moves entire format up or down COLUMN OFFSET 0 00 to 4 50 Default is 0 00 Moves entire format side to side UPDATE COUNT ON 0 to 99 Default is 1 Number of labels printed before updating consecutive num...

Page 94: ...ar format ALT S Calls up the SYSTEM MAINTENANCE screen ALT I This function is used in the CREATE MODIFY LABEL screen to insert a new field description line between existing field description lines on the screen It is especially useful when the REPEAT function is used and other lines on the screen are already below the field to be repeated ALT F Feeds one label at a time It operates the same as the...

Page 95: ...el returns the cursor to the top of the screen and allows the F1 key to be used to switch screens The ESC key is also used to exit ALT S and ALT P screens DEL or DELETE Erases one character HOME Deletes the current field and moves the cursor to the beginning of that field 5 4 Create Modify Label Screen This section describes how to create a new label Before starting a good tool to have on hand is ...

Page 96: ...uct name an address a bar code a consecutive number and so on that is specified on individual lines on the CRT screen Because fields are independent of each other it is possible and sometimes quite desirable to place two or more fields on the same horizontal or vertical measurement Be careful however to not print one field over another You will notice in the upper left hand corner of the screen th...

Page 97: ...ition enter the type of font you want to print This can be an alphanumeric font or a bar code Enter one of the following a An alphanumeric font type followed by the RETURN key Choices are 0 through 8 See APPENDIX D for examples of each available font type and for the actual printed size of the various fonts using different multiplications b A bar code followed by the RETURN key Choices are upperca...

Page 98: ... a very high or wide solid line Any text placed at the same coordinates inside the line is reversed with white letters on a black background BOXES Bhhhvvvbbbsss Where B B specifies box drawing hhh horizontal width of box vvv vertical height of box bbb thickness of bottom and top box edges sss thickness of sides of box If any letter or number is entered in the FNT position other than those specifie...

Page 99: ... position 7 Enter the desired XH dimension The default for fonts is 1 The default for element bar codes such as UPC or 128 is 1 For ratio based bar codes the default is 1 Enter the desired XH dimension and press the RETURN key The prompt moves to the bar height BH position 8 In the BH position a 3 digit number defines the printed bar height for this field For UPC EAN bar codes the default is 80 Fo...

Page 100: ...ters If using a bar code the measurement will be to the bottom of the bar code s human readable line If the bar code you are printing does not have a human readable line measure to the bottom of the bars When rotating a bar code or alphanumeric field the ROW measurement is specified as the amount of space from the starting point of the label to the top of the field wherever you want printing to be...

Page 101: ...his is a prompt Whatever is typed in the DATA PROMPT position will reappear on the PRINT LABEL screen This allows you to set up the desired label format ahead of time but to change variable information every time you print that format For example if you are printing inventory labels you may want the same company name date and factory location printed on every label in exactly the same position How...

Page 102: ...ss the C key to signify a comment Any data entered in DATA PROMPT will appear on the PRINT LABEL screen as a comment This function is useful to give the operator special instructions such as to load a particular type of media for the labels to be printed Comment fields do not affect the printing of the label e Press the R key to request a repeat of the previous field s data After entering one of t...

Page 103: ...racters c Enter the desired consecutive number fill character and increment value The field has this format xnn Use this chart to specify the parameters x fill character It can be any character including a space For example if is used all insignificant characters will be filled with If 0 is used the field will fill with zeros nn increment value desired If 01 it will increment by ones i e 1 2 3 etc...

Page 104: ...3 Enter additional fields of information as desired To print a sample label press the ALT X keys and the PRINT screen will appear with a quantity of 0001 Press ENTER again and a sample label will be printed and the CREATE screen will return After all fields are completed press the ESC key from any fields in the ROT columns This brings the cursor back to the LABEL NAME position 14 To print a quanti...

Page 105: ...r or letter was specified as a data type or to a prompting position if a P was specified as a data type Enter the starting number or the prompt information followed by the RETURN key for each consecutive number or prompt After this information is completed the cursor moves to the SAMPLE position 4 In the SAMPLE position you have two choices a You can print a sample label to check data placement by...

Page 106: ...PRINT TEST LABEL 5 SYSTEM TEST LABEL 6 TEST MODULE 7 RESET PRINTER 8 EXIT TO RS232 SYSTEM ENTER NUMBER To exit the screen press the ESC key All SYSTEM MAINTENANCE screen choices are explained below 1 FORMAT MODULE Used to initially format or to reformat a memory module 2 COPY MODULE Copies graphic images and or label formats from one memory module to another Be certain that the WRITE PROTECT SWITC...

Page 107: ...nctioning and that it is capable of erasing and loading data WARNING this test destroys all existing memory module data Follow the prompts to perform the test 7 RESET PRINTER Same as turning the main power switch on and off Resets the Printer s processor circuit Used if the processor locks up or goes off in the weeds due to a power surge spike or other power line interference 8 EXIT TO RS 232 SYST...

Page 108: ...________________________________________________________ __ Page 100 Using the Printer s Internal Labeling Software ...

Page 109: ...43 2B K 75 4B k 107 6B Ctrl L FF 12 0C 44 2C L 76 4C l 108 6C Ctrl M CR 13 0D 45 2D M 77 4D m 109 6D Ctrl N SO 14 0E 46 2E N 78 4E n 110 6E Ctrl O SI 15 0F 47 2F O 79 4F o 111 6F Ctrl P DLE 16 10 0 48 30 P 80 50 p 112 70 Ctrl Q DC1 17 11 1 49 31 Q 81 51 q 113 71 Ctrl R DC2 18 12 2 50 32 R 82 52 r 114 72 Ctrl S DC3 19 13 3 51 33 S 83 53 s 115 73 Ctrl T DC4 20 14 4 52 34 T 84 54 t 116 74 Ctrl U NAK ...

Page 110: ...AB 203 CB Ù 235 EB î 140 8C 1 4 172 AC 204 CC ý 236 EC ì 141 8D 173 AD 205 CD Ý 237 ED Ä 142 8E 174 AE 206 CE 238 EE Å 143 8F 175 AF 207 CF 239 EF É 144 90 176 B0 ð 208 D0 240 F0 æ 145 91 177 B1 Ð 209 D1 241 F1 Æ 146 92 178 B2 Ê 210 D2 242 F2 ô 147 93 179 B3 Ë 211 D3 3 4 243 F3 ö 148 94 180 B4 È 212 D4 244 F4 ò 149 95 Á 181 B5 213 D5 245 F5 û 150 96 Â 182 B6 Í 214 D6 246 F6 ù 151 97 À 183 B7 Î 215...

Page 111: ... S1 1 S1 2 S1 3 9600 4800 2400 1200 600 300 19200 TEST 9600 OFF OFF OFF OFF ON ON ON ON OFF OFF ON ON OFF OFF ON ON OFF ON OFF ON OFF ON OFF ON WORD LENGTH S1 4 8 1 N BIT WORD OFF 7 2 N BIT WORD ON MODE SELECTION S1 5 STANDARD RS 232 RS 422 INPUT OFF INTERNAL BATCH LABELING ON PRESENT SENSOR S1 6 DISABLE SENSOR OFF ENABLE SENSOR ON ...

Page 112: ..._________________________________________ __ Page B 2 Appendix B RIBBON SENSOR S1 7 STANDARD SENSING OFF INVERTED SENSING ON Colored and Special Ribbons CUTTER ENABLE S1 8 REMOTE CUT ENABLED ON REMOTE CUT DISABLED OFF ...

Page 113: ...Printer to CRT Terminal DB25P RS 232 556001 Printer to PC 9 Pin DB9S RS 232 556002 Printer to PC 25 Pin DB25S RS 232 899516 Printer to PC Parallel Port DB25P Pin Connections All unlisted pins are not connected Pin Description 1 CHASSIS 2 TXD RS 232 3 RXD RS 232 4 RTS 4 7k ohm to 5VDC 5 CTS input 7 LOGIC GROUND 20 BUSY output 9 TXD 10 TXD 18 RXD 19 RXD ...

Page 114: ...Cable Printer HOST NOTE Cable is used for typical connection to other DCE equipment with XON XOFF flow control Straight Cable MM Printer HOST 1 DB25P DB25P 4 5 7 RXD 2 2 TXD TXD 3 3 RXD SHIELD GROUND 1 NOTE Cable is used for typical connection to other DCE equipment with XON XOFF flow control ...

Page 115: ..._____________________________________ __ Appendix C Page C 3 PC DB25P to Printer Printer PC DTE NOTE Cable is used for connection to PC compatible with DB25P communication Ports Flow control is either XON XOFF or CTS DTR ...

Page 116: ...______________________________________ __ Page C 4 Appendix C PC DB9P to Printer Printer PC DCE NOTE Cable is used for connection to PC compatible with DB25P communication Ports Flow control is either XON XOFF or CTS DTR ...

Page 117: ...the alphabetic O Fonts 0 1 and 2 include the upper and lowercase ASCII characters which include commonly used international characters I Standard Human Readable Fonts CPI at 1 2 3X 203 DPI PRINTER 152 DPI PRINTER Dot Pattern 1x1 2X2 2X3 1x1 2X2 2X3 Rotations ALL ROT ALL ROT ROT 2 4 ALL ROT ALL ROT ROT 2 4 DPI 200 100 66 7 153 8 76 3 51 3 Dot Size 0 005 0 010 0 015 0 0065 0 0130 0 0195 FONT Dot H D...

Page 118: ...4 11 28 7 25 3 17 5 64 J 120F5 W BARS 16 92 7 25 12 69 8 46 3 63 6 34 K PLESSEY 20 30 9 23 16 92 10 15 4 61 8 46 L UPC CASE 14 50 6 34 11 28 7 25 3 17 5 64 152 DPI Printer actual dpi 153 8 2 1 5 2 3 1 2 1 5 2 3 1 Narrow Bar Name 0 006 0 006 0 006 0 0130 0 0130 0 0130 A 30F9 11 83 5 31 9 62 5 92 2 65 4 81 D 120F5 10 99 4 81 8 55 5 49 2 40 4 27 H HIBC 11 83 5 31 9 62 5 92 2 65 4 81 I CODABAR 10 99 4...

Page 119: ...303 M UPC 2DIG ADD 38 76 114 152 227 303 N UPC 5DIG ADD 38 76 114 152 227 303 O CODE 93 11 28 4 51 7 52 5 64 2 26 3 76 152 DPI Printer actual dpi 153 8 Multiplier Narrow Bar Width 1 0 0065 2 0 0065 3 0 0065 4 0 0065 6 0 0065 8 0 0065 B UPC A 50 100 150 200 300 400 C UPC E 50 100 150 200 300 400 E CODE128 B 6 99 2 80 4 66 3 50 1 40 2 33 F EAN 13 50 100 150 200 300 400 G EAN 8 50 100 150 200 300 400...

Page 120: ...cter alphanumeric font Uppercase and lowercase Characters are 7 dots high 5 dots wide and 1 dot spacing 203 DPI Printer 152 DPI Printer 1 Identifies a 145 character uppercase and lowercase alphanumeric font that includes descenders and ascenders Characters are 9 dots high 9 dots wide and 2 dots spacing International characters are 13 dots high 7 dots wide and 2 dots spacing 203 DPI Printer 152 DPI...

Page 121: ...upper and lowercase font Characters are 18 dots high 10 dots wide and 2 dots spacing 203 DPI Printer 152 DPI Printer 3 Identifies a 62 character alphanumeric font uppercase Characters are 27 dots high 14 dots wide and 2 dots spacing 203 DPI Printer 152 DPI Printer ...

Page 122: ...Page D6 Appendix D 4 Identifies a 62 character alphanumeric font uppercase Characters are 36 dots high 18 dots wide and 3 dots spacing 203 DPI Printer 152 DPI Printer ...

Page 123: ...Appendix D Page D 7 5 Identifies a 62 character alphanumeric font uppercase Characters are 52 dots high 18 dots wide and 3 dots spacing 203 DPI Printer 152 DPI Printer ...

Page 124: ...Page D8 Appendix D 6 Identifies a 62 character alphanumeric font uppercase Characters are 64 dots high 32 dots wide and 4 dots spacing 203 DPI Printer ...

Page 125: ...Appendix D Page D 9 6 Continued 152 DPI Printer ...

Page 126: ...ints OCR A size I Characters are 32 dots high 15 dots wide and 5 dots spacing 203 DPI Printer 152 DPI Printer 8 Identifies a font that prints OCR B size III Characters are 28 dots high 15 dots wide and 5 dots spacing 203 DPI Printer 152 DPI Printer ...

Page 127: ...of 12 characters Eleven digits supplied by host or application software 12th digit checksum supplied by Printer If the 12th digit is sent by the host the Printer will check that character against the calculated checksum and will print the bar code as all zeros if they do not match Addendum codes for this font are described by fonts M and N The normal ratios that the Printer can print are 1 1 2 2 3...

Page 128: ... of 7 characters Six digits supplied by host or application program 7th digit checksum supplied by the Printer If the 7th digit is sent by the host the Printer will check that character against the calculated checksum and will print the bar code as all zero if they do not match Addendum codes for this font are described by fonts M and N The normal ratios that the Printer can print are 1 1 2 2 3 3 ...

Page 129: ...cter set including both uppercase and lowercase alpha characters Code 128 is an element based bar code similar to the UPC fonts Therefore ratios must be equal to one The valid ratios are 1 1 2 2 3 3 4 4 6 6 and 8 8 The Printer supports Code 128 Code Subset A B and C You can select the Printer to start on any code subset and switch to another with the data area default is subset B Code Subset A inc...

Page 130: ...recede the data to be encoded with an ASCII C DEC 67 HEX 43 You must not try to encode alpha data if you select Code Subset C Special Character Handling Characters above ASCII value 95 are considered special characters To access these values a two character reference table has been built into the Printer The following table describes this reference ASCII 2 CHAR CODEA CODEB CODEC 95 A FNC3 FNC3 NA ...

Page 131: ...ing the lowercase ASCII characters a z a SOH b STX c ETX and so on Font Sizing Font sizing for 128 on Rotation 2 is not consistent because of the variable character code to character correlation Therefore the row address may have to be adjusted to place it properly 203 DPI Printer 152 DPI Printer ...

Page 132: ... Printer will check that character against the calculated checksum and will print the bar code as all zero if they do not match Addendum codes for this font are described by fonts M and N The normal ratios that the Printer can print are 1 1 2 2 3 3 4 4 6 6 and 8 8 These ratios actually specify size of elements since EAN type bar codes are element based and not ratio based Maximum 12 bar codes per ...

Page 133: ...the host the Printer will check that character against the calculated checksum and will print the bar code as all zero if they do not match Addendum codes for this font are described by fonts M and N The normal ratios that the Printer can print are 1 1 2 2 3 3 4 4 6 6 and 8 8 These ratios actually specify size of elements since EAN type bar codes are element based and not ratio based 203 DPI Print...

Page 134: ...ariable in length The valid ASCII characters for this font are 32 36 39 42 43 45 47 48 57 65 90 Code 3 of 9 s normal wide to narrow bar ratio is 3 1 203 DPI Printer 152 DPI Printer I Identifies the 20 character CODABAR bar code CODABAR is basically a numeric bar code with some special additional characters These characters are 0123456789ABCD excluding the characters The length of the code is varia...

Page 135: ...he ASCII range for the numeric codes is 48 57 Code I 2 of 5 s normal wide to narrow bar ratio is 5 2 Font D and L also print different forms of the I 2 of 5 bar code Maximum 8 bar codes per label 203 DPI Printer 152 DPI Printer K Identifies the Plessey bar code 203 DPI Printer 152 DPI Printer ...

Page 136: ...eadable formatting and adds bearer bars to the top and bottom of bars when encoding 13 digits The ASCII range for the numeric codes is 48 57 Code I 2 of 5 s normal wide to narrow bar ratio of 5 2 Font D and J also print different forms of the I 2 of 5 bar code There must be a maximum of 8 bar codes per label 203 DPI Printer 152 DPI Printer ...

Page 137: ...ost the Printer will check that character against the calculated checksum and will print the bar code as all zero if they do not match The normal ratios that the Printer can print are 1 1 2 2 3 3 4 4 6 6 and 8 8 These ratios actually specify size of elements since UPC type bar codes are element based and not ratio based It must be placed after the UPC EAN code manually This code should be placed 9...

Page 138: ...host the Printer will check that character against the calculated checksum and will print the bar code as all zero if they do not match The normal ratios that the Printer can print are 1 1 2 2 3 3 4 4 6 6 and 8 8 These ratios actually specify size of elements since UPC type bar codes are element based and not ratio based It must be place after the UPC EAN code manually This code should be placed 9...

Page 139: ...normal ratios that the Printer can print are 1 1 2 2 3 3 4 4 6 6 and 8 8 These numbers actually specify size of magnification and are element based not ratio based The ASCII characters that are permissible for Code 93 are 0 ABCDEFGHIJKLMNOPQRSTUVWXYZ 0123456789abcdefghijklmnopqrstuvwxyz 203 DPI Printer 152 DPI Printer ...

Page 140: ......

Page 141: ...Appendix E Page E 1 Appendix E Transmitted Error Codes Small c The Printer received a data byte from the host that contains a framing error corrupted usually due to noise Small v Input buffer overflow ...

Page 142: ...Page E 2 Appendix E ...

Page 143: ...ssly or used for purposes other than those for which they were manufactured This warranty also does not cover loss damages resulting from accident or damages resulting from unauthorized service Thermal Printhead This warranty is limited to a period of ninety 90 days or 1 000 000 linear inches of use whichever comes first for the PRODIGY and PRODIGY 152 Label Printers thermal printhead This ninety ...

Page 144: ...ty DATAMAX will return the repaired or replaced product to Purchaser at DATAMAX s cost With respect to a defect in Hardware covered by the warranty the warranty shall continue in effect until the end of the original warranty period or for sixty 60 days after the repair or replacement whichever is later General Warranty Provisions DATAMAX makes no warranty as to the design capability capacity or su...

Page 145: ...LATION OF THE COMPUTER HARDWARE SUPPLIES OR SOFTWARE OR IN THE PERFORMANCE OF ANY SERVICES THE REMEDIES SET FORTH HERE ARE THE SOLE AND EXCLUSIVE REMEDIES AVAILABLE TO ANY PERSON FOR ANY DAMAGES OF ANY KIND AND NATURE INCLUDING INCIDENTAL CONSEQUENTIAL OR SPECIAL WHETHER ARISING FROM WARRANTY INCLUDING ANY IMPLIED WARRANTIES CONTRACT NEGLIGENCE TORT OR OTHERWISE IN THE EVENT ANY IMPLIED WARRANTIES...

Page 146: ...4 Warranty Information ...

Reviews: