Data I/O
FLX500
Chptr 2
—18—
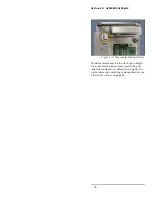
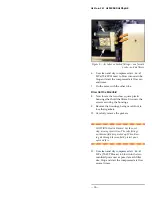
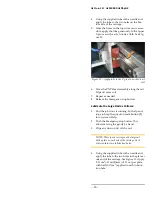
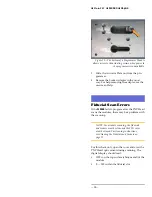
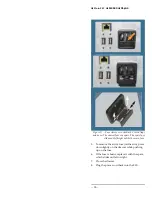
Figure 9—Air tubes on barbed fittings—one for each
probe—and air filters.
6.
Use clean and dry compressed air
.48-.62
MPa
(70-90 PSI max) to blow into one tube.
Stop and start the compressed air flow sev-
eral times.
7.
Do the same with the other tube.
Blow Out the Manifold
8.
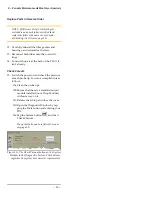
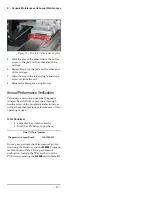
Now locate the two clear, square plastic
housings that hold the filters. Unscrew the
screws securing the housings.
9.
Remove the housings, being careful not to
lose their gaskets.
10. Carefully remove the gaskets.
CAUTION: Health Hazard. For the next
step, wear eye protection. The tube fittings
on the manifold are pointed up. When blow-
ing air through the manifold, protect your
eyes and face.
11. Use clean and dry compressed air
.48-.62
MPa
(70-90 PSI max) to blow into the two
manifold ports now exposed at each filter
site. Stop and start the compressed air flow
several times.
Summary of Contents for FLX500
Page 4: ... Data I O FLX500 ii ...
Page 12: ... Data I O FLX500 Chptr 1 8 blank page ...
Page 28: ... Data I O FLX500 Chptr 2 24 blank page ...
Page 40: ... Data I O FLX500 Chptr 4 36 blank page ...
Page 42: ... Data I O FLX500 Chptr 5 38 Daily Sign off Clean the sockets page 10 Date Initials Notes ...
Page 43: ...5 Sign off Charts Daily Sign off 39 Daily Sign off Date Initials Notes ...
Page 44: ... Data I O FLX500 Chptr 5 40 Daily Sign off Date Initials Notes ...
Page 45: ...5 Sign off Charts Daily Sign off 41 Daily Sign off Date Initials Notes ...
Page 46: ... Data I O FLX500 Chptr 5 42 Daily Sign off Date Initials Notes ...
Page 48: ... Data I O FLX500 Chptr 5 44 Weekly Sign off Date Initials Notes ...
Page 52: ... Data I O FLX500 Chptr 5 48 blank page ...
Page 57: ... FLX500 ...

