Data I/O
FLX500
Chptr 2
—20—
Annual Maintenance
•
•
•
Annual Performance Verification
Checking Air Filters
The PNP Head uses two air filters. Visually
check the filters for dirt each year (filters are not
white by several shades and possibly have visi-
ble debris). If necessary, or if performance is
affected (dropping devices), remove the filters
from the PNP Head to inspect them. (Mainte-
nance interval may be adjusted depending on
your findings.)
Tools Required:
• Standard screwdriver
• tweezers
To remove the air filters:
1.
End the job if one is running. For help end-
ing a job, tap the [
?
] for on-screen Help.
2.
Push the Emergency-stop button. (This
allows moving the gantry by hand.)
3.
Open the cover and move the PNP Head
closer to you for access to its far side.
4.
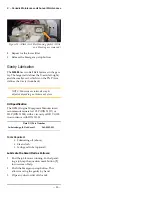
Locate the two clear, square plastic housings
that hold the filters. Unscrew the screw
securing the upper filter.
5.
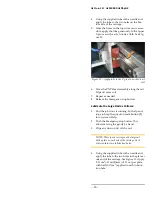
Remove the housing, being careful not to
disrupt its gasket.
6.
Pull the white strip filter from the housing
with tweezers. If it is more than slightly
dirty, replace it with a new filter or contact
Data I/O.
7.
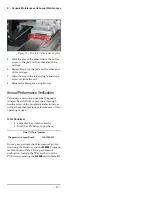
Carefully replace the filter housing without
disrupting the gasket, and reinstall the
screw.
Summary of Contents for FLX500
Page 4: ... Data I O FLX500 ii ...
Page 12: ... Data I O FLX500 Chptr 1 8 blank page ...
Page 28: ... Data I O FLX500 Chptr 2 24 blank page ...
Page 40: ... Data I O FLX500 Chptr 4 36 blank page ...
Page 42: ... Data I O FLX500 Chptr 5 38 Daily Sign off Clean the sockets page 10 Date Initials Notes ...
Page 43: ...5 Sign off Charts Daily Sign off 39 Daily Sign off Date Initials Notes ...
Page 44: ... Data I O FLX500 Chptr 5 40 Daily Sign off Date Initials Notes ...
Page 45: ...5 Sign off Charts Daily Sign off 41 Daily Sign off Date Initials Notes ...
Page 46: ... Data I O FLX500 Chptr 5 42 Daily Sign off Date Initials Notes ...
Page 48: ... Data I O FLX500 Chptr 5 44 Weekly Sign off Date Initials Notes ...
Page 52: ... Data I O FLX500 Chptr 5 48 blank page ...
Page 57: ... FLX500 ...


