2 About this document
Installer and user reference guide
4
BRK+S
Wired remote controller
4P513689-1A – 2018.03
2
About this document
Target audience
Authorised inst end users
Documentation set
This document is part of a documentation set. The complete set
consists of:
▪
Installation and operation manual:
▪ Installation instructions
▪ Basic operation instructions
▪ Format: Paper (in the box of the controller)
▪
Installer and user reference guide:
▪ Extended installation and operation information
▪ Format: Digital files on
http://www.daikineurope.com/support-
and-manuals/product-information/
▪ Madoka Assistant
in-app documentation:
▪ The controller only allows for basic settings and operation.
Advanced settings and operation are performed via the Madoka
Assistant app. For more information, see the app and its in-app
documentation.
▪ Format: App available from Google Play and the Apple Store
▪
Declaration of conformity:
▪ Hereby, Daikin Europe N.V. declares that the radio equipment
type BRC1H is in compliance with the Directive 2014/53/EU.
The original declaration of conformity is available from the
BRC1H product page
▪ Format: Digital file from the product page
Latest revisions of the supplied documentation may be available on
the regional Daikin website or via your dealer.
The original documentation is written in English. All other languages
are translations.
Technical engineering data
▪ A
subset
of the latest technical data is available on the regional
Daikin website (publicly accessible).
▪ The
full set
of latest technical data is available on the Daikin
extranet (authentication required).
For the user
3
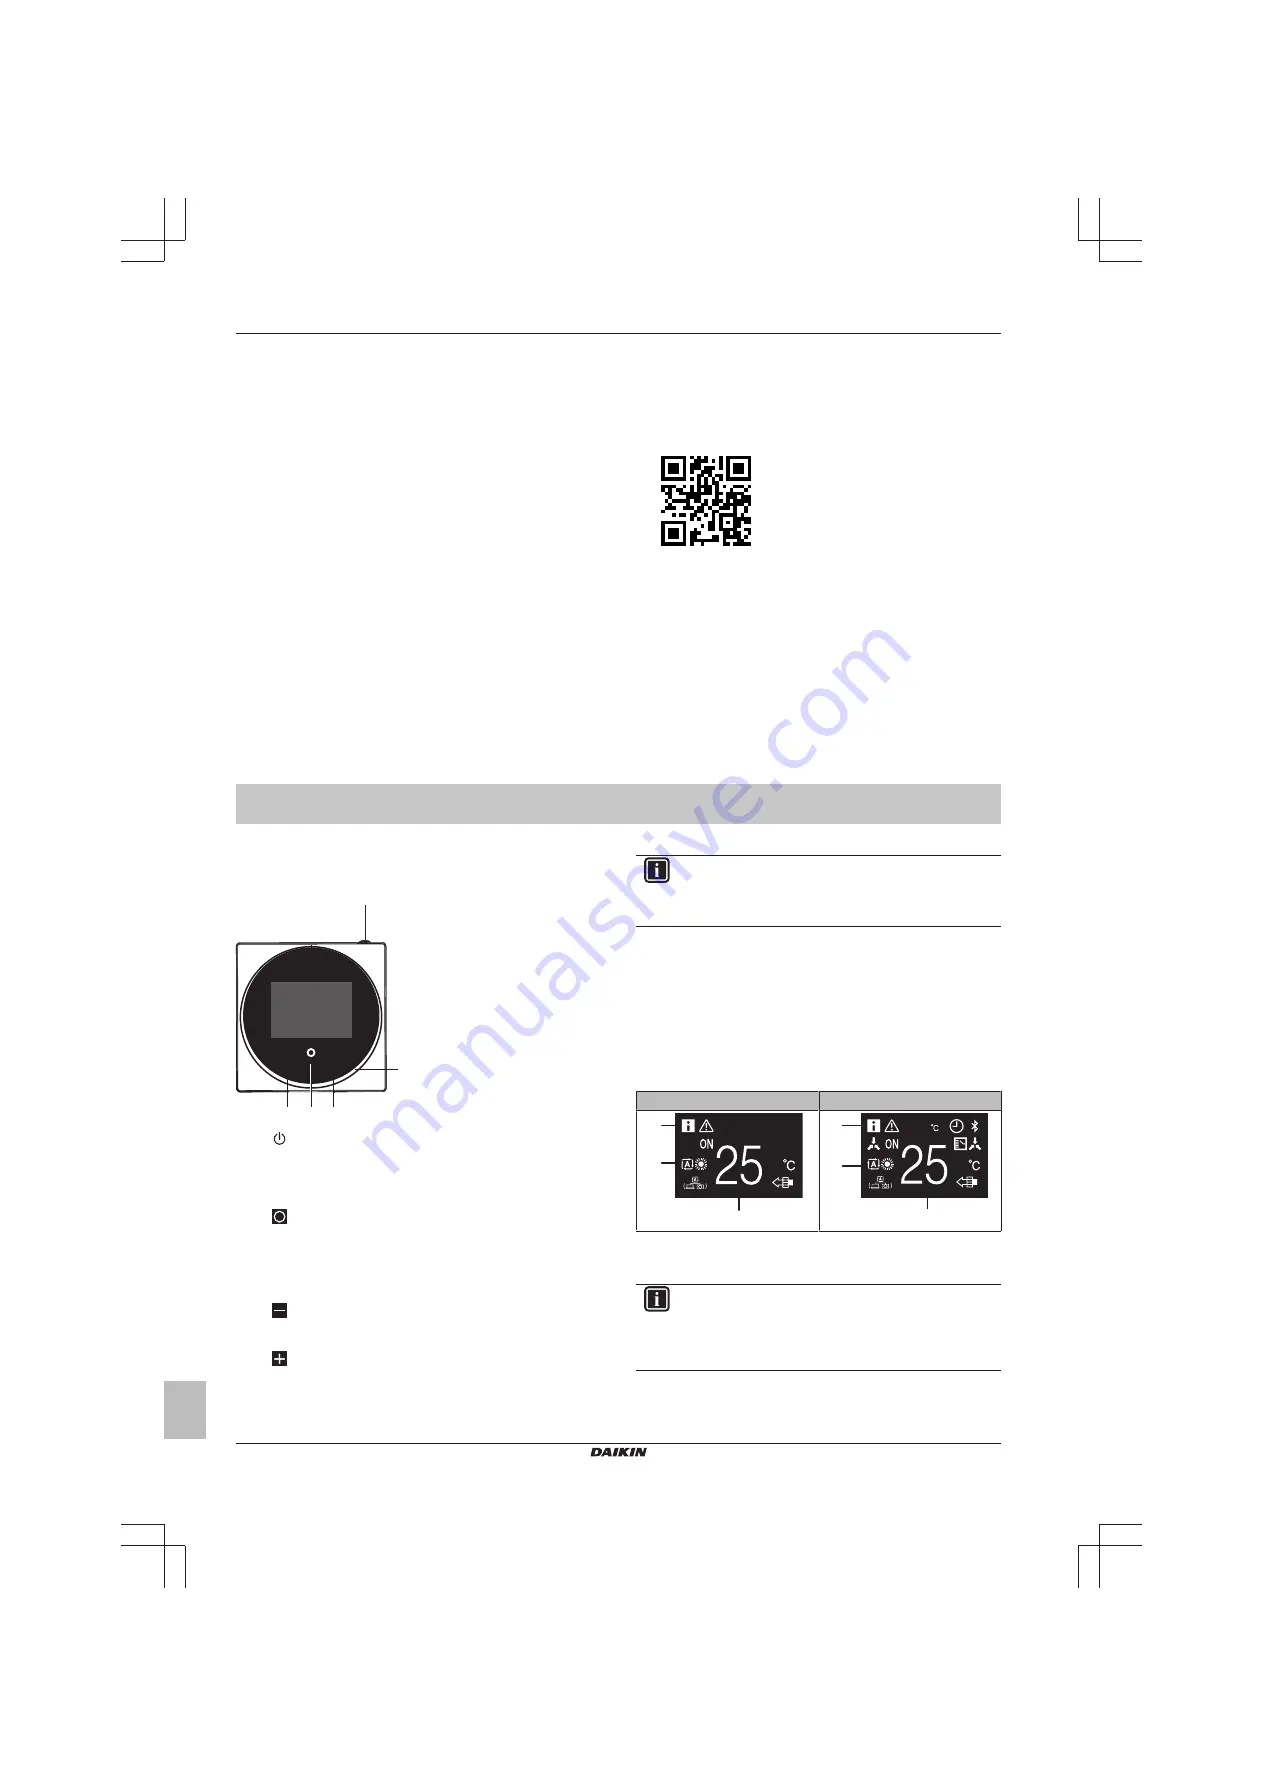
Buttons
+
-
c
b d
e
a
a
ON/OFF
▪ When OFF, press to turn ON the system. As a result, the
status indicator (e) will turn ON too.
▪ When ON, press to turn OFF the system. As a result, the
status indicator (e) will turn OFF too.
b
ENTER/ACTIVATE /SET
▪ From the home screen, enter the main menu.
▪ From the main menu, enter one of the submenus.
▪ From their respective submenu, activate an operation/
ventilation mode.
▪ In one of the submenus, confirm a setting.
c
CYCLE/ADJUST
▪ Cycle left.
▪ Adjust a setting (default: decrease).
d
CYCLE/ADJUST
▪ Cycle right.
▪ Adjust a setting (default: increase).
INFORMATION
The behaviour of the status indicator is according to field
settings. For more information, see
.
4
Home screens
Depending on installer configuration, the controller either has a
standard or a detailed home screen. In most cases, the standard
home screen gives you only the active operation mode, messages (if
any), and the setpoint temperature (in case of Cooling, Heating, or
Auto operation mode). The detailed home screen gives you all kinds
of information through status icons.
Standard
Detailed
a
b
c
19
a
b
c
a
Messages
b
Active operation mode
c
Setpoint temperature
INFORMATION
The controller is equipped with a power saving function
that causes the screen to go blank after a period of
inactivity. To make the screen light up again, press one of
the buttons.


