


286
etc.
This series DVR max supports 8 SATA HDDs. Please use HDD of 7200rpm or higher.
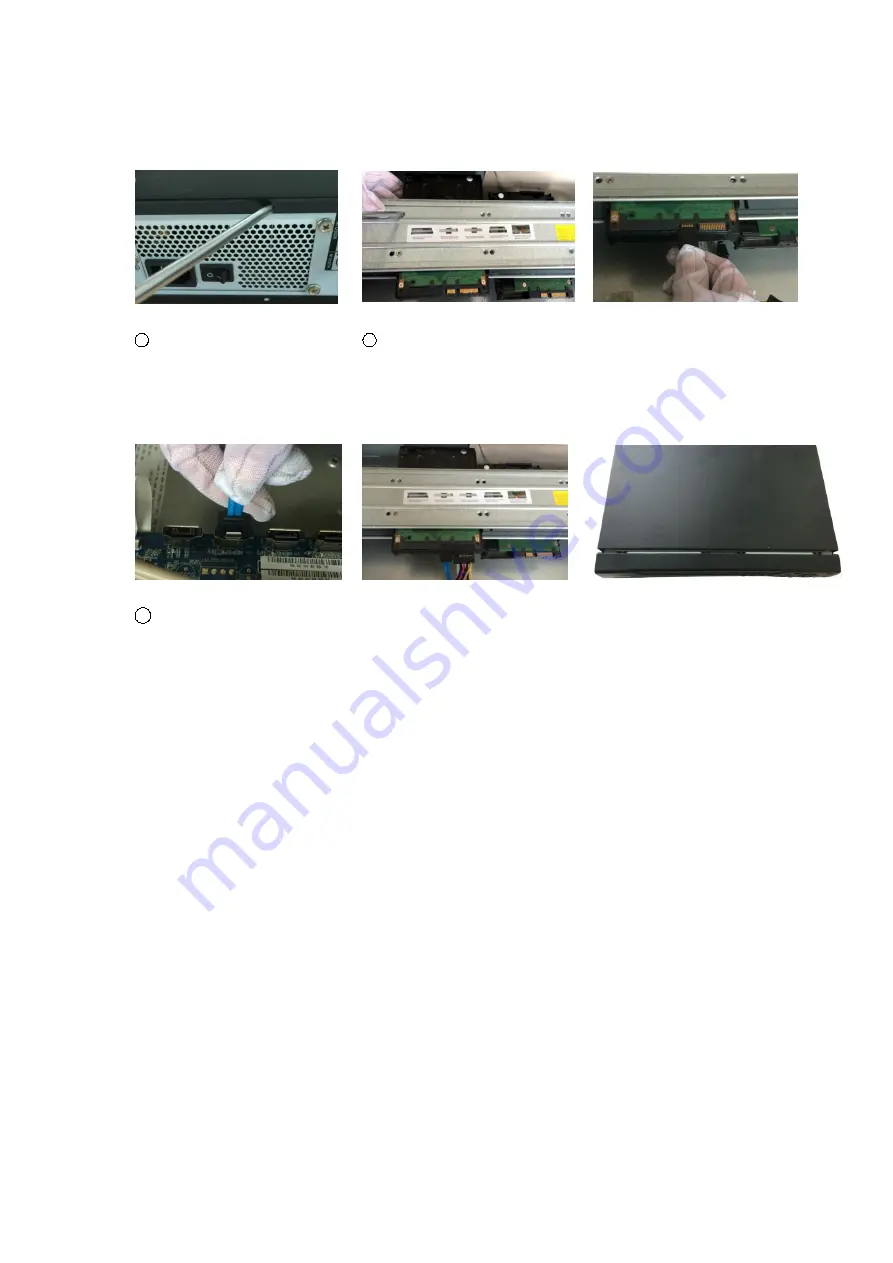
1
Loosen the screws of the
upper cover and side panel.
Remove the cover.
2
Fix the HDD(s) on the
bracket. Remove the top
bracket if you want to install
HDD to the bottom bracket.
③
Connect the one end of the HDD
cable to the HDD.
4
Connect the other end of the
HDD cable to the mainboard.
⑤
Connect the power cable to the
HDD.
⑥
Put the cover back and fix the
screws to secure firmly.
Important:
If the HDD amount is less than four, you do not need to install the HDD bracket.
When there is a bracket, please make sure the installation direction of HDDs is the same.
3.3.7 Rack Installation
The DVR occupies 1.5U/2U rack units of vertical rack space.
Use twelve screws to fix the unit
Please make sure the indoor temperature is below 35
℃
(95°f).
Please make sure there is 15cm (6 inches) space around the device to guarantee
sound ventilation.
Please install from the bottom to the top.
If there are more accessories connected in the rack, please take precaution
measures in case the rack power is overload.
3.4 Connecting Power Supply
Please check input voltage and device power button match or not.
We recommend you use UPS to guarantee steady operation, DVR life span, and other
peripheral equipments operation such as cameras.
Summary of Contents for HCVR2104HS-S3
Page 1: ...Dahua HDCVI Standalone DVR User s Manual Dahua HDCVI Standalone DVR User s Manual V2 3 2 ...
Page 200: ...184 ...
Page 425: ...409 Figure 4 137 Figure 4 138 ...
Page 440: ...424 Figure 4 153 Step 2 Draw the zone 1 Click Draw button to draw a zone See Figure 4 154 ...
Page 446: ...430 Figure 4 157 Figure 4 158 ...
Page 447: ...431 Figure 4 159 Figure 4 160 ...
Page 448: ...432 Figure 4 161 Figure 4 162 ...
Page 451: ...435 Figure 4 165 Figure 4 166 ...
Page 452: ...436 Figure 4 167 Figure 4 168 ...
Page 458: ...442 Figure 4 177 Figure 4 178 4 9 4 1 2 2 Trigger Snapshot ...
Page 460: ...444 Figure 4 180 Figure 4 181 4 9 4 1 2 3 Priority ...
Page 466: ...450 Figure 4 186 Figure 4 187 ...
Page 471: ...455 Figure 4 193 Figure 4 194 ...
Page 557: ...541 Figure 5 69 Figure 5 70 ...
Page 573: ...557 device Figure 5 86 Figure 5 87 ...
Page 579: ...563 Figure 5 94 Figure 5 95 ...
Page 580: ...564 Figure 5 96 Figure 5 97 Please refer to the following sheet for detailed information ...
Page 607: ...591 Figure 5 136 Note For admin you can change the email information See Figure 5 137 ...


