


Intelligent Operation 64
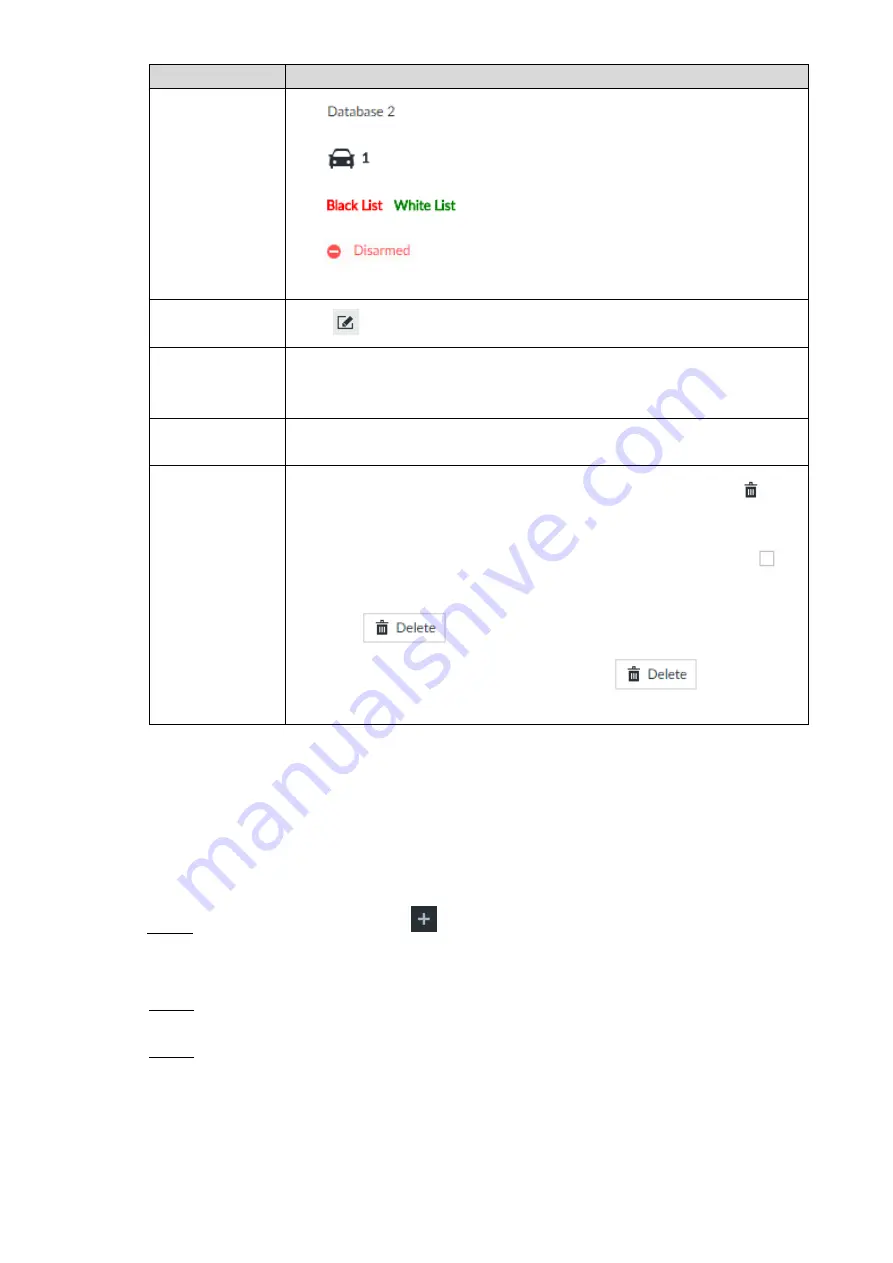
Operation
Description
View database
information and
status
: Database name.
: Number of vehicle plate in the database.
/
: The database is in the blocked/trusted list.
: The database is not linked to channel for vehicle plate
comparison. If armed, the linked device channel will be displayed.
Modify database
name
Click
next the database name to modify its name.
Manage database
Double-click the database, and you can manage the vehicle plate
information in the database. For details, see "6.5.3.3 Managing Vehicle
Arm database
Link the database to camera channel for vehicle plate comparison. For
details, see "6.5.4 Setting Plate Comparison."
Delete database
Delete one by one: Move the cursor to the database, and click
at the
upper right corner to delete it.
Delete in batch: Move the cursor to a database, and check
to
select the database. Select multiple databases in this way, and then
click
to delete the selected databases.
Delete all: Select
All
, and then click
to delete all
databases.
6.5.3.2 Registering Vehicle Information
Add vehicle information in the created databases. Supports manual add, batch import, and
add by searching.
This section takes batch add for example. Batch add allows you to import vehicle information
to the database in batches.
On the
LIVE
interface, click
, and then select
FILE > Vehicle Management >
Step 1
Vehicle Database
.
The
Vehicle Database
interface is displayed.
Double-click the database.
Step 2
The database interface is displayed.
Click
Batch Import
.
Step 3
The
Batch Import
interface is displayed. See Figure 6-66.
Summary of Contents for 8-HDD Series
Page 1: ...Intelligent Video Surveillance Server Quick Start Guide V2 1 0 ...
Page 11: ...The Grand Tour 4 Dimensions 2 3 Dimensions with LCD mm inch Figure 2 4 ...
Page 12: ...The Grand Tour 5 Dimensions without LCD mm inch Figure 2 5 ...
Page 16: ...Hardware Installation 9 Connection diagram Figure 3 2 ...


