


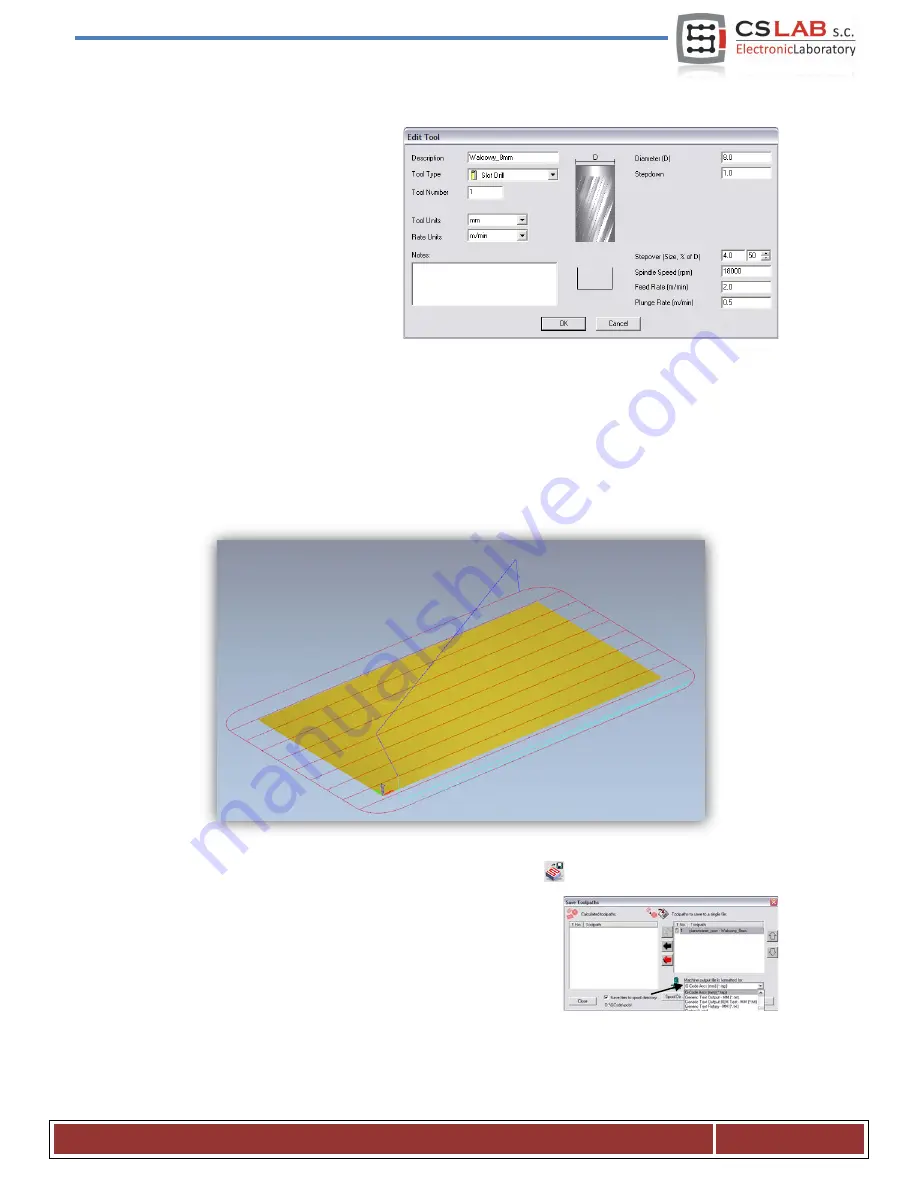
You should inform the program what kind of tool you use. Below the Tool List click the Add button. In the
tool-base window, click the Add Tool, to
add a new tool. Enter the parameters as
the picture shows. Some parameters like
description or diameter are obvious.
Step-down is a maximum depth the tool
gets. Stepover is a working density. The
bigger the density, the generally better
surface, but here it is also not worth to
overdo because you can only
unnecessarily make the treatment lasted
longer. Feed Rate is a feed on XY surface, and the Plunge Rate means speed with which the tool will get
into the material. Tool Type is a tool shape type. Here the drawing, displayed after shape type selecting, is
helpful.
In the end press „OK”, choose our tool from the list and click Select.
In the Tool List box, in the Area Clearance configuration panel there should our tool appear, now only press
Calculate: Now in the bottom of the panel, in the preview of the working area there should the calculated
tool trajectory appear. We can switch to a 3D view to look closer. It should look something like this:
Now we record the trajectory, go to the Toolpaths tab and click the
icon.
In the record window select so-called postprocessor, thus define the
output data format suitable for our control system. In the ArtCam
we recommend the „G-Code Arcs (mm) (*.tap)”. It’s basic G-Code
format suitable for Mach3 program. When you select the format
pres „Save” and save our trajectory as e.g. „planning.tap”.
C S - L a b s . c . – C N C C S M I O / I P - M c o n t r o l l e r
Page 57


