25 issue 5
Or
For Pebbles
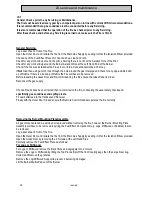
For Pebbles remove and separate into the 2 different sizes.
Collect and Remove the granules.
Lift the Burner Matrix Pad out of the Burner.
Note: Have you isolated the gas supply?
Disconnect the gas-tubing nut to the side of the Isolation Elbow and move the pipe clear of the Control.
Remove the screws securing the
Outer Trim
to the
Fixing
Frame
See
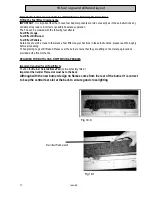
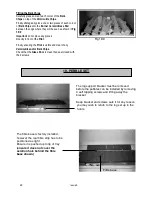
Fig’s 16:3a & Fig 16:3b. On Page 15,
it will
be necessary to open the
Glass Door
to enable you to manoeuvre
Outer Trim
over the
Glass Door
.
Secure the
Glass Door
with the 2 securing screws to prevent it swinging open.
Remove the screws securing the
Fire
to the
Wall Sealing Frame
.
The Fire can then be slid clear of the Wall Sealing Frame taking care to ensure the Gas Inlet Pipe complete
with Isolation Elbow clears through the slotted cut out at the rear.
Remove any Debris from the rear of the fire.
Replace the fire by following the above instructions in reverse order.
Check that the foam seal is adequately sealing the fire to the fireplace opening.
For refitting the Fuel Bed components see
relevant sections
Check all faults have been corrected then re-commission the fire, conducting the usual safety checks and specifically
gas soundness and spillage tests.
Fit new batteries into the Handset and Receiver
Finally with the
Outer Door
Refitted and Closed ensure the Remote Control Handset operates the fire correctly.
23:3
Changing the ODS Pilot Assembly.
The ODS Pilot Assembly is not a Serviceable item and for continued Safety MUST only be replaced with a
genuine crystal Fire Ltd Part.
Follow Section 23:1 Removing the Burner Mounting Plate Assembly.
If Logs or Driftwood is being used remove and retain the 3 screws securing the Log Support to prevent it becoming
damaged
Remove and retain the 3 screws securing the Air Guide.
With the Burner Mounting Plate Assembly Upside down, disconnect the Electrode Lead from the Pilot Electrode, and
disconnect the Pilot Pipe from the base of the Pilot
Assembly and the Thermocouple from the Main Gas Control
Remove and exchange the ODS Pilot by removing and retaining the 2 securing screws.
Replace the parts in reverse order.
For refitting the Fuel Bed components see
relevant section
Check all faults have been corrected then re-commission the fire, conducting the usual safety checks and specifically
gas soundness and spillage tests.
Fit new batteries into the Handset and Receiver
Finally with the Outer Door Closed ensure the Remote Control Handset operates the fire correctly
Changing the injector
Follow instructions above to remove fuel and remove 4 screws holding on the aeration bracket
Disconnect the nut on pipe to injector and remove injector and aeration bracket
Change injector and replace in reverse order


