background image

Connect the Network Bridge to the
Zūm Net Wireless Gateway

The Zūm Network Bridge connects wirelessly to the Zūm Net Wireless
Gateway to form a centrally managed, enterprise-wide lighting control
system.

Add the Zūm Network Bridge to the Zūm Net Wireless Gateway’s
network:

1. Press the ACQUIRE button on the Zūm Net Wireless Gateway to place

the gateway into Acquire mode.

2. Join the Zūm Net Wireless Gateway’s network.

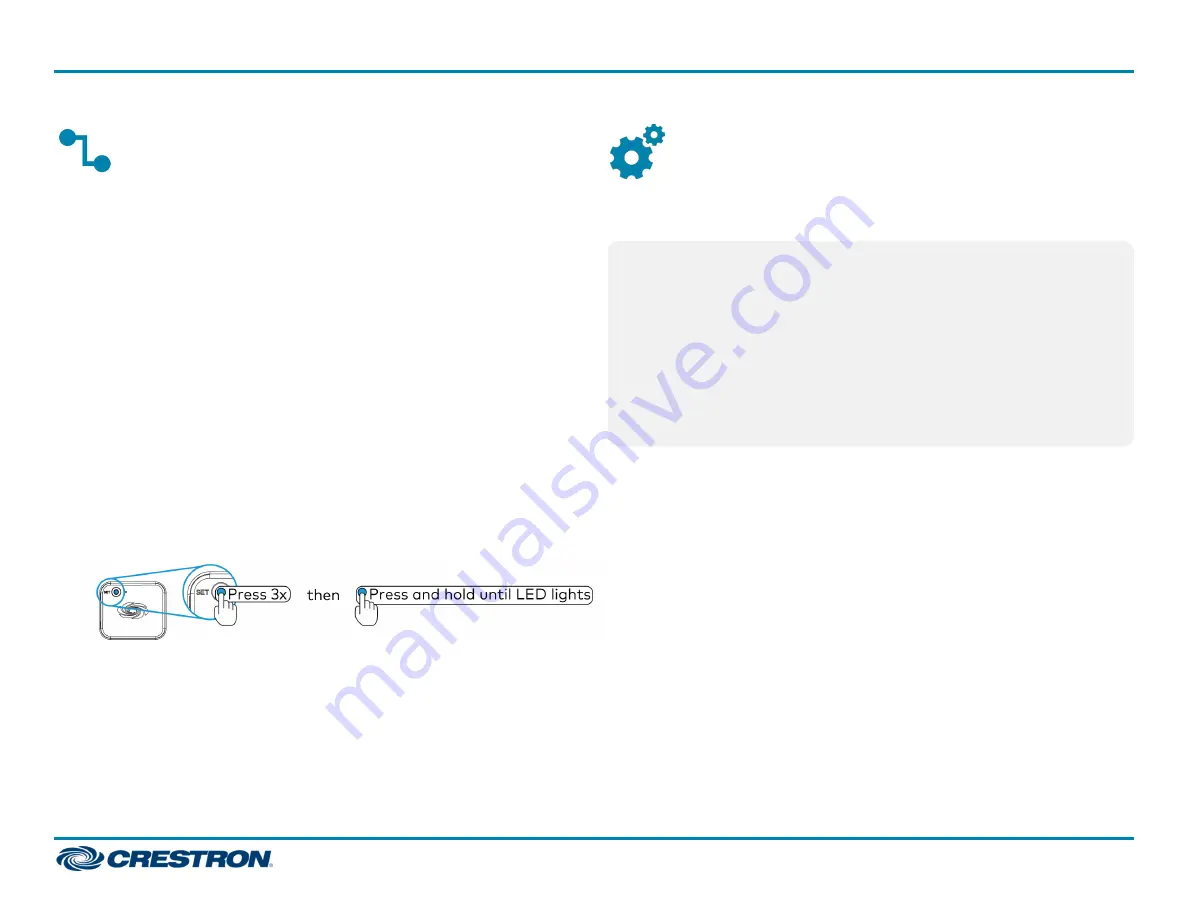
a. Press the SET button on the Network Bridge 3 times.

b. Press and hold the SET button until the LED flashes once (up to 10

seconds). The LED on the Network Bridge flashes slowly to indicate
that it is searching for a network to join.

l

The LED lights for 5 seconds when the network bridge
successfully joins the gateway.

l

The LED flashes quickly to indicate that the network bridge
failed to join the gateway. Press the SET button to acknowledge
the failure and then repeat this procedure.

3. Press the ACQUIRE button on the gateway to exit Acquire mode.

Calibrate and Test the Daylight
Sensor

To enable daylight harvesting, calibrate and then test the daylight sensor
after all devices are installed and powered in the Zūm space.

NOTES:

l

Only dimmers are capable of adjusting load levels that are driven by
daylight sensor readings.

l

Daylighting only operates when Scene 1 is enabled.

l

Calibrate the daylight sensor during the day when the sun is bright.
Avoid light fluctuations caused by clouds that are rapidly exposing
and hiding the sun.

l

Do not stand between the daylight sensor and the windows. Doing
so affects the readings and can result in poor calibration settings.

10

ZUMMESH-JBOX Series

Quick Start

Zūm™ Mesh Wireless J-Box Load Controllers

Summary of Contents for ZUMMESH-JBOX Series

Page 1: ...immer 5 A 100 277 V l ZUMMESH JBOX 16A LV 0 10 V Dimmer 16 A 100 277 V l ZUMMESH JBOX 16A LV EM 0 10 V Dimmer 16 A 100 277 V Emergency Load Controller l ZUMMESH JBOX 20A SW High Inrush Switch 20 A 100...

Page 2: ...ox when installed l For a Chicago plenum compliant installation refer to the ZUMMESH JBOX FMKT CP Quick Start 8461 at www crestron com manuals To install a ZUMMESH JBOX 1 Turn the power off at the cir...

Page 3: ...ZUMMESH JBOX 20A PLUG Wiring ZUMMESH JBOX PSU Wiring 3 ZUMMESH JBOX Series Quick Start Z m Mesh Wireless J Box Load Controllers...

Page 4: ...intended use SAVE THESE INSTRUCTIONS WARNING The installation and the use of this product within a specific installation must be approved by an applicable local state or federal Authority Having Juris...

Page 5: ...ency mode and return to normal operation when normal power is restored Communications with nonemergency devices continue when normal power is restored Test the Loads To verify system wiring the loads...

Page 6: ...ices NOTE The device used to create the Z m space is automatically added to the space and does not need to be added in Step 2 Using a Keypad Dimmer or Switch To create a new Z m space using a keypad d...

Page 7: ...ly to indicate that it has joined the space NOTE Only one ZUMMESH AVBRIDGE can be installed per Z m space Adding a Keypad Dimmer or Switch To add a keypad dimmer or switch to a Z m space 1 Press the t...

Page 8: ...device using a keypad dimmer or switch 1 Enter Joining mode a Press and hold both the top and bottom buttons until the LED lights about 5 seconds b Press the top button once c Press the bottom button...

Page 9: ...wdriver to remove the cover on the ZUMMESH JBOX device Insert the flat head screwdriver into the slot next to the cover and pry upward to remove the cover 2 Align the ports on the J box module and the...

Page 10: ...ay l The LED flashes quickly to indicate that the network bridge failed to join the gateway Press the SET button to acknowledge the failure and then repeat this procedure 3 Press the ACQUIRE button on...

Page 11: ...ss is complete the room enters Test mode Refer to Test the Daylight Sensor for details Test the Daylight Sensor Test mode is used to verify that the settings stored during calibration are correct Chan...

Page 12: ...ler is not accessible NOTES l Keypads do not control J box plug controllers l Binding Mode exits after 5 minutes when initiated from an AC powered keypad or 1 minute when initiated from a battery powe...

Page 13: ...rollers in the Z m space are accessible i e there are no J box load controllers in the Z m space To change the load controllers that are bound to the keypad 1 Enter Binding mode a Press and hold both...

Page 14: ...ng Configuration Remote Binding configuration is used when all load controllers in the Z m space are not accessible i e there are j box load controllers To change the load controllers that are bound t...

Page 15: ...ress the top button of the keypad to assign the load controller as bound or not bound to the keypad The LED on the keypad flashes to indicate that the load is bound or unbound l The LED flashes quickl...

Page 16: ...es in the Z m room are listed 4 De select any devices that the keypad is bound to and tap Save selected associations When de selected no check marks will appear in the check boxes to the left of the d...

Page 17: ...ss and hold the SCENE 2 or SCENE 3 button until the LED lights about 5 seconds to save the light levels to the selected button Manual Method Manual method to change the scene for On Scene 1 NOTE Scene...

Page 18: ...r 1 minute when initiated from a battery powered keypad 2 Press and hold the bottom button of the keypad until a set of lights in the space flashes on and off twice about 3 seconds to indicate that it...

Page 19: ...h press and hold the top and bottom buttons until the LED lights about 5 seconds and then release both buttons Then press and hold the bottom button until the LED lights about 10 seconds Factory Reset...

Page 20: ...om legal software_license_agreement The product warranty can be found at www crestron com warranty The specific patents that cover Crestron products are listed at www crestron com legal patents Certai...

Reviews: