14
7. Getting to Know Your
Storm C@m
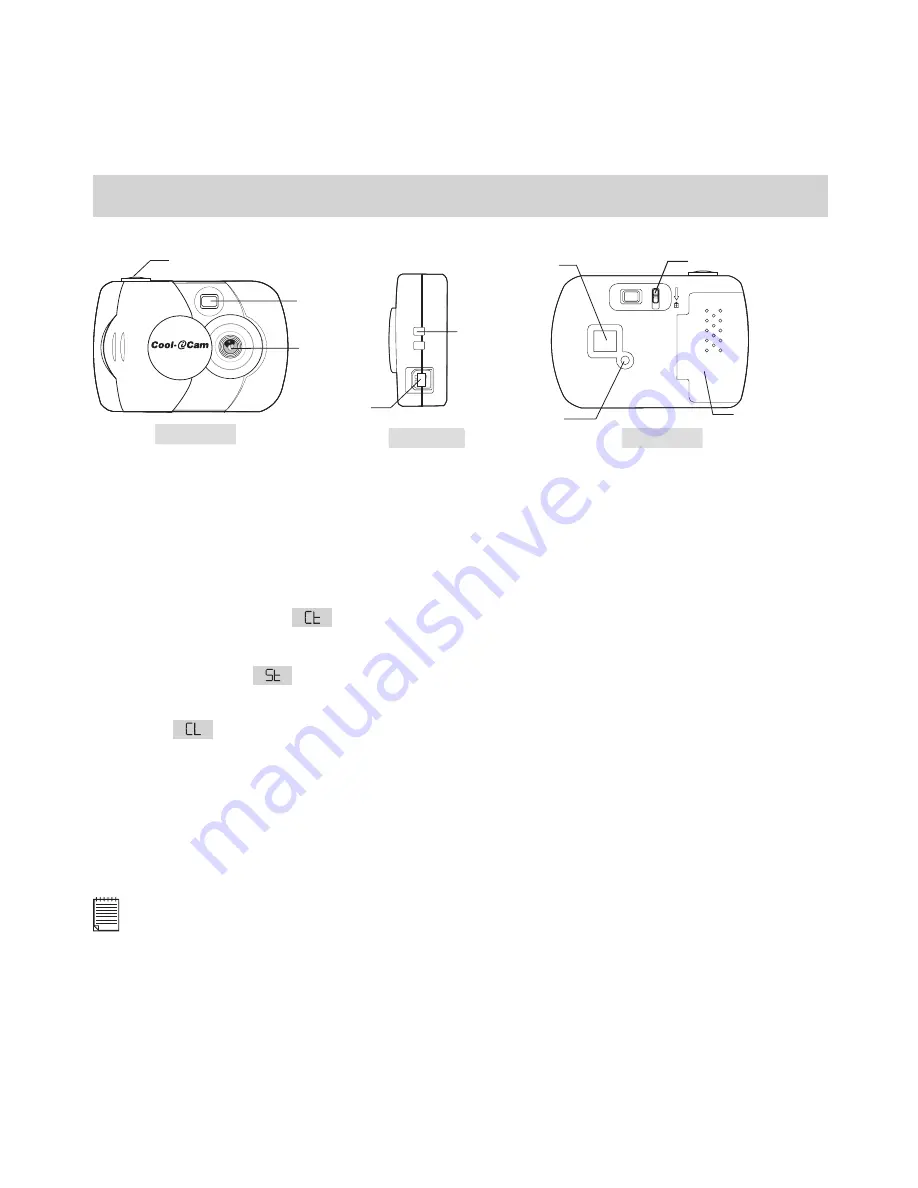
Refer to the picture below for a quick overview for your
Storm C@m
.
Viewnder
Lens
Strap
Holder
USB Cable
Port
LCD Display
Mode Button
Battery
Door
Front View
Back View
Side View
M
STORMCAM
Shutter Lock
Shutter Button
7.1 Shutter Button
The Shutter Button has 5 functions. Although these are covered in more detail later in this
manual, please nd below a brief description.
7.1.1 Still Image
To take an image, aim the
Storm C@m
by looking through the viewnder and press the
Shutter Button once. A beep means you have taken an image. (see page 17)
7.1.2 Movie Clip
To take a movie clip, press and hold the Shutter Button to start taking continuous images
when in the Continuous
Mode. (see page 17)
7.1.3 Self-Timer
To start the 10 second Self-Timer, simply press the Shutter Button when the
Storm C@m
is in the Self-Timer
Mode. (see page 18)
7.1.4 Clear Memory
To clear all images that you have taken, simply press the Shutter Button when you are in
the Clear
mode. (see page 18)
7.1.5 Change Resolution
The Shutter Button can be used to switch between Hi-Res and Low-Res settings. To do
this, the memory must rst be cleared, and the resolution option selected. (see page 18)
7.2 Viewnder
The viewnder is the window you look through when you aim the
Storm C@m
. Make sure
you center the subject in the viewnder before taking an image.
Important Note:
Due to the very small size of the viewnder, ensure your
Storm C@m
is perfectly parallel to the subject
you wish to take an images of. We recommended images are taken at a minimum distance of 2 metres
from the subject.


