17
EN
GL
IS
H
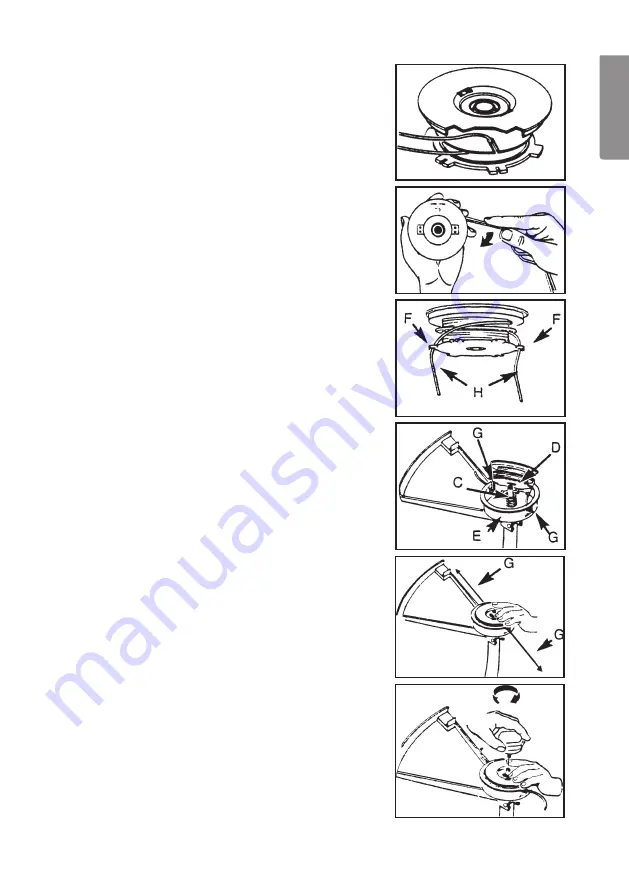
5. Wind both ends of the line around the spool
clockwise. Hold the line with your fingers while
winding, keeping the line taut. Stop when
about 15 cm of the line remains.
6. Press the ends of the line into the slots (F) on
opposite sides of the spool.
7. Push in the spring (C) on the bottom of
the spool (if not already secure), pull the ends
of the line through the holes (G) in the side
of the housing (E).
8. Push the spool (B) into the housing whilst feeding
the ends of the line through the holes (G).
9. Press the spool (B) inwards so that the spring
becomes compressed. Tug the line, freeing
them from the line slots (F) in the spool.
10. Push the assembled trimmer head securely
onto the spindle and hold it in position. Tighten
the locking cap (A) clockwise (only finger-tight).
11. Cut the ends of the line so they are no longer
than 13 cm.


