


31
Motion Detection Recording and Snapshot
When enabled, a motion detection alarm occurs if an object inside the detection area moves to
certain extent. Motion detection alarms can trigger actions including recording and snapshot.
Motion Detection Recording
1.
Click
Menu
>
Alarm
>
Motion
.
2.
Select the desired camera from the list, and then select the check box to enable motion
detection.
NOTE!
When enabled on the NVR, the default detection area covers the full screen, and recording is
triggered only for the current camera by default. If motion detection recording has been configured
before, the previously configured motion detection area and motion detection recording are still
effective when you enable motion detection in step 2.
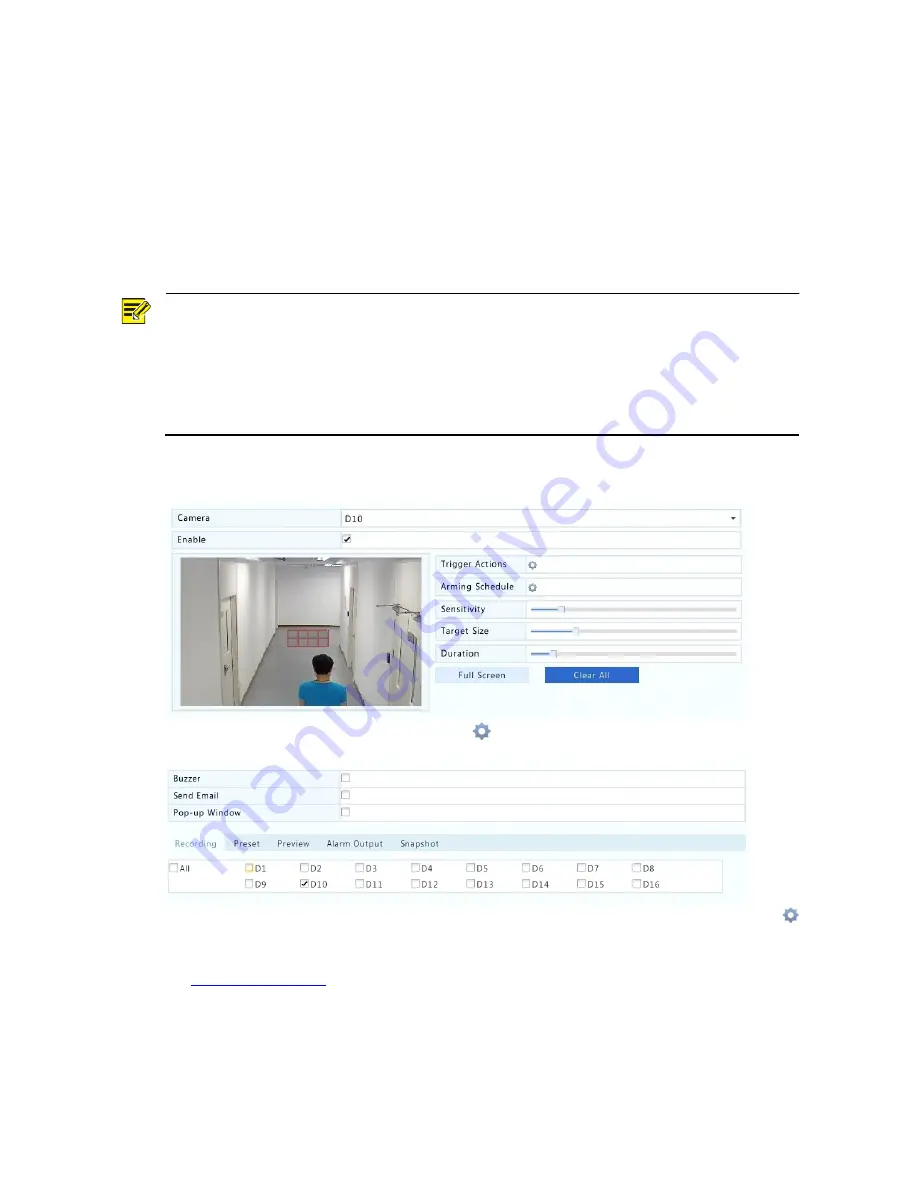
When a motion detection alarm occurs, highlighted grids appear in the preview window to indicate
the motion detected area, and meanwhile, an alarm icon appears in the upper right corner.
3.
In the preview window on the left side, click and drag your mouse to specify a motion detection
area (red grid). Use the sliders to adjust detection sensitivity, target object size, and duration.
4.
Configure motion detection recording: click right to
Trigger Actions
, click the
Recording
tab,
select the desired camera, and then click
OK
.
5.
(Optional) Configure an arming schedule (time when motion detection is enabled): click
right to
Arming Schedule
and then set time periods as needed.
6.
Set a recording schedule under
Menu
>
Storage
>
Recording
. For the detailed steps, see
Scheduled Recording
. Make sure
Type
is set to
Motion
. The set schedule appears in green,
which stands for motion detection recording. The following figure shows an example.


