


10
❑
Plug one 12" servo extension onto the aileron servo lead.
❑
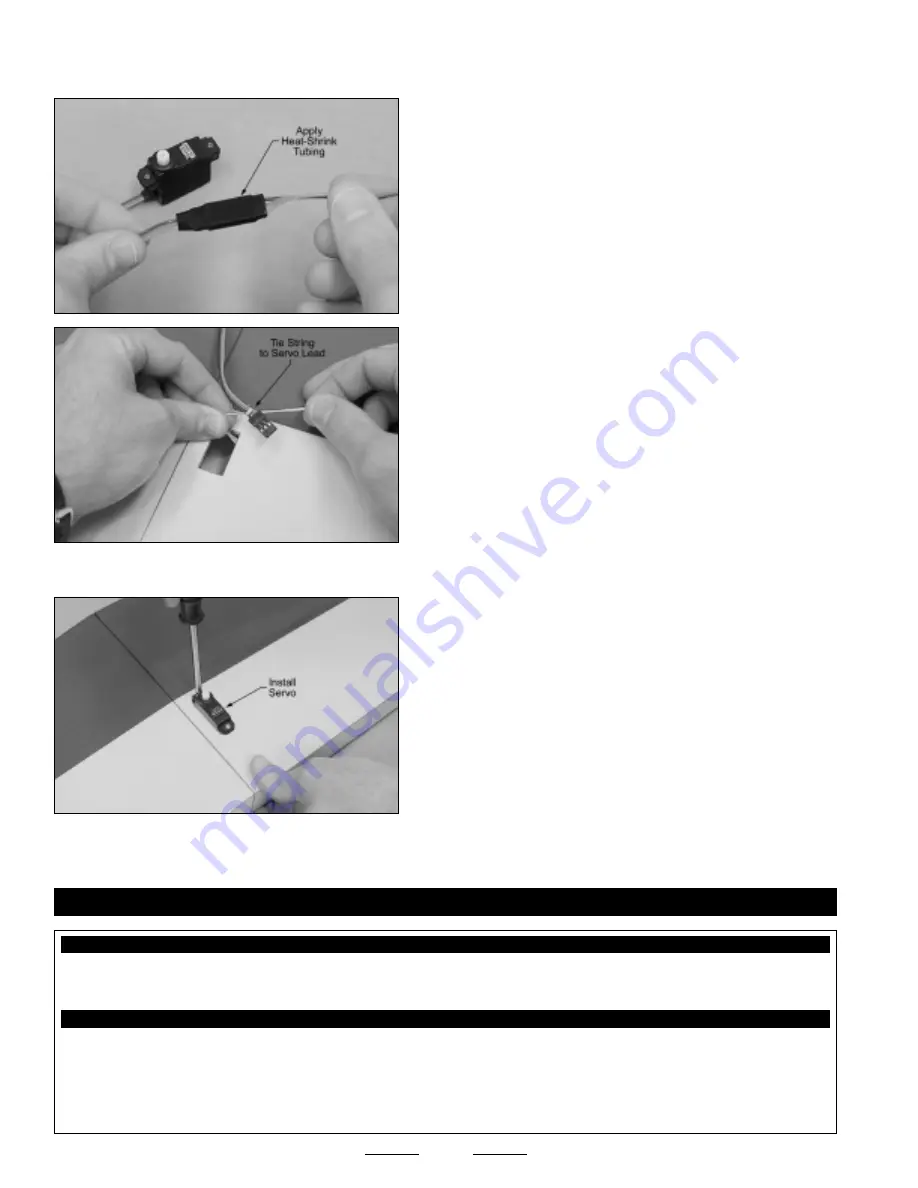
To prevent the plugs from pulling apart during assembly, or worse,
during flight, secure the plugs together, using a short piece of 3/8"
diameter heat-shrink tubing. Use a heat gun to shrink the tubing tight.
❑
Tie the end of the length of preinstalled string in the servo mounting
hole to the servo lead plug and use it to pull the servo lead through
the wing.
❑
Set the servo into place, making sure that the servo output shaft is
toward the
leading edge
of the wing.
❑
Install the aileron servo, making sure to drill 1/16" diameter pilot holes
for the mounting screws.
☞
The servo hole is sized to fit most standard-size mini servos. You
may need to enlarge the hole slightly to fit your particular servo.
❑
Repeat the previous procedures to install the second aileron servo into the wing.
☞
Tie the end of the string to the servo lead plug at the servo mounting hole, then pull the string from the other end to guide the
servo lead out through the bottom of the wing.
❑
Kwik Bond Thick C/A
❑
Kwik Bond 5 Minute Epoxy
❑
Excel Modeling Knife
❑
Ruler
❑
Pencil
❑
(1) Fuselage
❑
(2) Hardwood Dowels
❑
(4) Plywood Rubber Band Doublers
❑
Masking Tape
❑
Paper Towels
❑
Rubbing Alcohol
❑
NHP Epoxy Mixing Sticks
❑
NHP Epoxy Mixing Cups
YOU'LL NEED THE FOLLOWING PARTS FROM THE KIT:
YOU'LL NEED THE FOLLOWING TOOLS AND SUPPLIES:
SECTION 7: WING MOUNTING
Continued On Next Page
☛
☛
☛
☛
☛
❑
Install the rubber grommets and brass collets onto one aileron servo, making sure to install the collets with the flanges toward
the
bottom
of the servo.


