


ci5000 Series Printer Technical Service Manual
Version 0.1
3-34
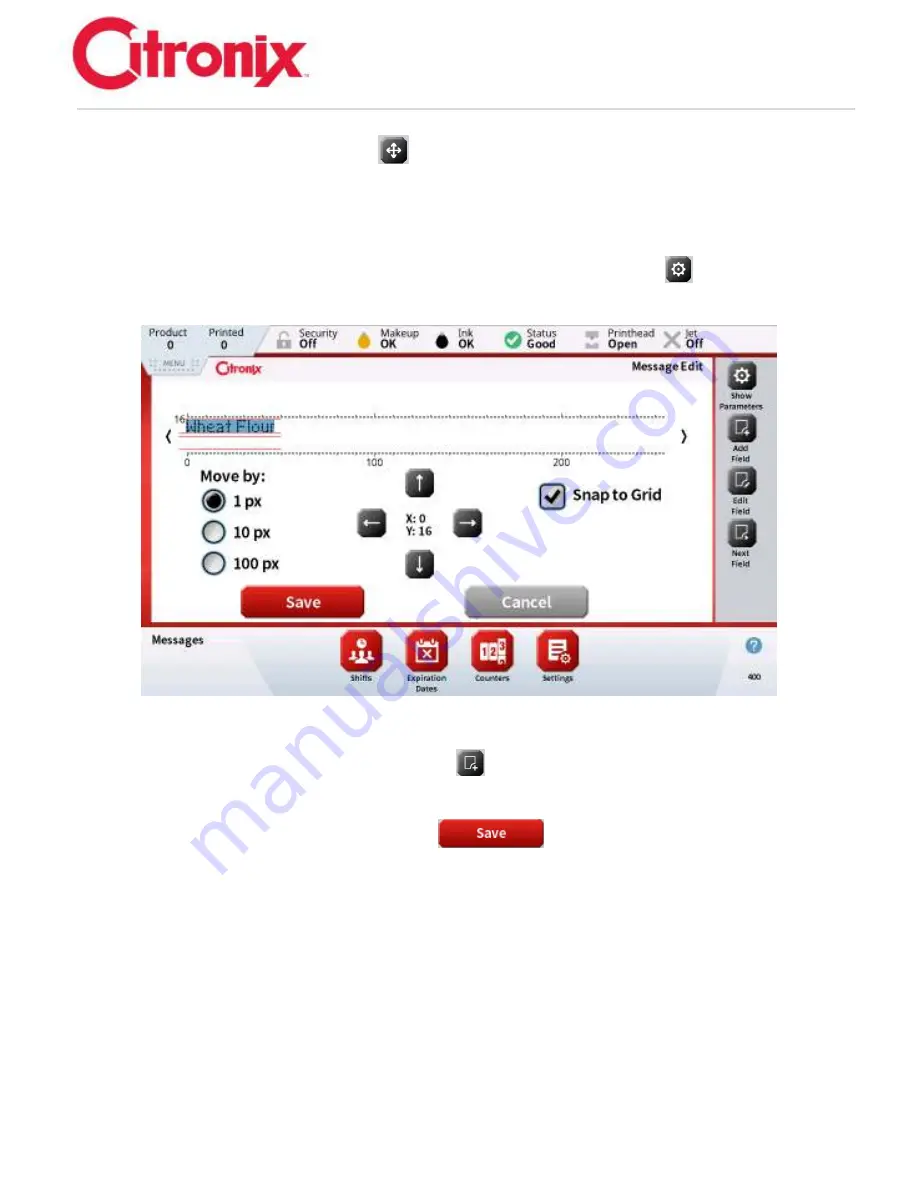
To move the field, press the [Move Field]
button and use the arrows to move the field. Each field
can be moved by pixel (1, 10, or 100 pixel) or by checking the [Snap to Grid] option, the field will move
(up or down) to the next grid (red lines shown below) depending on the arrow selected (up or down).
Pressing and holding a field that needs to be moved will cause the Highlight to become a darker blue
color, this will allow the user to
”drag & drop” the field in the location you want it to be. Then you can use
the arrows to finely adjust the exact position. When done, press the [Move Field]
button again to go
back.
If additional fields are needed, press the [Add Field]
button to add a new field and follow the
previous 3 steps.
When the message is complete, press the [Save]
button to save, rename or confirm the
name, and then exit the Message Edit screen.
The new message will now be displayed in the Message List.
Summary of Contents for ci5200
Page 34: ...ci5000 Series Printer Technical Service Manual Version 0 1 1 28 Ink System Diagram ...
Page 47: ...ci5000 Series Printer Technical Service Manual Version 0 1 2 10 ...
Page 129: ...ci5000 Series Printer Technical Service Manual Version 0 1 4 6 Encoder ...
Page 130: ...ci5000 Series Printer Technical Service Manual Version 0 1 4 7 Beacon Options ...
Page 132: ...ci5000 Series Printer Technical Service Manual Version 0 1 4 9 ...
Page 189: ...ci5000 Series Printer Technical Service Manual Version 0 1 6 45 Pic 3 Pic 4 Ink Reservoir Low ...
Page 222: ...ci5000 Series Printer Technical Service Manual Version 0 1 6 78 ...
Page 286: ...ci5000 Series Printer Technical Service Manual Version 0 1 11 5 Electrical Connections ...
Page 287: ...ci5000 Series Printer Technical Service Manual Version 0 1 11 6 Fluids Connections ...


