


Citrix ADC MPX
• Two 10/100/1000Base-T copper Ethernet management ports, numbered 0/1 and 0/2 from left
to right. You can use these ports to connect directly to the appliance for system administration
functions.
• Four 10/100/1000Base-T copper Ethernet ports numbered 1/1, 1/2, 1/3, and 1/4 from left to right.
Note: The network port numbers on all appliances consist of two numbers separated by a forward
slash. The first number is the port adapter slot number. The second number is the interface port
number. Ports on appliances are numbered sequentially starting with 1.
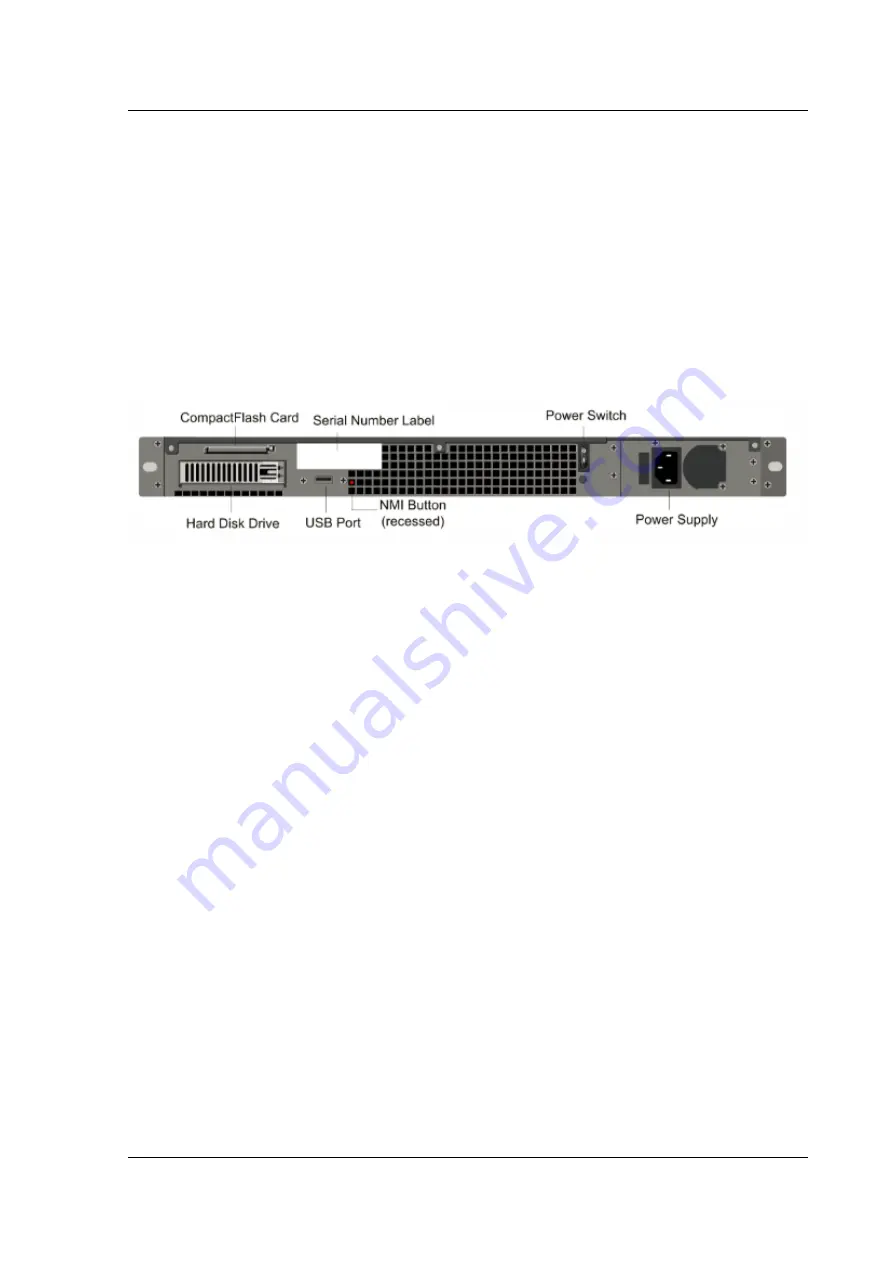
The following figure shows the back panel of the MPX 5500.
Figure 2. Citrix ADC MPX 5500, back panel
The following components are visible on the back panel of the MPX 5500:
• Four GB removable CompactFlash card that is used to store the Citrix ADC software.
• Power switch, which turns off power to the MPX 5500, just as if you were to unplug the power
supply. Press the switch for five seconds to turn off the power.
• Removable hard-disk drive (HDD) that is used to store user data. Appliances shipped before
February, 2012 store user data on a HDD. In appliances shipped after February, 2012, a solid-
state drive replaces the HDD. Both types of drive have the same functionality and support the
same software releases.
• USB port (reserved for a future release).
• Non-maskable interrupt (NMI) Button that is used at the request of Technical Support and pro-
duces a core dump on the appliance. You must use a pen, pencil, or other pointed object to
press this red button, which is recessed to prevent unintentional activation.
• Power supply rated at 300 watts, 110-220 volts. The power-supply fan is designed to turn on
only when the internal temperature of the power supply reaches a certain value. You cannot
see the fan turning on the back panel. What you can see is the fixed part of the fan that holds
the spinning motor.
For information about installing the rails, rack mounting the hardware, and connecting the cables,
see
.
For information about performing initial configuration of your appliance, see
© 1999-2019 Citrix Systems, Inc. All rights reserved.
28


