Chapter 2 Installing the GoQAM
26
4004834 Rev D
Installing the Modulator into a Rack
CAUTION:
Do not tangle or strain interconnecting cables.
Use caution when installing wiring and racks to avoid obstruction of airflow
into the side air vents of the GoQAM or out of the vent fans on the side of the
GoQAM.
IMPORTANT: You must use the supplied notched rack mounts to provide
additional support and to allow correct air circulation through the unit.
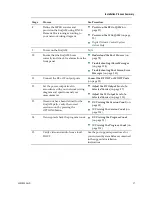
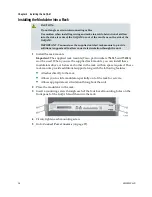
1
Install the rack mounts.
Important:
The supplied rack mounts (Cisco part numbers 734845 and 734846)
must
be used. When you use the supplied rack mounts, you can install these
modulators above or below each other in the rack with no space required. These
rack mounts provide additional support along with the following features:
Attaches directly to the rack
Allows you to slide modulators partially out of the rack for service
Allows appropriate air circulation throughout the unit
2
Place the modulator in the rack.
3
Insert a mounting screw through each of the four-bezel mounting holes on the
front panel of the GoQAM and then into the rack.
4
Firmly tighten each mounting screw.
5
Go to
Connect Power Sources
(on page 27).
Summary of Contents for GoQAM
Page 1: ...GoQAM Modulator RF Output and IF Output Hardware Installation and Operation Guide ...
Page 2: ......
Page 8: ......
Page 14: ......
Page 30: ......
Page 52: ......
Page 67: ...Provision GoQAMs on the DNCS 4004834 Rev D 51 ...
Page 68: ......
Page 116: ......
Page 138: ......
Page 164: ......
Page 176: ......

